Tuesday, July 10, 2012

Mermaid needlepoint sandals

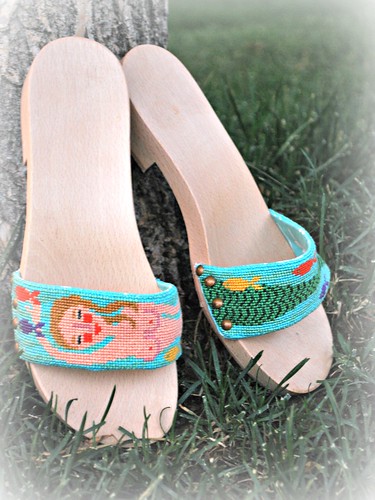
A couple of years ago I picked up this needlepoint kit for a pair of hand stitched mermaid sandals.  This week I finally got around to finishing them.  I am tickled pink with the end result - seriously, could this design be any cuter!

Mermaid stitched wooden sandals

The kit is from Birds of a Feather.  I picked it up at the The Yarn Studio in Minturn, Colorado.  They have a floor devoted to knitting goodies, and another floor that is brimming with some of the most beautiful needlepoint designs, many of which were handpainted.
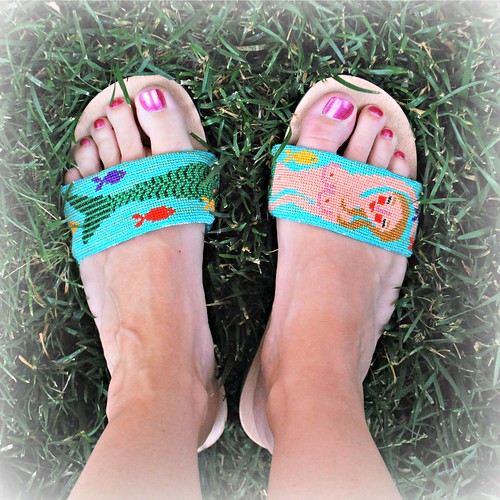
Twinkle toes

I'd finished the needlepoint some time ago.  Such a sweet little design that stitched up quite quickly.  My favourite part was adding the sparkles to the tail. It was the finishing that had me stumped - I'd never done anything like that before.  I always send my needlepoint pillows to a professional finisher.  And I couldn't seem to find any useful links on T'Internet. 
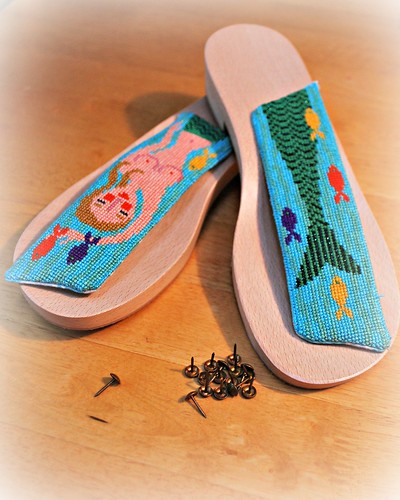
Ready to be fixed to the sandal

This week I took the plunge (now that my sewing machine is back from the shop - yay!).  It turned out to be a lot simpler than I was expecting:
  • Mark a 3/8 inch border around each sandal strap and then cut on that 3/8 inch line to remove the strap from the canvas
  • Use the sandal straps as a template to cut out 2 pieces of fabric that would become the backing for each strap
  • Place pretty side of fabric to pretty side of needle point and pin in place
  • Stitch around 3 of the 4 sides of the strap:  stitch as closely to the edge of the needlepoint design as possible
  • Trim some of the excess fabric away from these 3 stiched sides and then turn the entire piece right side out
  • Hand stitch the final side of the strap, tucking the raw edge of the needlepoint, and raw edge of fabric inside the strap as you work along
  • Finally I added a top stitch along the top and bottom edge of the straps - about 1 row of stitches in from the edge.  I'm not sure that this was absolutely necessary, but thought best to be safe and add this extra row of stitches to secure the fabric backing in place and hopefully prevent the likelihood of it coming apart and fraying.
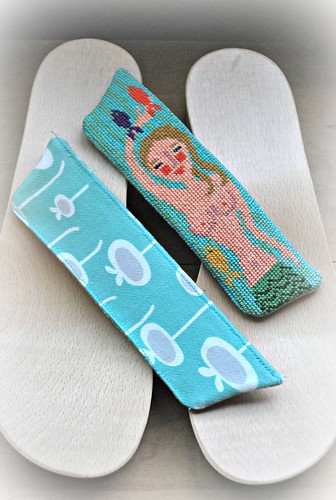
Lining for the stitched sandals

Truth be told, the trickiest part was hammering the tacks to secure the sandal strap to the wooden sole.  I'm sure it would have been easier with a vice grip, or other woodworking device for holding something in place while you hammer tacks into it.  Instead I was sat at the dining room table with the wooden sandal firmly 'clamped' between my knees as I tried to finish this last step :o)  The tacks aren't perfectly spaced and even, but I didn't kneecap myself in the process, so I consider it a success!

And that my friends is it!  I'm off up to the mountains this weekend with some of my knitty friends for this year's Camp Wanna Knit Knit.  The Yarn Studio is en route...  who knows what goodies I may be sharing with you next week :)

Have a great week, and an even better weekend,
Sam xxx

Sunday, July 08, 2012

This week's WIP: Princess Palace

This week I've been in the mood to do a little cross stitching.

Princess Palace - p1 of 9

A good friend gifted me this Princess Palace kit, from Bothy Threads, before Naomi was born. It's a fun design, with bright happy colours. But I need to step up the pace - this is page 1 of 9 for the background colours. And then of course there are 9 pages of top stitching to outline the key elements of the design. At the current pace Naomi will be in her 20's by the time I complete it!

What have you been up to this week?
Sam
xxx

Wednesday, July 04, 2012

Linen stitch man scarf

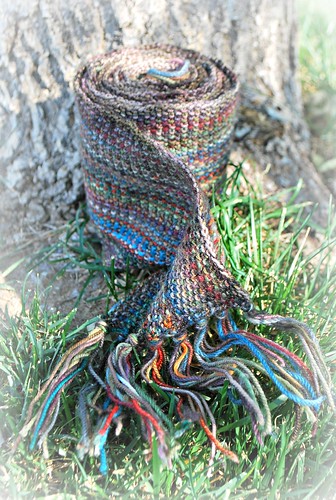
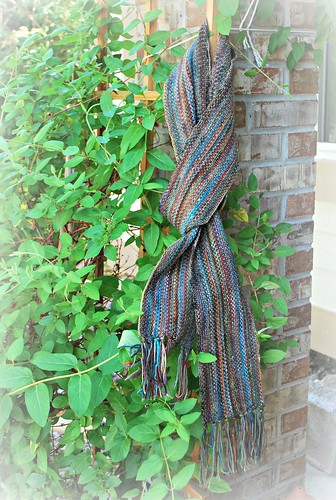
Thank you for the kind comments on the linen stitch man scarf.  I've really enjoyed working on this and using up leftovers of sock yarn from other projects.

Linen stitch man scarf

The pattern is Scrappy Lengthwise Scarf.  It is super easy, and yet interesting because you see the fabric develop as you add in each new colourful strand of yarn. 

Linen stitch man scarf rolled up

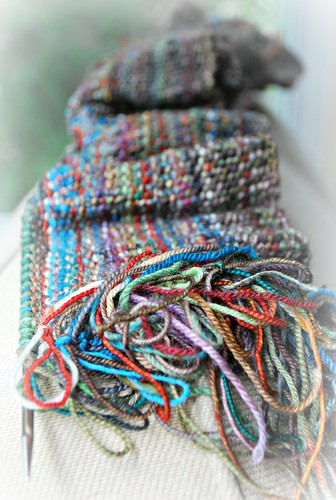
I used a US 6 needle and lots of leftover sock yarn from socks I'd made for Joe and also squares from my barn raising blanket.  I could also see that this would be fun in a chunkier weight yarn and larger needles.

Linen stitch man scarf tassels

Savannahchik asked how many different yarns I used.  Hmm let's see:
Yes, for sure a great way to use up leftover scraps of yarn from other projects.  I picked out leftovers that looked like they would work together, popped them in my project bag, and for the most part selected the colours at random.

Linen stitch man scarf - good length

The only thing I was concerned about was whether it would be long enough, since you knit it lengthwise and can't really tell when it is on the circular needle all scrunched up.  I cast on 600 stitches and hoped for the best.  When it came to casting off, I was relieved to see that it was plenty long.  The pattern does advise that you do a swatch and calculate the math to make it the length you'd like.  Erm, yes, lets just say I skipped that important step ;o)

I "need" to make one for myself now in pretty girly colours.  I certainly have the leftovers for it. 
Hope you are having a good week,
Sam xxx

Saturday, June 30, 2012

This week's WIPs: linen stitch scarf and a lace shawl

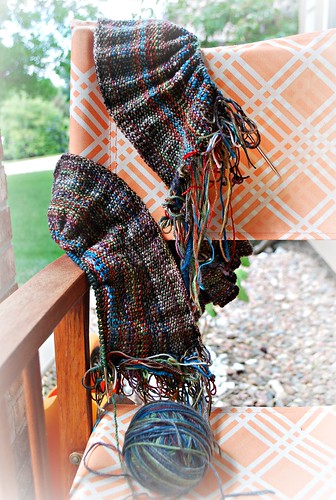
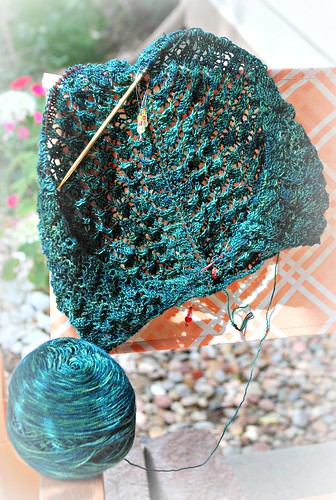
My sewing machine is in the shop, and I am feeling a little lost without it!  But it is the perfect opportunity to pull out some knitty WIPs and make a little progress.  No finished objects this week... but here's a quick glimpse at what has been on the needles:

Linen stitch scarf - close

Linen stitch scarf

Shawl

Shawl - close

What have you been working on this week?

Wishing you a wonderful weekend,
Sam
xxx
Saturday, June 23, 2012

Another Itty Bitty Dress

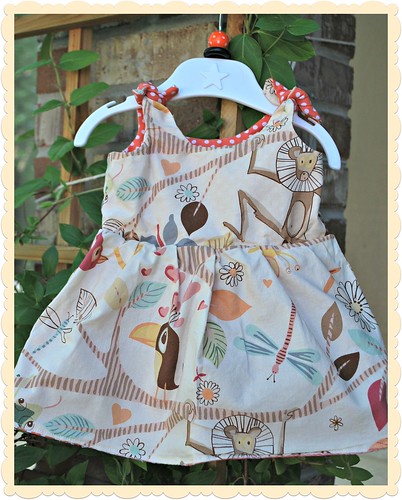
Joe's niece had a baby girl: Leila Rose!  Loving that name, and good grief that baby girl is a cutie pie!  Naturally I needed to make something for her.  I really enjoyed making the Itty Bitty Dress for Naomi and thought  a baby version would be fun too.  I think this one is even cuter... seriously, check out how cute these fabrics are:

Itty Bitty Baby Dress - Side 2

One of the sides is made from Just Hanging Monkey Bizness fabric, and the other side in the coral dot to  dot from Children at Play range.  I wanted to add a little something to the polka dot side to jazz it up, and simply cut out one of the flowers from the Just Hanging fabric and stitched it to the front. 

Itty Bitty Baby Dress - side 1

The baby pattern came in newborn and 1-3 month size.  I increased the sizing a little more to hopefully make it a 3-6 month size.  One gotcha - I should have lengthened the straps too.  Thinking I may add press-studs so that they can be clipped together instead of the ties.  The ties just seem a little short to me.

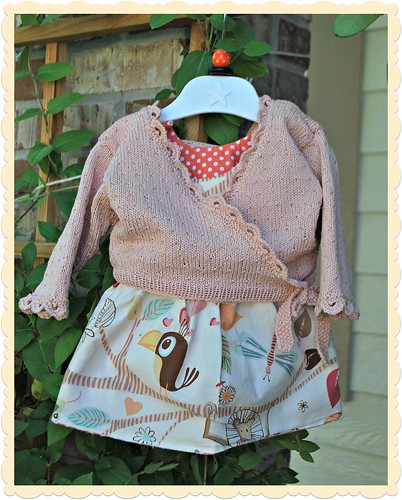
Ooh and look how perfectly they go with the Dolly wrap cardigan.

Itty Bitty Baby Dress and the Dolly Wrap

If you still aren't convinced how cute this pattern is, then go feast your eyes at the Itty Bitty Dress flickr pool.
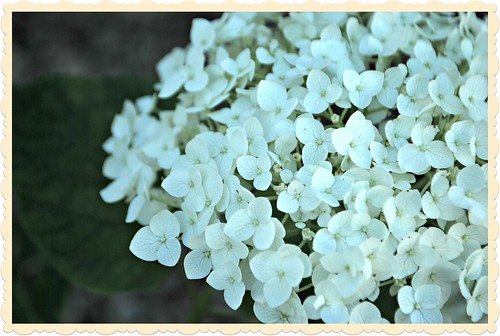
On an entirely unrelated note - the hydrangeas I planted this spring are starting to bloom.  So pretty.

Summer is here and the Hydrangea is blooming

Have a  great weekend,
Sam

Monday, June 18, 2012

Instant Gratification Projects

One of the things I love about sewing is the relative speed with which you can finish a project.  Of course it all depends on the project, but here are two that I was able to start and finish over the weekend. 

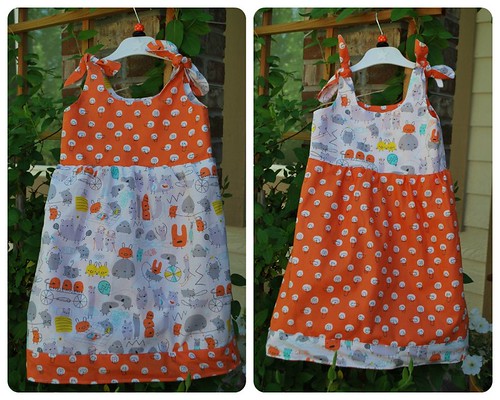
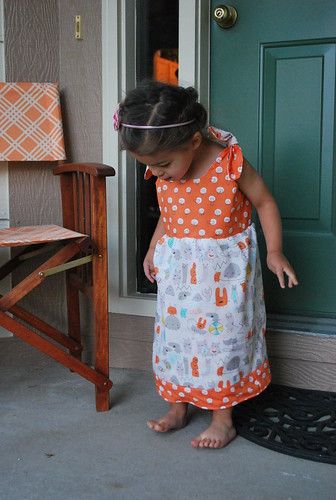
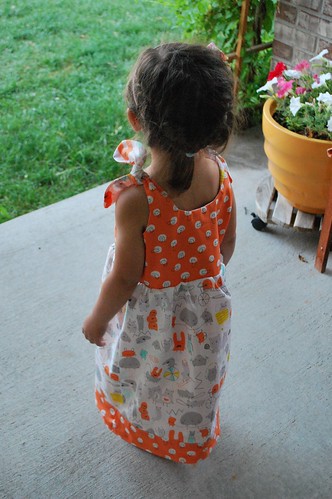
First up is a summer dress for Naomi. We recently went through her clothes to swap out the warmer weather gear for her summer clothes. There were a few things from last year that still fit well, but her wardrobe was drastically depleted. This gave me the nudge to pull something together for her. I found this free pattern for a reversible Itty Bitty dress.

Itty Bitty Reversible Dress

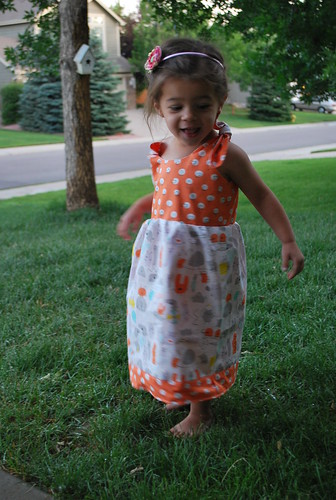
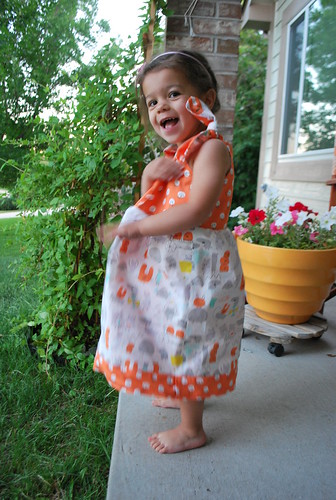
As you can see below, it is a not-so-itty bitty dress on my tiny little girl! I used the 2-3T size, which clearly stated that it runs closer to 3T. This works for me - I'm hoping to get 2 summer's wear out of the dress!  The pattern is fantastic - so very easy to follow.  And quick!  This beauty only took 3 hours to put together.

Checking out her flintstone feet

The fabric is The Monsterz, which I picked up at Fabricate last month. Such a fun print for a wee one.  And what a great feeling to be able to put it to great use. 

Good for twirling

Happy with her new dress Monsterz dress - back

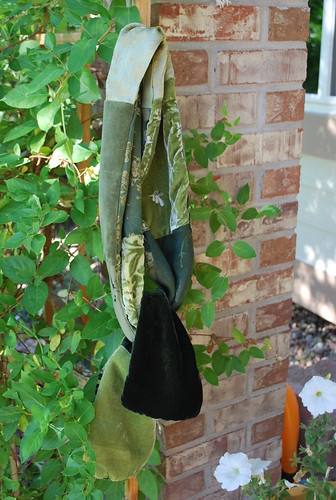
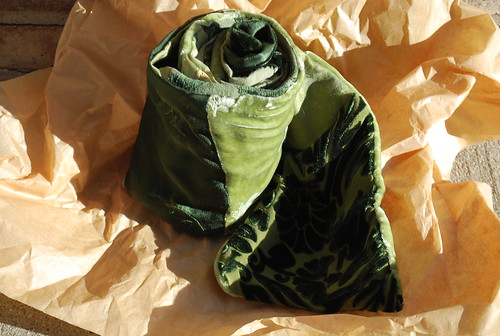
The other project is a scarf that I'd made for my good friend Anita.  She was kind enough to check in on our home while we were off gallivanting on our hols!  Anita always looks so sophisticated and I wanted to create something that suited her style.  And so I created this glam scarf. 

Scarf for Anita

There's a story behind the fabric:  Joe and I were browsing around some local boutique stores recently.  I was a little sad to see that one of the stores that I liked was closing it's doors and selling off everything - fixtures, fittings, the lot.  One of the things that caught my eye was a pile of interior decorating fabric.  I was able to purchase a couple of their swatch booklets - one of which was for the Bella Notte line of luxury fabrics.  The swatches included velvets, silks, lace... and was such an interesting find.  I knew I'd be able to put it to good use.

Scarf for Anita

Wishing you a great week,
Sam xxx
Saturday, June 16, 2012

Vintage Inspiration

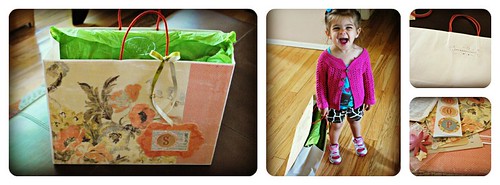
Today was a really good day.  I started the morning with a quick and easy craft project: Putting together a gift bag using scrapbooking supplies and a paper shopping bag.  This is a great way to make good use of those good quality paper bags that some stores are using.  I think they are too nice to throw away, especially those that I pick up at Anthropologie: a simple off-white paper bag, with fun red handles.
Scapbook gift bag

All you need is the paper bag, double sided sticky tape, and scrapbook supplies.  I found this nice vintage-looking floral design paper with coordinating polka dot paper, letters, frames, ribbon and some fun old-fashioned dictionary page paper.  I use double sided tape because it sticks really well, is quick, easy and doesn't make a mess.

Next it was off to breakfast at one of my local haunts, and then to my favourite local quilt store - Snappy quilts - where they happened to have a sale on fat quarters.  So naturally I left with a handful :)  Some pretty Kaffe Fassett prints that I'm collecting to make a quilt for my Mum.  Speaking of this quilt store, I recently took a class there for the 'perfect skirt'.  We used McCall's pattern M5431 as the basis, and the very talented teacher showed us how to adapt for our shape and size.  I've fumbled through creating a couple of skirts now, and was thrilled that I learned so many new, and professional, techniques in this class - customizing the shape and the fit, grading seams to remove bulk, different hem options...  The fabric is from Denyse Schmidt's Flea Market fancy which she descibes as being inspired the vintage charm of some of her flea market finds.  Really happy with how this turned out - it is very wearable.  I especially love the big deep pockets.

Mccalls M5431 Skirt

And finally I spent the afternoon at Old Glory Antiques Fair.  Old Glory Antiques is a fabulous local store (I'll have to post the fun vintage swim locker I previously picked up - it now houses my yarn stash).  They'd pulled together a bunch of similarly wonderful vendors and put on a fair.  If funds were unlimited I could have gone crazy.  Soo many wonderful things to buy.  I oohed and aahed over many of the items displayed there, but was able to show restraint and only came away with some vintage threads, which I think will be a nice addition to my yet-to-be-created craft room. 

Hope you had a good day too,
Sam xxx
Tuesday, June 12, 2012

Vesper Scrappy Socks

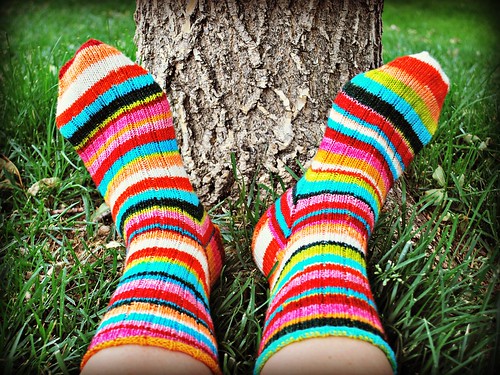
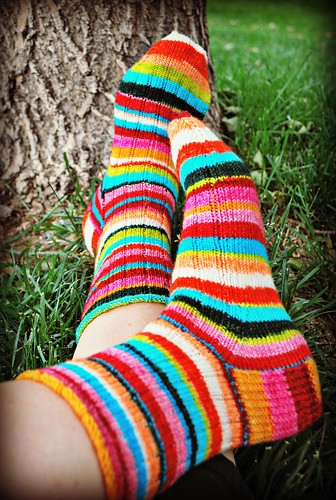
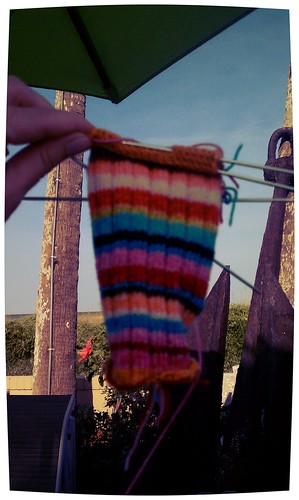
Ooh I do love finishing a project.  There's a sense of achievement that just makes me really happy.  The added bonus is that I'm pleased with the outcome.  And what's not to be pleased with... gotta love a cosy pair of handknit socks that have such a jolly vibe to them.

Vespa scrappy socks

The yarn was some Vesper odds and ends that I purchased from a Ravelry member.  I really enjoyed chopping and changing between the different colour schemes that I'd been able to get hold of.  (Although weaving in the ends was a pain!)  The pattern was an adapted version of my basic sock pattern.  This time with a size 2 needle to suit this skinny sock yarn.  I cast on a more stitches than my basic pattern to accommodate the smaller needle size - 75 stitches.  The rib is a simple K4, P1 repetition.

Vespa scrappy socks

Not a lot else to tell you about these.  Except little miss has taken a shining to them and keeps telling me they are her socks.  I have enough odds and ends that I could probably whip out a toddler sized pair.  (I need more hours in a day!)

Hope you are having a good week,
Sam xxx
Sunday, June 10, 2012

Vacation

I've just returned from a lovely vacation. Aah, I love being on holiday... and I love coming home.

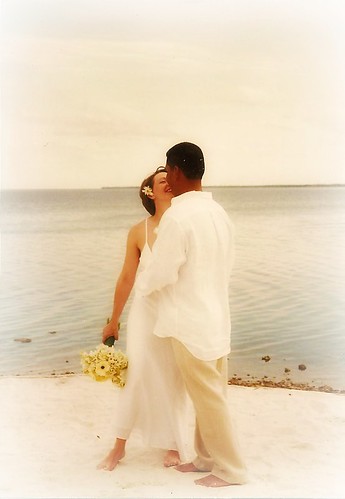
The first week was in celebration of our 10 year wedding anniversary.  I often wonder where the time has gone.  As they say, time flies when you are having fun.  I also wonder who those skinny dark-haired folks are in our wedding photos :o))) Here's to the next 10 happy years.

our wedding day, 10 years ago
10 happy years

We celebrated by going to Disney in Florida.  We all had a blast, and Naomi was super exciteable the whole time.  It was fun seeing her big brown eyes sparkle with delight.

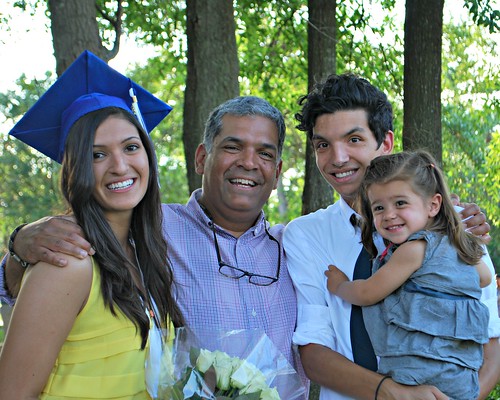
The following week we headed north to Amelia Island so that we could be closer to Joe's older 'babies' - Ian and Jessica.  Jessica was graduating from high school that week and I'm soo happy that we were there for the ceremony.  Joe is one proud Poppa.  Congratulations Jessica, you are an amazing young lady!

Joe and his babies :)

During our trip to Amelia Island (which is lovely by the way), we took a day trip to Savannah, Georgia.  Savannah is one of those places that I've wanted to visit since I moved to the US.  I'm not sure why I had this desire as I know next to nothing about the area.  I guess I dreamed of a historic town, wonderful boutique shops, fabulous food, and a warm friendly place.  Savannah was all that I dreamt it would be, and more.  I thoroughly enjoyed our day there.  And the cherries on the cake - a fantastic fabric shop called Fabrika, and a boutique yarn store called Wild Fiber.

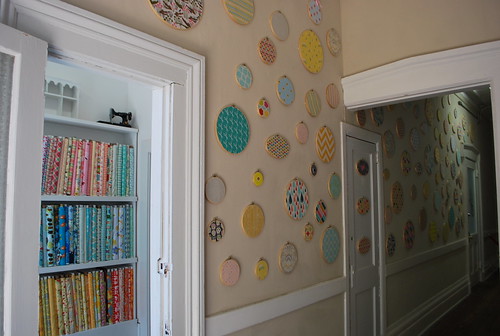
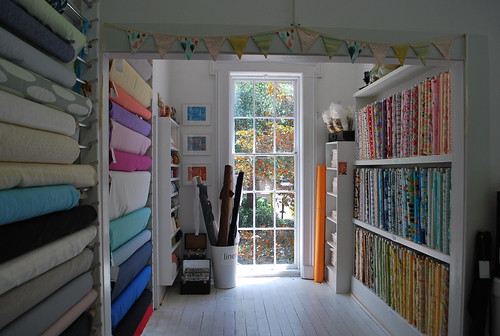
Fabrika was beautifully decorated (check out the embroidery hoops with the different fabrics) and had a variety of supplies for the quilter, home decorator and seamstress alike.  The staff were extremely welcoming and friendly.  Needless to say I found a few little something somethings to take home!  More on those in another post.

View entering Fabrika

Love the fabric in the embroidery hoops

Fabrika inside view out to street

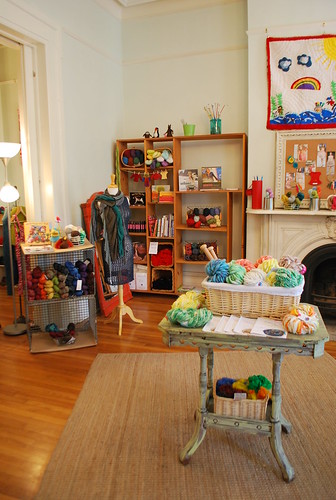
Wild fiber was practically right next door to Fabrika and stocked a variety of high-end yarns.  Naturally I picked up something there too!

Inside Wild Fibre

And there was also knitting activity.  I took my scrappy Vespa sock yarn socks which I'd started this time last year.  These are super close to being finished and I hope to share them with you soon.

Knitting on the beach, amelia island

Hope you are enjoying a lovely weekend.
Hugs, Sam xxx

Wednesday, May 16, 2012

Hexagon blanket


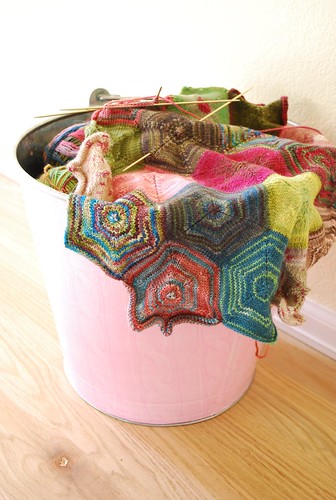
I don't have a finished object for you this week. But I do have a knitty work-in-progress: I have been plugging away on the Araucania/Patagonia hexagon blanket.

Pattern: Bobby's Garden Hexagon Blanket
(You can purchase the pattern online, or simply follow the tutorial)

Yarn: The original pattern uses Noro (which gives a fantastic effect). I have used Araucania and Patagonia cotton which has a nice nubby texture and weighty feel to it. Plus I had some left over from another project and was gifted a bunch from my knitty pals (thanks girls :) Oh, and of course I purchased a few skeins.

Needles: Since I'm using a bigger yarn, I'm using bigger needles - US 10.

Modifications: I only cast on 10 stitches for each side -- the hexagons go pretty quickly :)

Tips:
  • When starting each hexagon, you need to figure out how many sides you will be connecting to adjacent hexagons and how many will be free-standing.
  • Cast on for the free-standing sides first, and then pick up the required stitches on the edges of the adjacent hexagons.
  • I use 3 needles for holding the stitches: 2 sides of the hexagon on each needle.  On each needle I seperate the 2 sides of stitches with a stitch marker.  On the first needle I use a different stitch marker than on needles 2 and 3 - this helps remind me when I've come the the beginning of another round.
  • After casting on I knit in the loose tail end on the second round of stitches (saves weaving it in later).
  • Once I get to the end of each hexagon I weave in the end (so that I'm not left with a bunch of ends to weave in once the knitting is done.
And that's it - it really is a great pattern. I now have 100 hexagons and feel like it is well over 50% there. Unlike the sock yarn version I've been making that could be on the needles for many decades :o)))

Hexagon blanket

Hope you are having a good week
Happy hump day,
Sam xxx
Sunday, May 06, 2012

Big Birdie Skirt

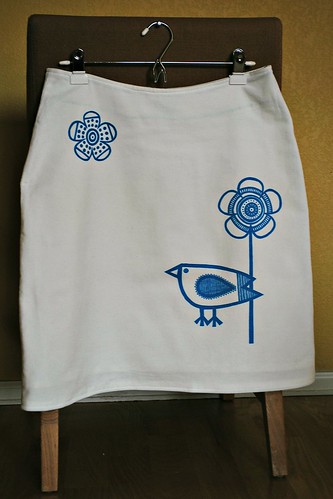
A couple of years ago my Sis bought me this fabulous Big Birdie Skirt kit from http://www.clothkits.co.uk/ I'm wishing I'd finished it sooner, because it is lovely and fits perfectly.

Big Birdie Skirt fits perfectly :)

The first year I had a good excuse - it was the year I was pregnant with Naomi.  And then the following year I was convinced I was going to lose all the baby weight and would wait until I was all slimline.  Ahem, er, yes, that hasn't really happened yet.  So rather than delay further, and given that the weather had started to turn warmer again, I pulled out the kit a couple of weeks ago and began working on it.

Big Birdie Skirt

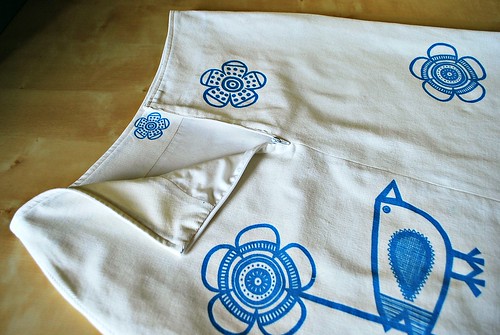
I was a little nervous to begin with - it was too pretty to mess up.  However that wasn't an issue at all because the instructions were extremely clear and easy for a beginner to follow.  I have nothing but great things to say about the kit.  The skirt fabric is this wonderfully soft baby cordruoy.  And I really like that it is fully lined.  I thought the attention to detail on the top band of the lining was a nice touch too.

Big Birdie Skirt - lined

The directions for where to cut each of the pieces is printed straight onto the fabric, and I'm kicking myself  for not tracing this onto paper after I'd cut out all the pieces -- I am super happy with the fit of the skirt and would like to make another one using some of the fabric in my stash.  I might take a stab by tracing round the completed skirt and adding the necessary seam and hem allowances.  Then again, I could always order this beauty (love, love, love this skirt), and make sure that I do the tracing the next time around :)

Hope you had a great weekend,
Sam

Saturday, May 05, 2012

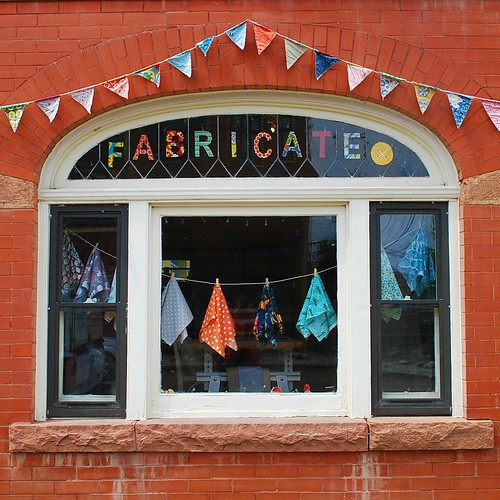
Fabricate in Boulder

This last week was my birthday.  I love birthdays.  Even better, I love that my hubby likes to make a big deal out of my birthday :)  This year we took the day off work to have a date day in Boulder.  Knowing thats where we were heading I did a quick web search to see if there were any cute fabric or yarn shops near the Pearl Street Mall area.  And there is:  A new store called Fabricate

Fabricate Boulder

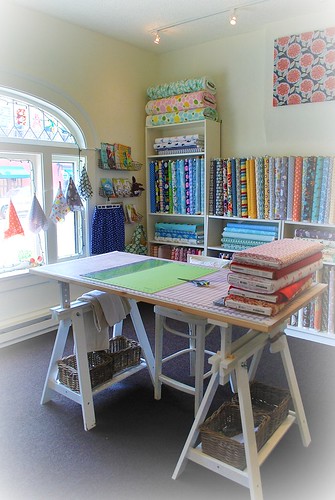
Fabricate is a fun little store that is stocked with modern fabrics and embroidery patterns.  They also sell some of the prettiest patterned ribbons I have ever seen.  If you happen to be out and about in Boulder it is definately worth a peek.  The store has a welcoming homely feel.  The staff were wonderful too - you know when you feel perfectly comfortable and are encouraged to browse to your heart's content, knowing that if you needed anything they'd be happy to help.  Love that.

In one of the rooms they have this great cutting table with the adjustable height.  I've had my eye on the very same table from Ikea.  (I have been dreaming of creating a dedicated craft space at home).

Inside Fabricate, Boulder

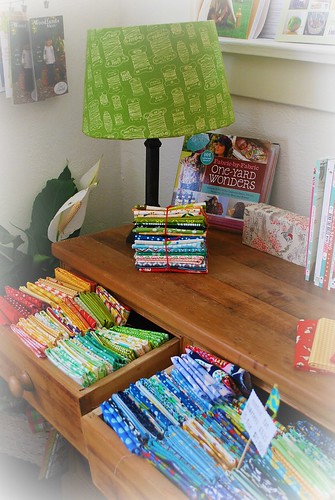
Ooh and look at this lamp shade... I should have asked where they got this from (or how they made it/what fabric)... sooo cute!

Lamp and fat quarters

Naturally I picked up a couple of yards of fabric.  Some fun children's prints to make clothes for Naomi.  I recently picked up this book, and want to make everything in there... watch this space :)  I also received some fabulous crafty gifts from my family including a Yarn Bowl from my Brother and Sister-In-Law, and an inspirational Orla Kiely book from my Sis and her family.

Wishing you a great weekend.
Sam xxx

Saturday, April 28, 2012

Miss Fran Canvas Tote

To use one of my sister's expressions, I'm as giddy as a kipper (overly excitable) with my latest crafterpiece!

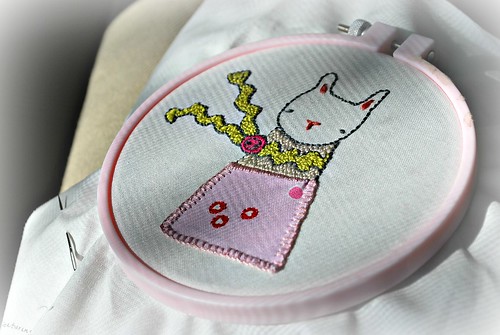
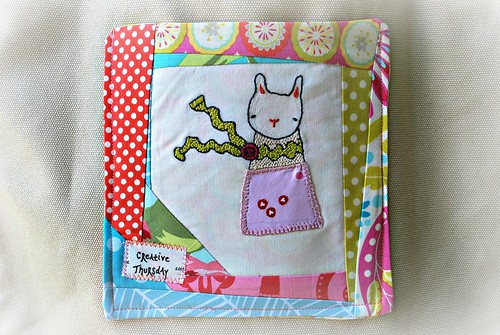
It all started with an embroidery workshop, hosted by the very lovely Marisa of Creative Thursday. The workshop was a lot of fun! We all worked on 'Miss Fran' - one of Marisa'a characters. Marisa showed us a number of different embroidery stitches, how to applique and encouraged us to experiment with different stitches. (Check out my friend Terrie's super cute version).

I thoroughly enjoyed the embroidery: adding a boucle effect scarf, an applique skirt, a little top... It was totally absorbing, and fun to see this little character evolve.

Ms Fran embroidery

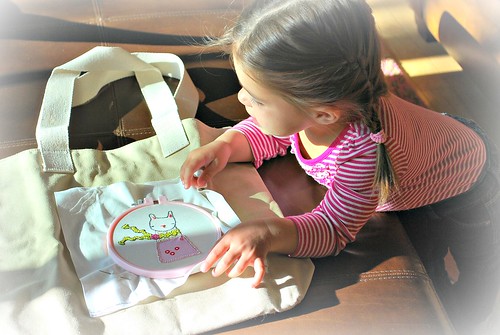
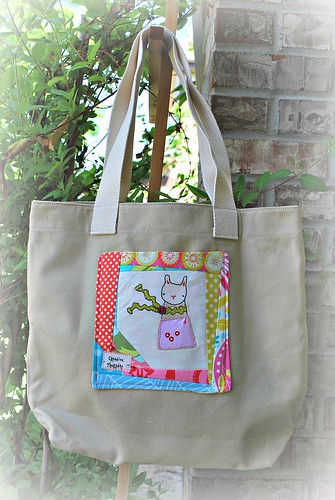
I was soo happy with the end result that I felt like Miss Fran needed to be put to good use... in a way that her loveliness would shine. I decided she would look very cute on the front of a simple canvas bag. Naomi agrees:

Hmm I like it

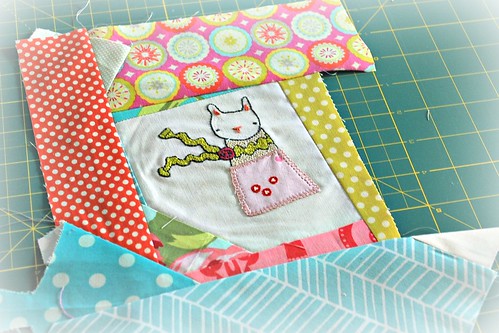
To make her pop, I decided to feature her in the center of a wonky log cabin square. This was a new technique for me, and I found it to be a great way to use some of the bits and pieces of fabric that I have accumulating in various boxes, drawers, shelves... And with each addition, my little helper would pick out the next piece of fabric that I would add to the block. I love that she likes to get involved.

Scrappy patchwork block

If you've never done a wonky log cabin block before, there is a great tutorial over on Quilt Dad's blog.

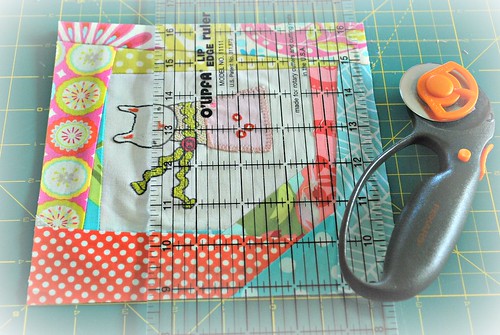
Trimming the patchwork block

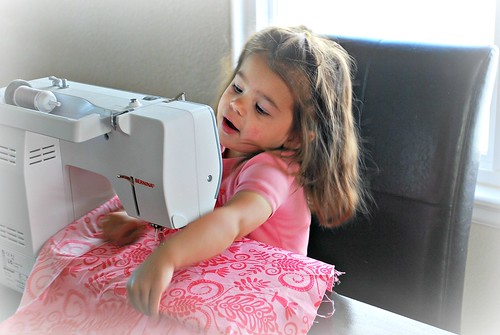
My little helper also wanted to have a go at the sewing too. Naturally this was a 'let's pretend' moment with the machine turned off! :o))

Mummy's little helper

The original embroidery fabric had the 'Creative Thursday' description printed on the corner of it. I've seen great projects that incorporate the descriptions from the selvedge of fabric. I thought it would be fun to mimic that idea, cut this out and zig zag stitched to the pocket. Soo happy with how this looks!

Ms Fran Pocket

Finally, I lined the pocket, and then simply stitched onto the front of the bag. Isn't it a bright and happy addition to this canvas tote. I see more of these types of projects in the future - after all who doesn't need a cute reusable canvas bag to do shopping, run errands etc...

Ms Fran bag

Have a great weekend,
Sam xxx