Saturday, July 28, 2012

Toddler Slouchy Hat

In addition to thoroughly enjoying last night's opening ceremony, the hours of tv time enabled me to whip out another project:  a hat and fingerless gloves for Naomi.

Hat plus a little felt flower

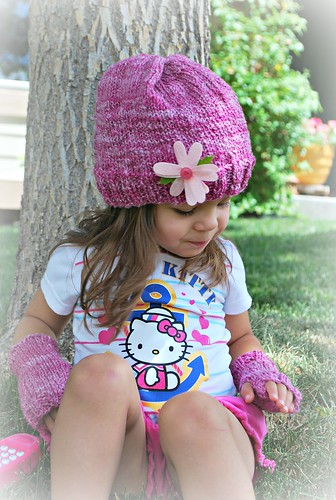
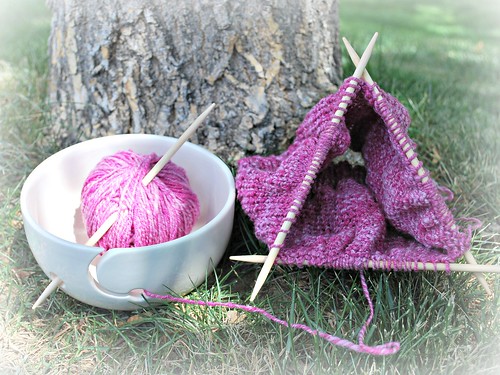
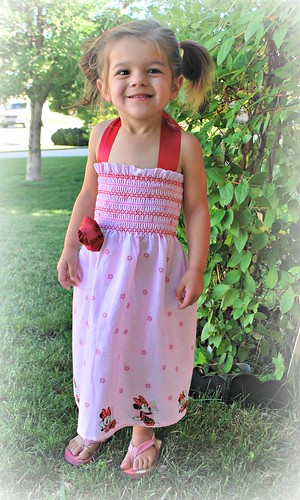
I'd picked up this handspun yarn at a Renaissance festival last year.  When I went hunting through my stash for it I was originally thinking that I'd use it to make a pair of socks for me.  But once I'd unearthed it, I saw that it was worsted weight and only had 142 yards - not enough for a pair of socks.  So I figured that I'd make a hat instead.  I used Ravelry's pattern finder to find a good free pattern that uses this weight of yarn - I stumbled upon Purl Bee's Simple Pleasures Hat.  I used this pattern as a guideline, rather than following it exactly.  Although the original pattern is super cute - I could see making one exactly like this.

Oh my

I wanted  a simple pattern that would showcase the handspun yarn.  However when I was finished I felt like it was just 'meh'.  Nice enough, but nothing to get excited about.  I felt like it needed a little something something.  Many moons ago I'd made this little felt flower from a Martha Stewart kit and decided that it would be a cute addition.

Handspun hat

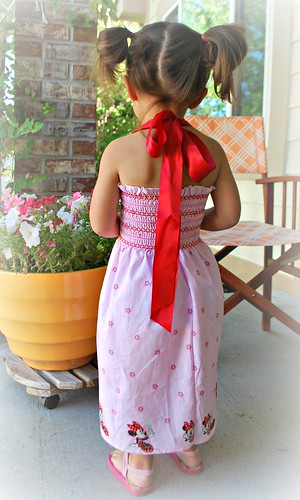
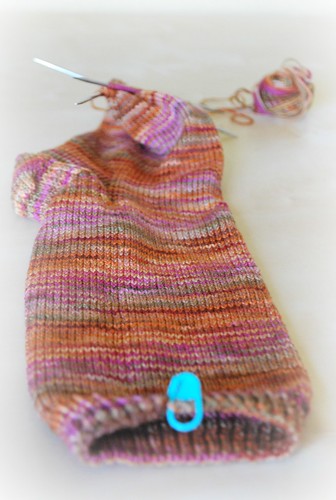
Once the hat was complete, I still had some yarn leftover, which is why I decided to make some matching fingerless mittens.  These are extremely simple to make.  I cast on 24 stitches and knit in the round until the palm piece reached where the thumb hole should start.  Then work back and forth for the a couple of rows to allow a gap for the thumb hole.  And finally knit back in the round again for the length that you'd like the mitten.  Very simple and very fast.  I wasn't convinced that Naomi would even wear these - I haven't been able to keep any gloves on her before now.  But she really liked them.  Another success.

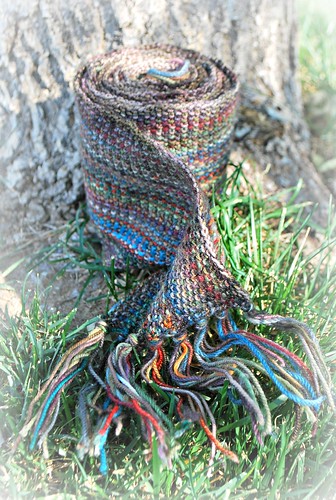
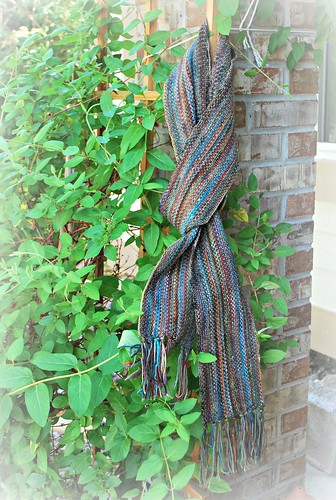
OK, back to the games, and my most recent project - a Citron shawl using this lovely yarn.

Bye for now,
Sam xxx

Man socks, toddler socks

Did you watch the Olympic opening ceremony?  I was glued to the tv and really enjoyed the event.  Made me long for home :)

But onto knitting:  I finished Joe's socks.  They were a nice simple knit, and I really enjoyed working with this yarn - Claudia hand painted in colourway John B.  Check out that model foot pose!  :o)))  Oooh my husband is a good man for humoring me! 

A matching pair

No particular pattern... just my standard approach.  This time with 75 stitches to account for the slightly smaller needles - US 2. 

Since these knit up really quickly and I get a kick out of completing projects, I decided I'd make a pair for Naomi.  These are a little different because they use a short row heel.  I had leftovers of koigu sock yarn and thought it was would be fun to make her a mismatched pair of socks.  US 2 needles.  Cast on 45 stitches.

Mismatch girly socks

Look how happy the little Miss is with them.  Can see more mini socks on the horizon. :)

Whooo new socks

I am excited!

Have a fabulous weekend,
Sam
xxx

Sunday, July 22, 2012

Minnie Mouse dress

Last night I made this cute little dress for Naomi.

Minnie Mouse dress

You are impressed, right? 
Don't be...

...You can buy fabric that is already hemmed at the bottom, and smocked at the top.  The majority of the work is done for you!  I picked this fabric up at Joann Fabrics.  Well, I should say that Naomi picked out this fabric :)  She's been Disney crazy ever since we returned from our hols there.

Front of Minnie Mouse dress

Not only was the dress super easy, it was also inexpensive.  The fabric was $5, after applying one of the 50% Joann Fabric coupons.  As for the ribbon and rose, I'm a little embarrassed to admit that they came off a box of chocs that Joe had bought for me ages ago.  They were simply too nice to throw away.  I was happy to put them to good use on this dress. :)

Back of  Minnie Mouse dress

So, all I needed to do was seam up the back of the fabric, using a french seam for a nice neat finish.  And then stitch the ribbon straps to the inside front of the dress so that they could be tied halter-style around the back of her neck.  And as Naomi would say 'Ta-daaaa!'.

Hope you are having a good weekend,
Sam xxx

Sunday, July 15, 2012

Camp Wanna Knit Knit 2012

I just spent a fabulous weekend with good friends.  Each year a group of us head up to the mountains and lock ourselves away to spend quality time together and craft!  A great time, and fun to catch up with folks I hadn't seen in a while.

This year I took up the princess palace cross stitch to work on.  Granted it is not knitting, but I'm a little hooked on working on this.  I am now on page 2 of 9.  Maybe Naomi will get this in her teens, and not her twenties!

Princess Palace 2 0f 9

I'd also picked up some claudia hand painted fingering yarn and made good progress on a man sock for Joe.  No particular pattern - just a basic stocking stitch sock using size US2 needles.  It's going pretty quickly.

Joe's man sock

Each year at camp we get goodie bags and this year was no exception.  Stacey had found a great pattern for project bags, and picked out this cute sheep fabric.  A couple of us helped out to make these in advance of the weekend.  Such fun bags.

Hope you had a fantastic weekend too,
Sam xxx

Tuesday, July 10, 2012

Mermaid needlepoint sandals

A couple of years ago I picked up this needlepoint kit for a pair of hand stitched mermaid sandals.  This week I finally got around to finishing them.  I am tickled pink with the end result - seriously, could this design be any cuter!

Mermaid stitched wooden sandals

The kit is from Birds of a Feather.  I picked it up at the The Yarn Studio in Minturn, Colorado.  They have a floor devoted to knitting goodies, and another floor that is brimming with some of the most beautiful needlepoint designs, many of which were handpainted.

Twinkle toes

I'd finished the needlepoint some time ago.  Such a sweet little design that stitched up quite quickly.  My favourite part was adding the sparkles to the tail. It was the finishing that had me stumped - I'd never done anything like that before.  I always send my needlepoint pillows to a professional finisher.  And I couldn't seem to find any useful links on T'Internet. 

Ready to be fixed to the sandal

This week I took the plunge (now that my sewing machine is back from the shop - yay!).  It turned out to be a lot simpler than I was expecting:
  • Mark a 3/8 inch border around each sandal strap and then cut on that 3/8 inch line to remove the strap from the canvas
  • Use the sandal straps as a template to cut out 2 pieces of fabric that would become the backing for each strap
  • Place pretty side of fabric to pretty side of needle point and pin in place
  • Stitch around 3 of the 4 sides of the strap:  stitch as closely to the edge of the needlepoint design as possible
  • Trim some of the excess fabric away from these 3 stiched sides and then turn the entire piece right side out
  • Hand stitch the final side of the strap, tucking the raw edge of the needlepoint, and raw edge of fabric inside the strap as you work along
  • Finally I added a top stitch along the top and bottom edge of the straps - about 1 row of stitches in from the edge.  I'm not sure that this was absolutely necessary, but thought best to be safe and add this extra row of stitches to secure the fabric backing in place and hopefully prevent the likelihood of it coming apart and fraying.
Lining for the stitched sandals

Truth be told, the trickiest part was hammering the tacks to secure the sandal strap to the wooden sole.  I'm sure it would have been easier with a vice grip, or other woodworking device for holding something in place while you hammer tacks into it.  Instead I was sat at the dining room table with the wooden sandal firmly 'clamped' between my knees as I tried to finish this last step :o)  The tacks aren't perfectly spaced and even, but I didn't kneecap myself in the process, so I consider it a success!

And that my friends is it!  I'm off up to the mountains this weekend with some of my knitty friends for this year's Camp Wanna Knit Knit.  The Yarn Studio is en route...  who knows what goodies I may be sharing with you next week :)

Have a great week, and an even better weekend,
Sam xxx

Sunday, July 08, 2012

This week's WIP: Princess Palace

This week I've been in the mood to do a little cross stitching.

Princess Palace - p1 of 9

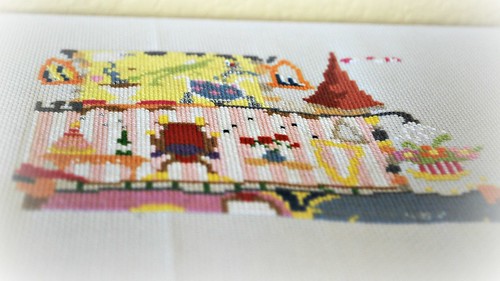
A good friend gifted me this Princess Palace kit, from Bothy Threads, before Naomi was born. It's a fun design, with bright happy colours. But I need to step up the pace - this is page 1 of 9 for the background colours. And then of course there are 9 pages of top stitching to outline the key elements of the design. At the current pace Naomi will be in her 20's by the time I complete it!

What have you been up to this week?
Sam
xxx

Wednesday, July 04, 2012

Linen stitch man scarf

Thank you for the kind comments on the linen stitch man scarf.  I've really enjoyed working on this and using up leftovers of sock yarn from other projects.

Linen stitch man scarf

The pattern is Scrappy Lengthwise Scarf.  It is super easy, and yet interesting because you see the fabric develop as you add in each new colourful strand of yarn. 

Linen stitch man scarf rolled up

I used a US 6 needle and lots of leftover sock yarn from socks I'd made for Joe and also squares from my barn raising blanket.  I could also see that this would be fun in a chunkier weight yarn and larger needles.

Linen stitch man scarf tassels

Savannahchik asked how many different yarns I used.  Hmm let's see:
Yes, for sure a great way to use up leftover scraps of yarn from other projects.  I picked out leftovers that looked like they would work together, popped them in my project bag, and for the most part selected the colours at random.

Linen stitch man scarf - good length

The only thing I was concerned about was whether it would be long enough, since you knit it lengthwise and can't really tell when it is on the circular needle all scrunched up.  I cast on 600 stitches and hoped for the best.  When it came to casting off, I was relieved to see that it was plenty long.  The pattern does advise that you do a swatch and calculate the math to make it the length you'd like.  Erm, yes, lets just say I skipped that important step ;o)

I "need" to make one for myself now in pretty girly colours.  I certainly have the leftovers for it. 
Hope you are having a good week,
Sam xxx