Saturday, October 26, 2013

Curio Quilt

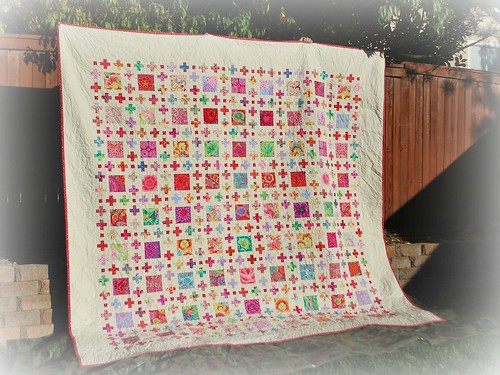
Well, here it is folks... one year in the making and the King Size Curio Quilt is finally finished :)

Curio Quilt

Mum and I started this one year ago - Mum had asked if I would make her a quilt to match her new bedroom (my brother had kindly redecorated for her). Sure, I said. I was a brand new quilter, full of optimism and false confidence. I'd happily make you a quilt, Mum. So after much Pinterest searching we agreed on the Curio Quilt from Fat Quarterly Issue 7, and went shopping for a variety of Kaffe Fassett fabrics.
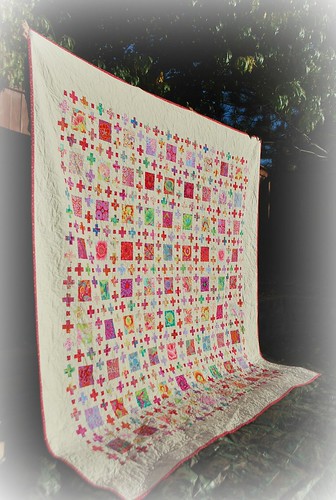
Curio Quilt

That first year, while Mum was visiting from the UK, she would spend her days fussy cutting the big flower squares and cutting the fabric strips for the little plus signs. I'd come home after work and help with the cutting as well as start the sewing while Mum would iron open all those teeny tiny seams.

I've read differing arguments for sewing seams open vs to one side. In hindsight, ironing to the dark side would have been much quicker, and stronger. But those little open seams did look so very neat.
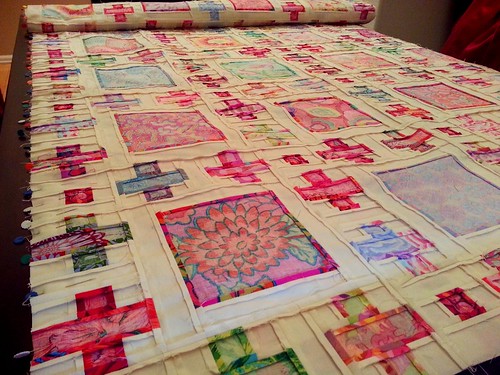
sea of seams

This quilt would have taken much longer if it wasn't for all the help that Mum provided - I'm trying to talk Joe into being my ironing helper now Mum has gone, but he is having none of it!  By the end of her visit last year we had the big squares completed and a good portion of the plus signs.

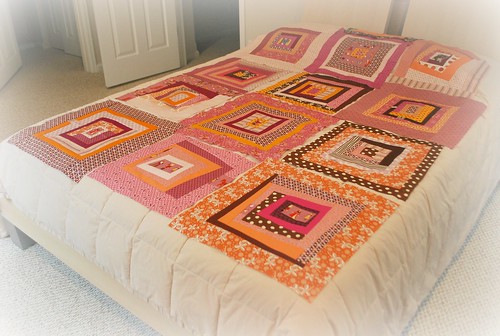
Layout - wip

Over the course of the next few months I would slowly plug away at finishing the plus signs and then the little one inch 'fish scale' squares. It was quite the task. I was soo excited when they were all complete.
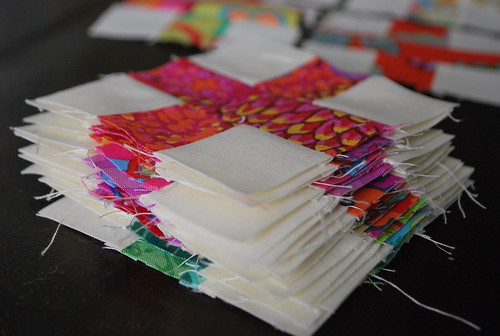
Lots of +'s

row1 sewn together: 100

It felt like a major achievement. The next job was to sew it all together. I sewed the first row, then the second, only to find that rows 1 and 2 did not align well. Harrumph. I put it on one side for a bit...
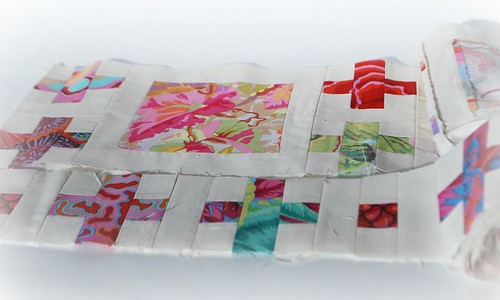
To be unpicked and reassembled

With renewed enthusiasm I decided that instead of sewing the big long strips together that I would put together in blocks. This way I could match up the rows and columns as I went along. This worked well for me.
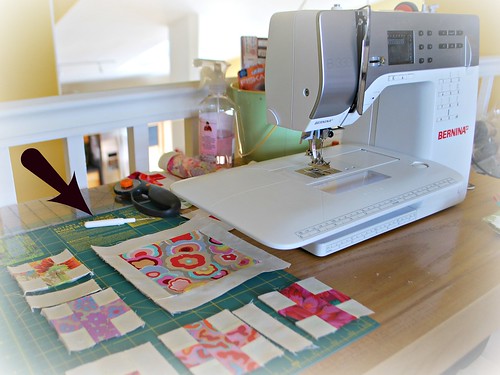
Be gone seam ripper

I set myself a goal of trying to complete for Christmas... erm, there was no way.
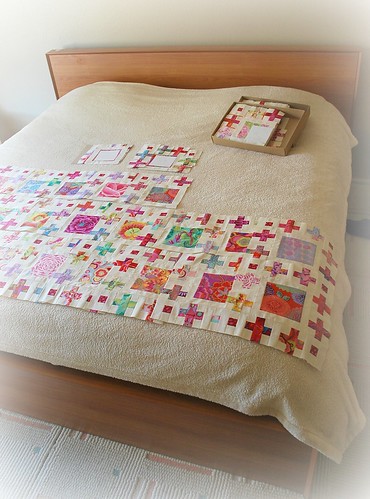
Mum's Curio Quilt - Row G WIP

Then Mum's 60th in April, yup that wasn't happening either.
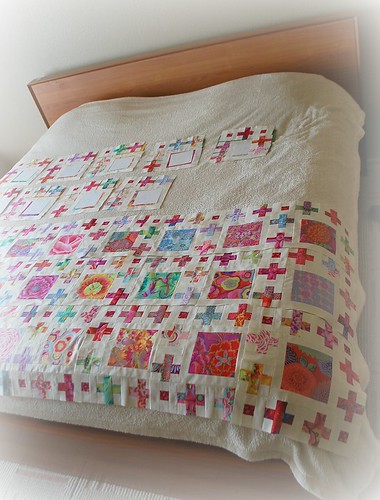
Mum's Curio Quilt: Row G Finished

But for sure it WAS going to be finished during my Mum's trip this year.
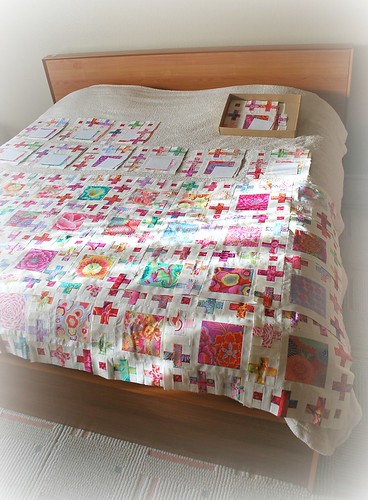
Curio Row F

And sure enough it WAS :)
It's on it's way back to the UK as I type. Mum has been here for the last 2 months, and over the course of that time we slowly put together the pieced blocks, and then sewed it all together.
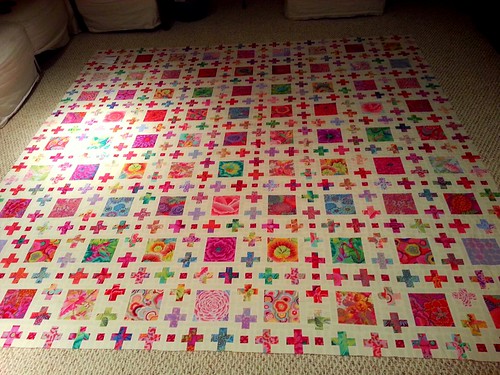
next... borders

Again, I cannot tell you how mush faster this process goes with someone doing the ironing :) I almost couldn't believe it when the quilt top was completely pieced together given how long we had been working on it. Next up we added a border so that the quilt was the desired size for Mum's bed back home. Picked out some backing and added that.

with border

One of the kind ladies - Amy Wade - at Quilt Guild offered to quilt it for us so that Mum could take it back with her (beautiful work with a super fast turnaround, thank you Amy).  Here is a great 'in progress' shots that she shared:
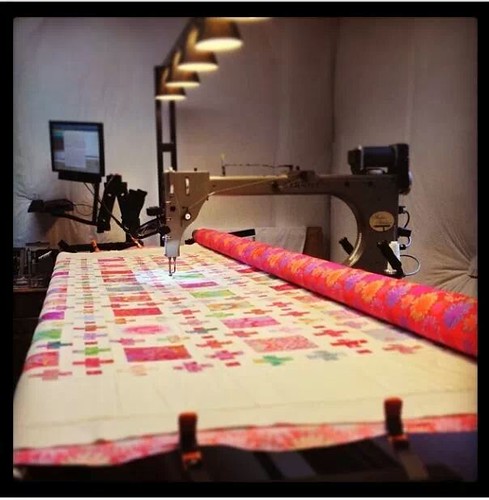
Amy Wade quilting Mum's quilt

She had recommended a big swirly stich which has a very nice modern feel to it, and helps soften out all the corners on the squares and plus signs.
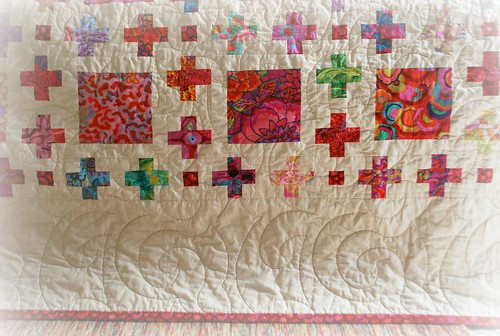
Big swirls quilt stitch

We got to show off the quilted piece at quilt guild.
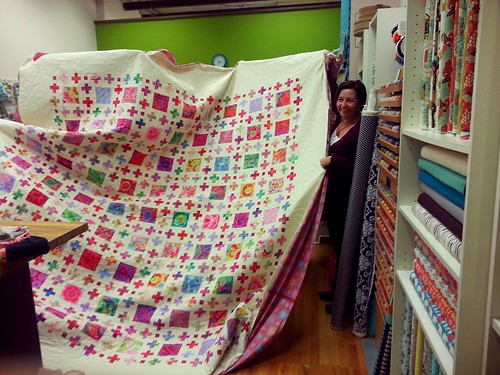
quilted!

All that was left now was to trim up and add the binding. I like to machine stitch the binding to the top, and then hand sew the back. Quite the job on a quilt that measures 112x112 inches!
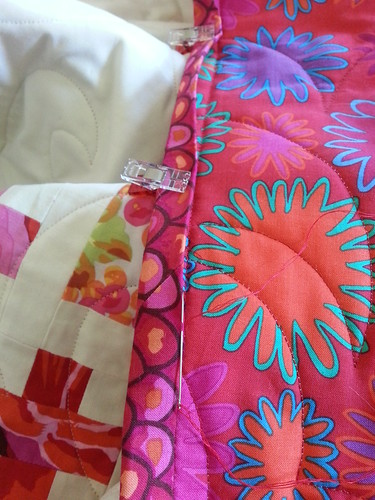
20131019_151540

binding

Mum actually did the majority of the hand sewing of the binding. Thanks Mum! Final touch was a turn in the washing machine, when all those lovely crinkles start to appear as a result of a little shrinkage - I just love those crinkles. And now it is done.
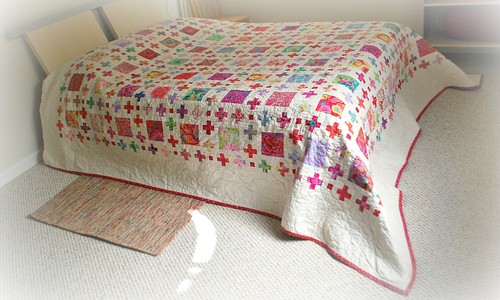
Curio Quilt

Amy had actually sent me this on Pinterest, and yes I do feel a little bit this way :)


I cannot tell you how happy Mum and I are with the finished quilt. It is truly beautiful and I feel soo proud to have been able to make this. It is my 3rd actual quilt (first one baby size strip quilt, 2nd one a simple design for Naomi's bed... so this was quite the leap in both size and difficulty). But what's probably the very best thing is that it was such a great experience to work on this together with Mum. xxx Sam

Friday, October 18, 2013

Catch up

I've been absent from blogland for a few weeks now. All for a good reason - my Mum has been visiting and so we've been out and about enjoying ourselves. :)

Some of the fun things have included a concert - Earth, WInd and Fire - at Red Rocks (amazing venue in Colorado... crazy to think that after all this time here, this was my first time seeing a concert at Red Rocks amphitheatre).

A trip to Disney world, where Halloween celebrations were in full effect! Naomi thoroughly loved the rides, and the bigger the better!

Dumbo Ride

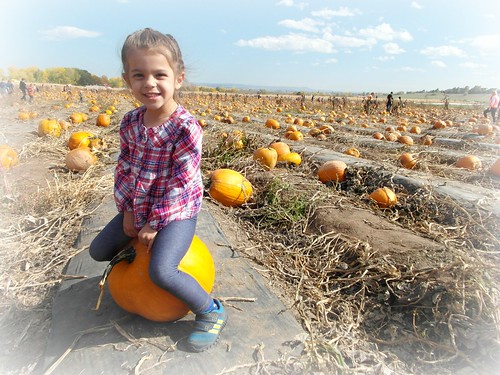
Pumpkin patch visiting:  If you are in the Denver area, we went to the Botanical Gardens at Chatfield and I highly recommend it.  In addition to the pumpkin patch there were hay rides, pony rides, children's fairground, food and craft stalls...  all in a beautiful location.

Pumpkin Patch

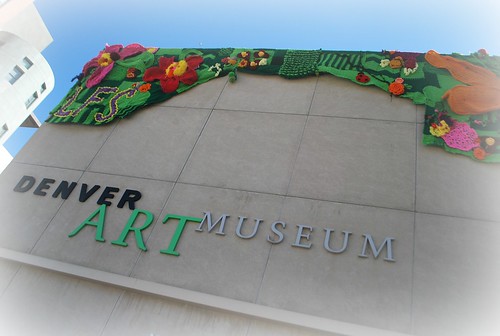
Checking out the Denver Art Museum and the textile exhibit.

Denver Art Museum - Spun

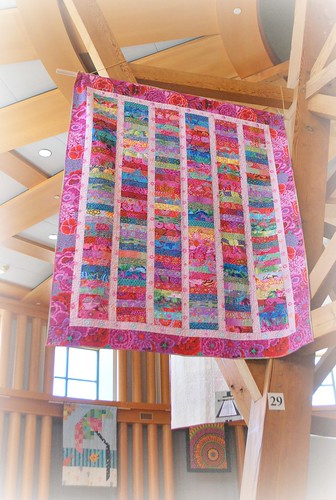
Not to mention a quilt exhibit that was hosted at the central Denver library and Capitol building.  This was amazing to see 250 quilts in such stunning settings. 

Quilt show

Trips to the zoo and the aquarium....
It has been fun and busy couple of months!

I've been able to do some crafting too. Major focus has been on finishing Mum's quilt - more to share on that in an upcoming post. (I am soooooooo excited!)  Then there are the quilt guild squares that I've made for Stacey's quilt. I only made the 2 on the bottom row: middle and right hand side square.  But look how great this looks all put together.

 Stacey Quilt

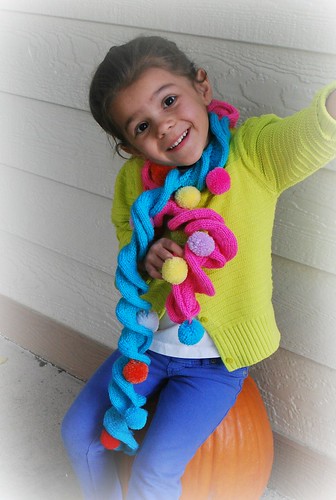
Plus this novelty scarf for Naomi, using Ella Rae Pompe yarn and a ruffle scarf pattern from Interweave knits.

Novelty scarf 1

I'm hoping to catch up with your blogs in the next week or so.
Hope you are well and having fun too,
Sam xxx
Sunday, September 15, 2013

If you go down to the woods today...

If you go down to the woods today you're sure of a big surprise,

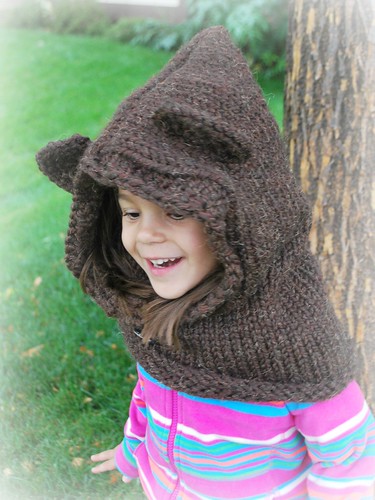
Bear hood

If you go down to the woods today you'd better go in disguise,

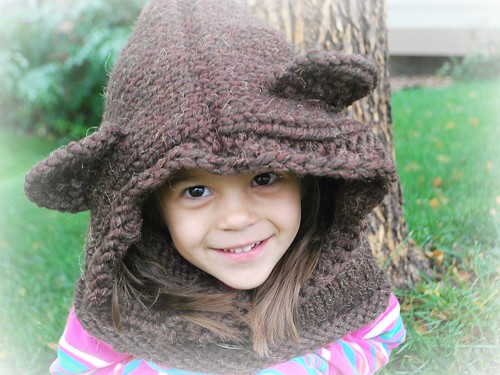
Bear hood

For every bear that ever there was will gather there for certain, because today's the day the Teddy Bears have their picnic!

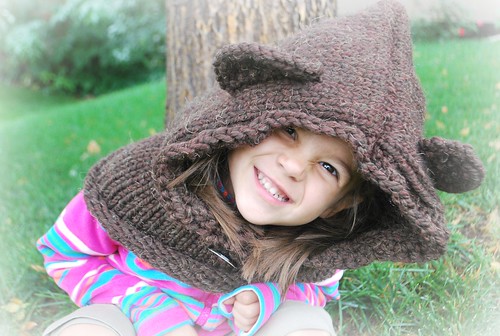
Bear hood

Pattern: The Burton Bear Cowl by Heidi May
Yarn: Lion Brand Wool Ease Thick and Quick
Made by: My Mum, for Naomi

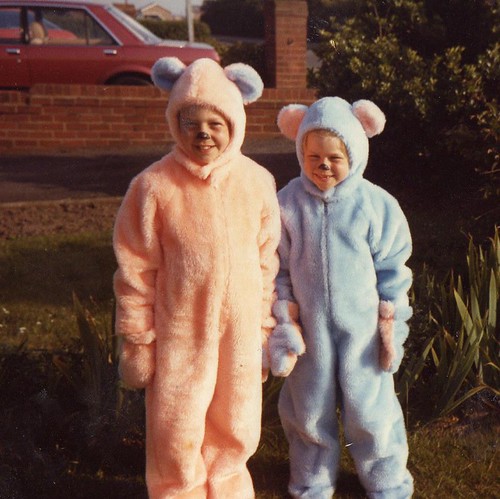
And for kicks and giggles, here are 2 additional teddy bear outfits that Mum made for my sister and I when we were kiddos :o)))

The Originals

Hope you are having a lovely weekend,
Sam xxx
Monday, September 09, 2013

Colourblock Fingerless Mittens

Another one bites the dust,
And another one's done,
Another one bites the dust...

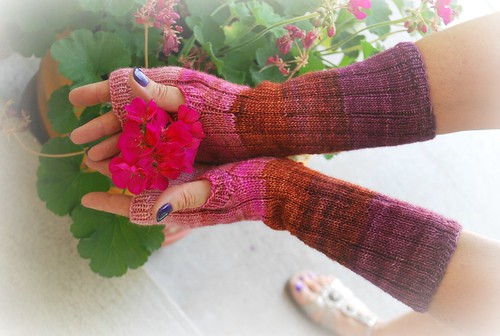
Colorblock mittens

Can you tell I'm a little excited that another WIP pile project is now complete? :)))
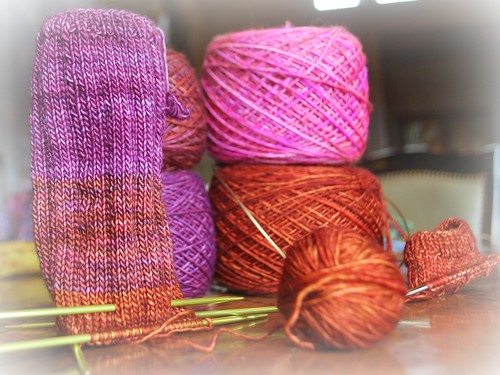
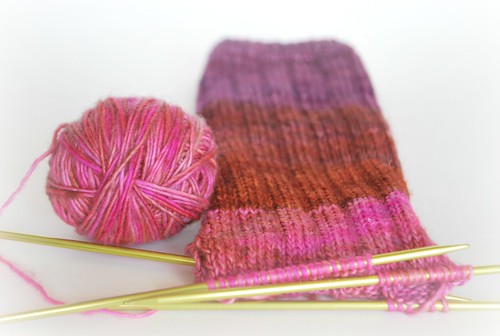
These are the colour block mittens that I started at our annual knitty retreat with a couple of my knitty friends.

Colorblock mittens

Pattern: Colorblock Hand Warmers from Purl Bee
Yarn: MadelineTosh Merino Light (Mmmmmmm love this stuff)
Mods: Instead of the stocking stitch, I used a K4,P1 ribbing to help make the gloves a little more form fitting (instead of slouchy).

These are a great knit. Simple and fairly quick. I'm thinking they'd make great teacher gifts.

In other good news, we also completed the first 2 Bertie's Blankets - blankets for folks in hospice care, in memory of my Dad.
The first one, was led by my Mum in the UK with help from friends and family back there.
The 2nd was an effort I led with your help, and contributions from all over the US, and Australia too!.

Thank you soo much xxx
Hope you are having a productive week.
Love,
Sam xxx
Saturday, August 24, 2013

Slouchy Flower Hat

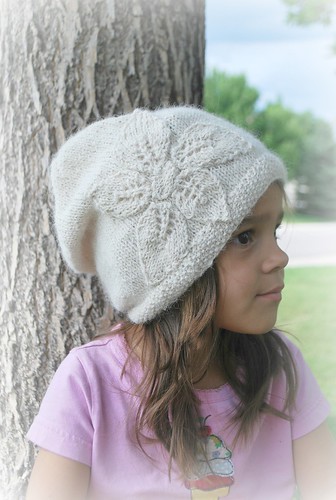
I just finished up this lovely slouchy flower hat:

Flower hat

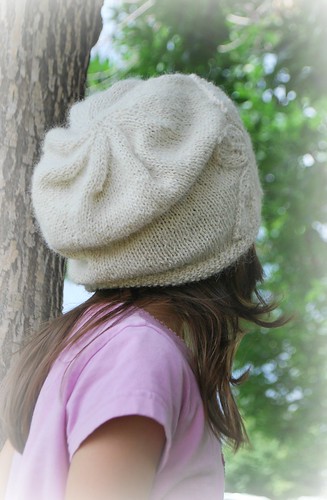
Flower hat - back

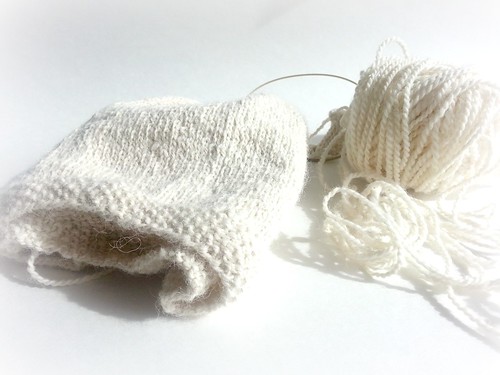
This started as a travel knit - I wanted something small and portable to take back to the UK with me at the beginning of the year. I found the pattern online, printed it out, threw it in a project bag with the recommended needles and some deliciously soft alpaca yarn...

En route I read the pattern for the first time and realised that the flower is knit after the hat is completed. Boo.  I thought the flower would be knit into the design of the hat. You see, I do not love fiddly knitting where there are little bits and pieces to crank out and assemble later. So I knit the hat on my trip, started the first flower petal and then cast it aside. That is until Andi started the KAL that spurs folks to finish up their projects!

I'm soo thankful for the motivation. And the crazy part is that the petals really weren't a big deal and took me no time at all. (Although sewing them onto the hat kept me occupied during a good portion of a movie last night!!)
The hat was originally intended for me. But I asked Naomi to model for me, and wow it looks pretty on her! Aside from her being a prettier model :o))), I think that certain hats just look better when there are long locks cascading out from underneath. So sweet girl has a new winter hat!

Pattern: Flower Hat by Rebecca Lenox
Yarn: A handspun alapaca that I picked up at a local craft fair (good grief this stuff was lovely to work with)
Needles: As recommended in the pattern
Modifications: None

Ooh and Naomi started preschool this last week. What a bag of emotions that was for the pair of us. Nerves and excitement before starting and wondering how the transition would be. Relief and overwhelming joy to see her integrate soo well and love the new school!


Hope you are having a lovely weekend,
Sam xxx

Saturday, August 10, 2013

Kid Silk Haze Airy Scarf

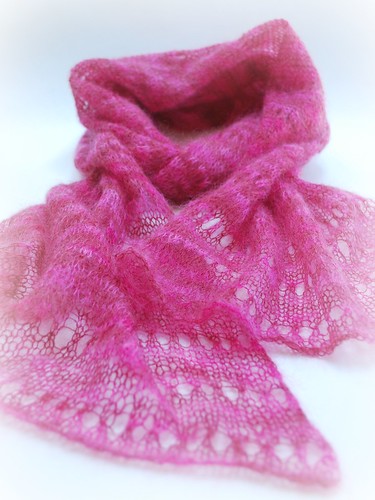
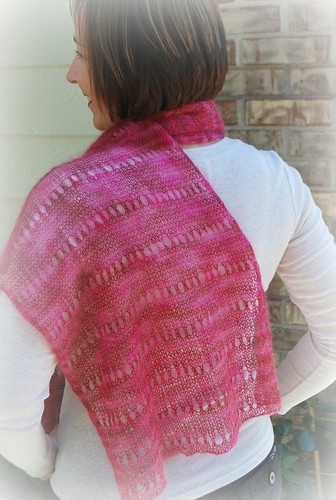
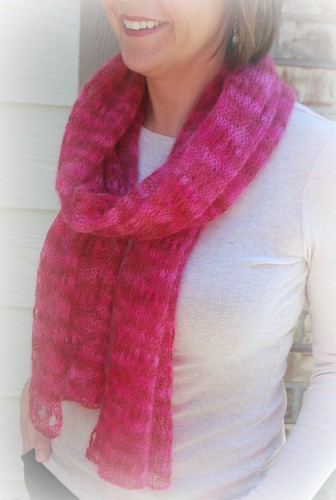
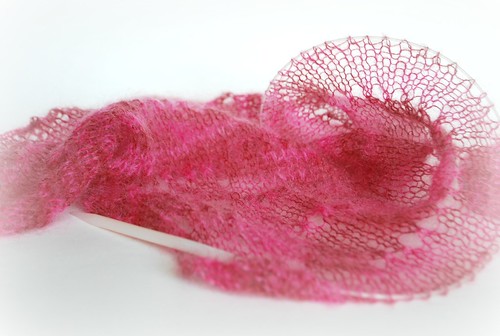
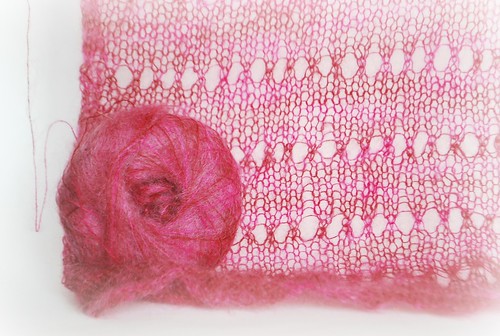
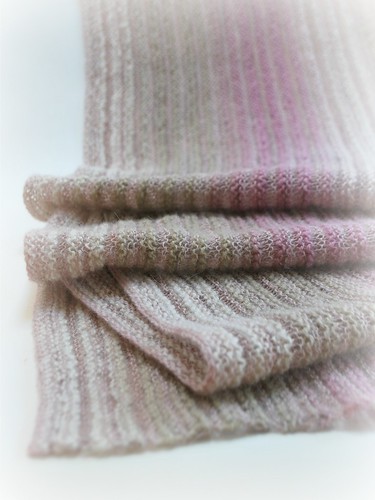
I am in love with this scarf. It is light, fluffy, cosy and fabulously PINK!
I shouldn't get too attached though - this is actually a gift knit.

Airy scarf

The Airy Scarf pattern is a free one (always a bonus): http://www.cheekyattitude.com/free-pattern-kidsilk-haze-shawl/

Airy scarf

It is an extremely straightforward pattern and was perfect plane knitting on a recent business trip.

Airy scarf

I used the recommended Kid Silk Haze yarn and knit on size 10 needles. The pattern recommends knitting 1.5 balls, but I always think it's better for scarves to be super long and so I knit 2 complete balls of the kid silk haze. The resulting scarf is 74 inches long.

I'd read that some folks didn't enjoy knitting with the fine yarn on larger needles. I really didn't mind at all... but I do think it helped that I was using lightweight needles - the old-fashioned plastic kind.

Not a lot else to say about this one except that I want one too :o)))
Ooh and it also gets entered into Andi's KAL.

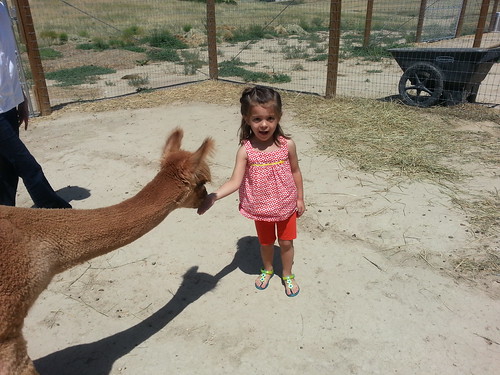
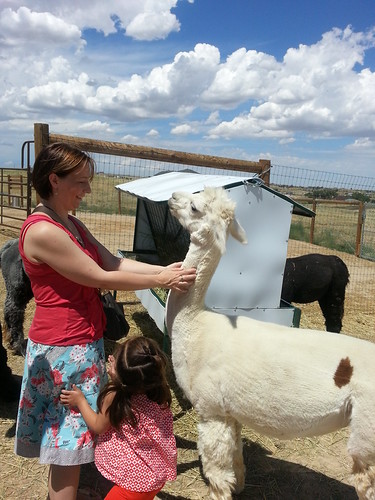
On an entirely different note, last weekend we all went to visit an alpaca farm. It was SOOOOO much fun. There were some yearlings and some that were only a month or 2 old.

naomi feeding the alpaca

I thoroughly enjoyed being able to be up close with the alpaca and pet them. (I don't think the alpaca were anywhere near as excited as I was :o)))

the alpaca isn't so sure

And Naomi enjoyed feeding them. Such a fun little outing.

Hope you are having a lovely weekend,
Sam xxx

Thursday, August 01, 2013

My Sister's Knitter KAL - WIPS

Yesterday was the last day to cast on new projects that would be eligible for Andi's Kal.

The intent of the KAL is to finish up Works-In-Progress by end September. The caveat being that they had to have been started prior to August 1st. But, how did August 1st get here soo fast? You see, I had in the back of my mind that I was going to cast on some new projects before today :))

This is a good thing though. With my WIP project count in the double digits it is time to whittle some of these down! Now, which to choose:

WIP 

For sure: Airy Kid Silk Haze Scarf:

Airy scarf

Airy scarf 

And the Colour Block Mittens:
CWKK Colour block mittens

Colour block, colour 4

Anything after this is a bonus.
Maybe the Poinsettia hat because I only have the Poinsettia to go. It's a quick finish if I just knuckle down.

Poinsettia hat 

This is going to be fun :)
What plans do you have to finish works in progress?

Hope you are having a good week,
Sam xxx

Saturday, July 27, 2013

Swallowtail Shawl

Andi of My Sister's Knitter is hosting a KAL/CAL that is focused on encouraging the participants to finish WIPs by September 30th.  Anything that is cast on prior to August 1st counts as eligible.  And if the comradery of the group isn't enough to motivate, then there are also fabulous prizes!  :)  I recommend that you check it out and join up on Ravelry!

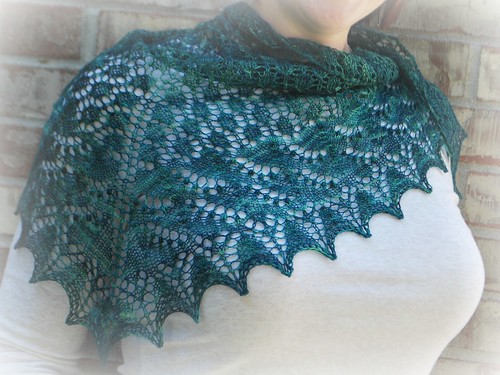
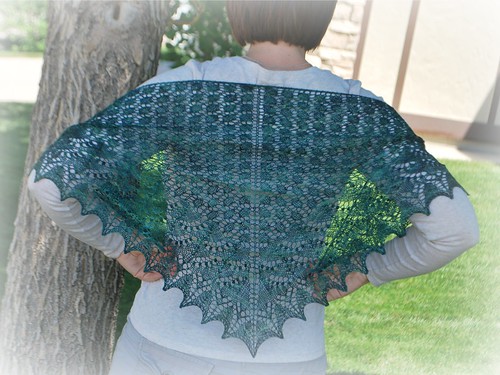
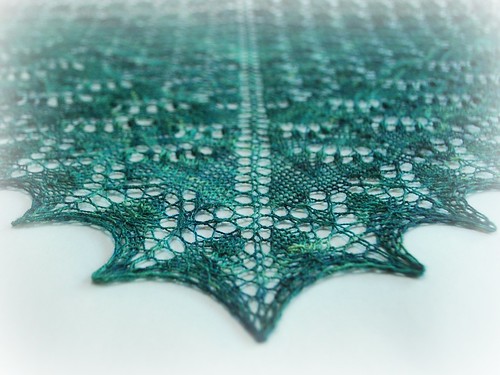
My first entry into the prize drawing is the Swallowtail shawl.  I cast on for this in February 2009, and finished it just the other day.  I can hardly believe that this baby has been on the needles for over 4 years!  Feels soo good to have it finished.

Swallowtail

I'm really not sure why this one took soo long.  I'd go through periods where focus on knitting this... lace  knitting for me is the perfect way to destress - I literally sit down in a quiet room away from all distractions and focus on the pattern.  But then, after a bit of attention, I would put it away and forget about it.  I was happy to have a nudge to pull this project out and finish it up.

Swallowtail

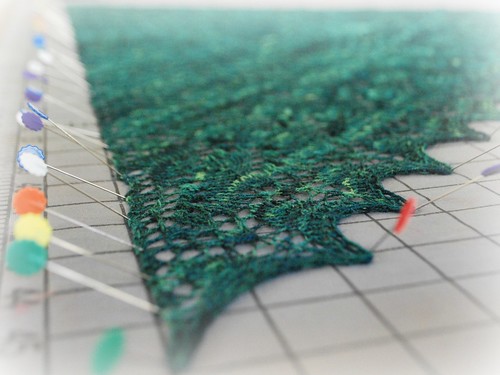
This colour is soo pretty and think that the subtle shifts in tone don't detract too much from the lace pattern.  If I had a do-over, I would have added more repeats of the leaf pattern.  The shaw is a reasonable size, but I would have preferred a little larger.  (I blocked this to it's max :))

Just finished blockingOn the blocking board

Details:
  • Pattern:  Swallowtail shawl by Evelyn A. Clark (available as a free ravelry download)
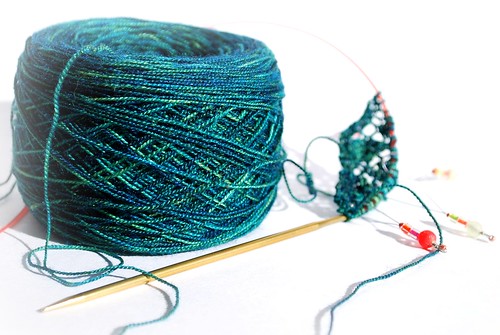
  • Yarn:  Curious Creek Fibers Meru, colorway is Emerald City
  • Needles:  US 3
  • Mods:  None

swallowtail, the beginningEmerald City

Hopefully this is the first of a couple of projects that I finish in the next couple of months.


What do you have on the needles?

Have a great weekend.
Sam
xxx

Friday, July 26, 2013

Tyk and Tynd

I recently had the good fortune to spend a weekend with my knitty friends.  Each year a group of us head up to the mountains for our annual Camp Wanna Knit Knit (for camping, read 'glamping').  A girls weekend of delightful company, fantastic food and oodles of crafting.  I have soo much fun on these weekends, and although it's always a little sad to say Goodbye to my little angel and dear sweet hubby, I do LOVE the dedicated crafting time and a grown-up girls weekend.

Naturally all that crafting time means I get to make a good dent on projects.  This year's focus was on finishing the Tyk and Tynd scarf.  A beautifully simple pattern (perfect for mindless knitting while I catch up with friends) with a stunning end result.

Tyk and Tynd

Tyk and Tynd

Part way through knitting the scarf I had an idea to replicate the scarf ridges in the form of a coordinating Wurm hat.  I kept the scarf on the needles while I worked from the other end of the yarn balls.  This way, when I returned to the scarf, I could knit until all that wonderful yarn was used up.

Wurm

Wurm Hat

Details:
  • Yarn:  Kauni Effektgarn and Isager Alpaca Strik 1 (alternating)
  • Scarf pattern:  Tyk and Tynd scarf
  • Hat pattern:  Wurm (a free ravelry download)
  • Needle size:  As recommended in the patterns
Tyk and Tynd

The combination of the Kauni wool and the Isager Alpaca is genius - the alpaca provides a colour wash that helps smooth out the transitions in the kauni wool, as well as 'lifting' the overall scarf so that it feels light and airy.  I am extremely happy with the end result and know this will get some good use once Winter rolls around.

Sunday, July 21, 2013

Stitchy Stuff

Hi Folks,
This is a quick one.  I have lots to share... just not enough hours in the day :)

For this post I wanted to drop a quick note about a couple of quick sewing projects:

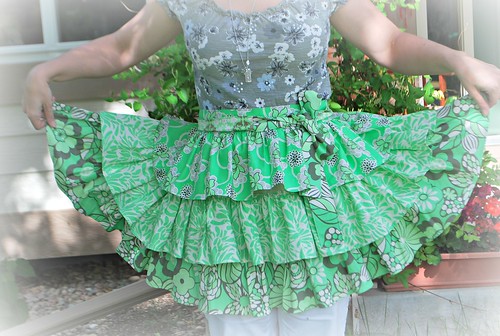
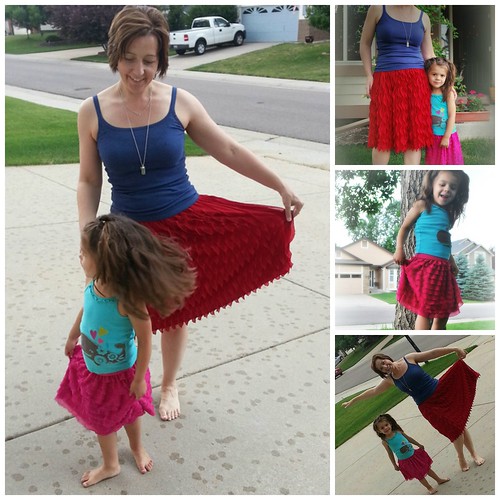
Ruffle skirts:
These are quick and easy - just buy ruffle fabric and matching elastic for the waistband.  Measure to the desired width and join together.  Naomi's ruffles are horizontal, and mine are vertical.  It was fun to play around with the fabric, and there is no shortage of online tutorials - here's a particularly pretty and feminine on:  Coastal Curtsy skirt .  Tempted :)

Ruffle collage

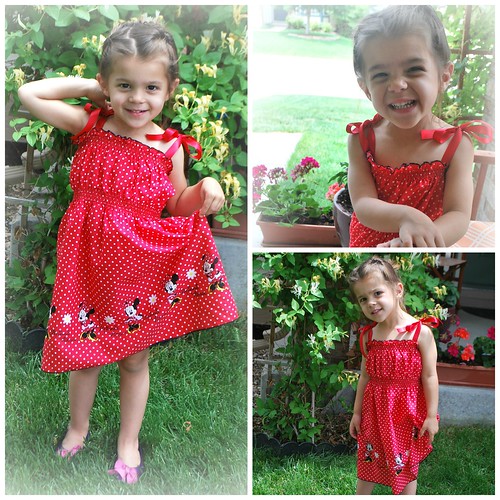
Minnie Mouse Dress:
This uses pre-smocked fabrics from Joanns. Again, measure to desire size and seam up the back. That's it.  Literally in 5 minutes I had a completed dress for Naomi.  I added a couple of ribbons for shoulder straps and it was done! Naomi is a very happy girl!

Minnie Mouse Collage

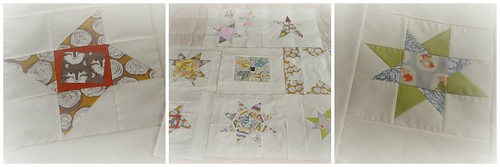
Swap Blocks for Guild - Liz's Star Quilt.
The guidelines on this were really straightforward. Make a star, any star, using the muted fabrics provided, and add a pop of colour from your own stash, if you so desire. In the piccie below you can see all the squares she has received to date, and the 2 I contributed.

Liz quilt collage

That's it for now.  I have lots of knitty goodness to share next weekend :)
In the mean time, have a fabulous week,
Hugs,
Sam xxx

Saturday, June 29, 2013

Apron Swap

The Denver Modern Quilt Guild met the other week, and this month's activity was an apron swap.  I can't believe my luck this month - I got to pick first and ended up with this beauty:

I lucked out

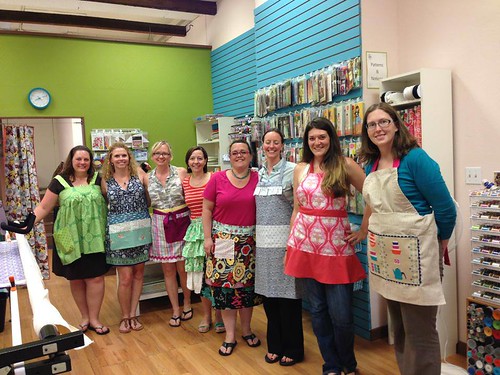
All the aprons were super lovely and I would have been thrilled to receive any of them. But getting to pick first... ooh that was fun! :) Here are all the aprons, modelled by the lucky recipients:

 Denver Quilt Guild Apron Swap

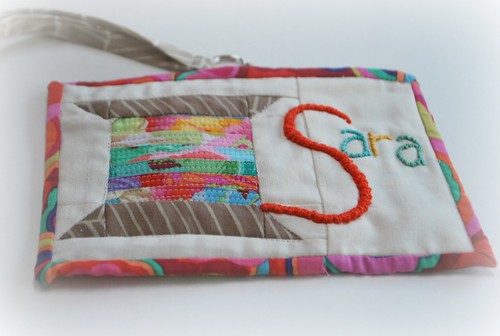
Next month we are doing a name tag swap. Each participant wrote their name, and some basic guidelines on a piece of paper and we drew at random. I received Sara, who simply wanted something bright on a lanyard. I'd seen some pieced spool designs online and thought it would be fun to try my hand at creating one, and using the spool's "thread" to spell out the letter S. I'm pretty pleased with how it turned out, although it is a tad larger than I think it needs to be (more postcard size than name card size). Hey ho, at least it's not sandwich board big :))) and no-one has an excuse for missing her name.

Denver Quilt Guild Name Tag swap for next month

I'm looking forward to seeing the results of this next swap.

Well, I hope you are well, friends?
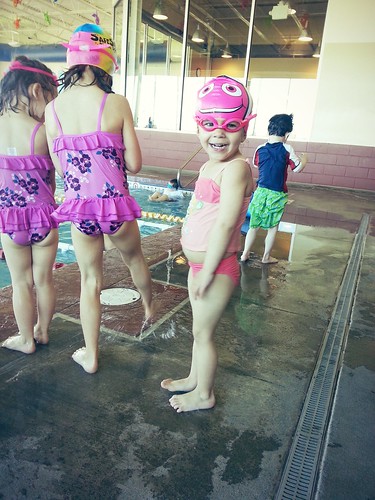
It's been a little hectic here (mainly work, but also some bug that has worked its way round the 3 of us) which has resulted in low energy levels and no desire to craft (shocker... I rarely ever feel this way). Consequently I've not really had anything to blog about. All that to change... starting with fun Mummy Daughter sewing plans tomorrow, as soon as we are wrapped up with swim class (little water baby just loves going to the pool).  Here's a fun swim pic that just makes me beam each time I see it:

this makes me smile... my little nemo

Enjoy the rest of your weekend,
Sam xxx

Sunday, June 16, 2013

Birthday Boneyard

I've been doing some secret knitting for a friend's birthday, which is part of the reason it has been a little quiet here.  But now that the big day has come and gone, I can share what I've been working on...

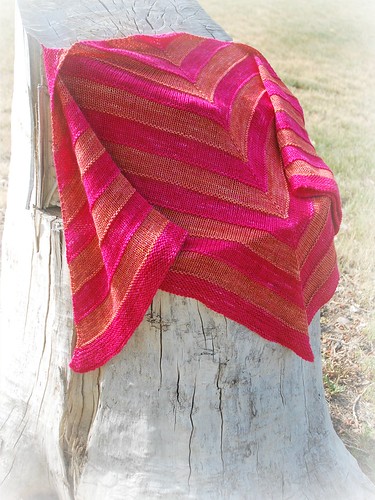
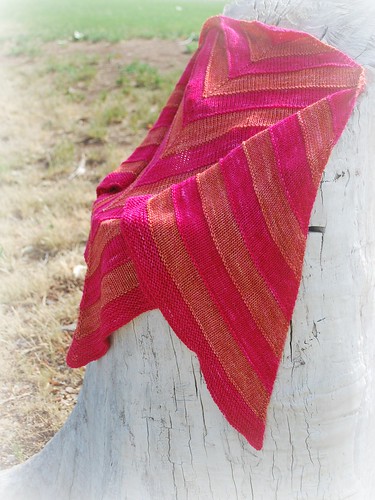
It's the Boneyard shawl from Stephen West (don't you just love his shawls!).  Bonus:  the pattern is a free Ravelry download!

Boneyard shawl

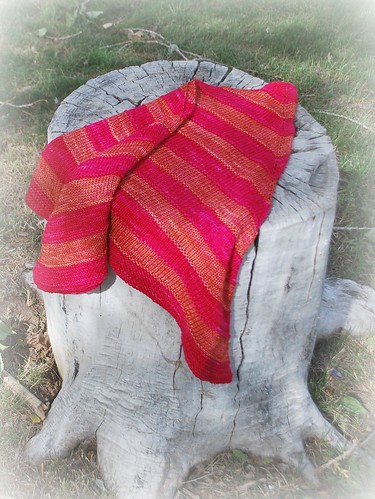
Before I start any given project, I like to look through the finished versions on Ravelry for inspiration.  For this pattern I saw that a bunch of folks had knit their shawl using one skein of Madeline Tosh Pashmina.  I had one particular colour of Pashmina in my stash - Pop Rocks - that I knew my friend, Stacey, would love.  It's a super bright pink, and just up her street.

Boneyard shawl

Looking through the finished projects on Ravelry I also saw that some folks had chosen to work the shawl in stripes of differing colours.  I love stripes, and thought this would add a touch of fun to the finished shawl.  I found some Coral online that would contrast well with the Pop Rocks Pink.  Yes, this combo would be a good, bright, fun one!  Perfect for Stacy.  Ooh and the Madeline Tosh Pashmina is just devine - soo very soft.

Mad Tosh Pashmina

The folks that had used one skein of MadelineTosh Pashmina were able to get about 9 repeats of the pattern, which is a good size for a neckerchief sized shawl.  I wanted to make something bigger and cuddlier and worked 12 repeats of the pattern.  The end result is a really good size - enough to truly be called a shawl, without being too big and 'drowning' the wearer.  FYI, the 12 repeat version used 1 whole skein of the main colour - Pop Rocks - and the majority of one skein of the contrast colour - Coral.

Boneyard shawl

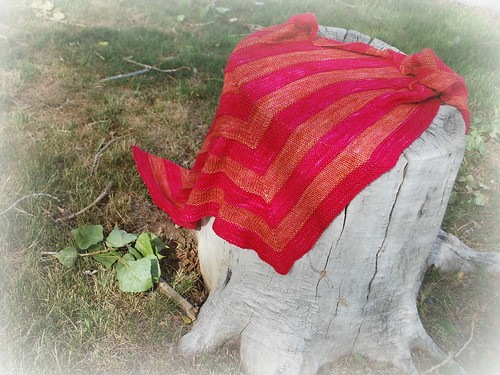
Finally, the pattern calls for the Elizabeth Zimmerman sewn bind off.  It's a perfect bind-off for the shawl due to it's strectchiness.  But man, it took me forever to bind off in this manner!  Well worth it though.

Boneyard shawl

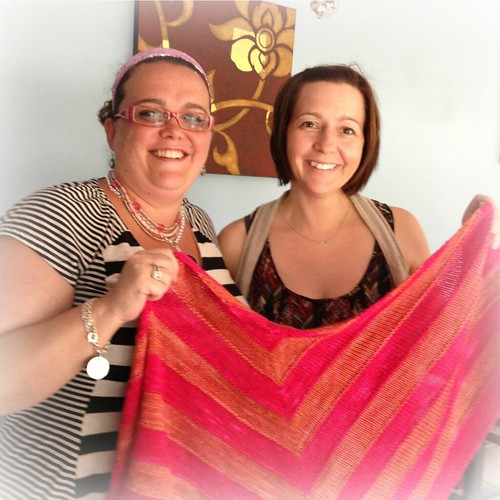
The gift is a winner (yay!) -- Stacey loves it.  Which means I am also over the moon:  I do love gift knitting when the finished project is soo graciously received.

Birthday girl + gift

Hope you are having a lovely weekend my friends,
Hugs,
Sam
xxx