Hi, Lots been going on here and so I've been away from the blog. Time to provide an update on the crafty stuff...
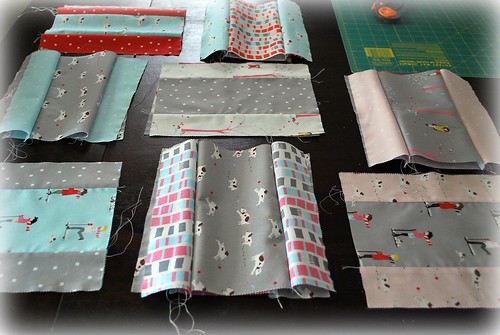
First, I have caught the quilting bug. On Bea's blog I saw Sherbet Pips and became fixated on the fabric. Little girls, puppy dogs, knitted scarves are all in the designs - of course I "needed" this fabric! ;o) I've made a start, piecing together the quilt top, and will share more about it in a future post.
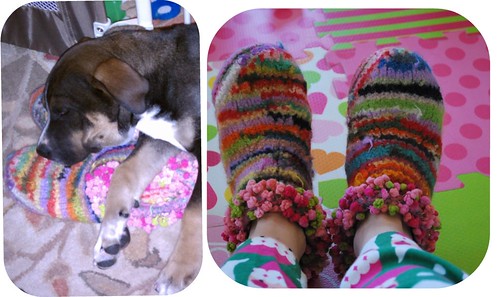
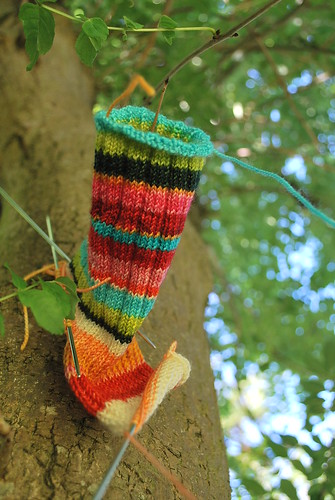
I was back in the UK for a couple of weeks. I took my scrappy sock blanket with me, but after the first week ended up working on new projects instead. I'd purchased some Vesper sock leftovers on Ravelry, and started making these cheerful socks out of a random mix of the leftovers. Love how these are turning out.
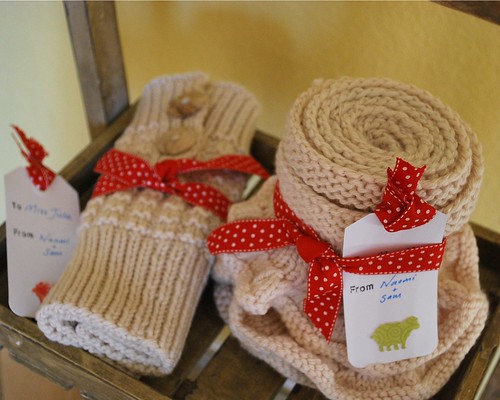
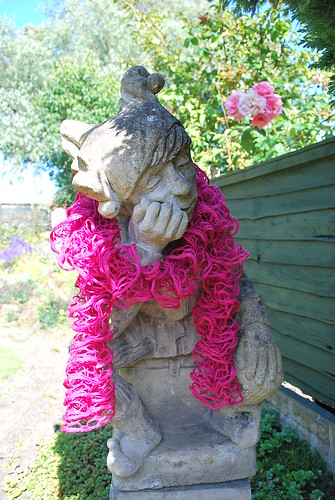
Mum and I also picked up some novelty yarn to make these ruffle scarves. I'm not a big novelty yarn fan, but have to admit that I really quite like how they turned out. Other bonus - made each scarf in a matter of hours. (You can make 2 scarves out of one ball of "Loopy" yarn. One scarf was 7 stitches wide. The other, shown here, only 4 stitches wide). So if you need a last minute, fun gift...
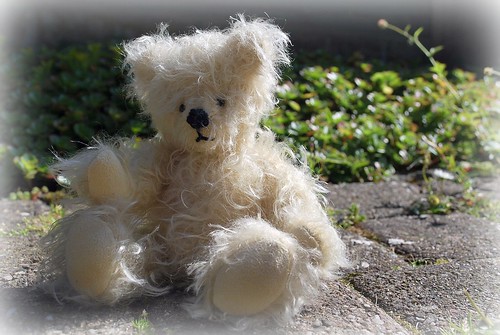
While at home I spotted Henry - Henry is a bear that I'd made for my Mum about 10 years ago now. Got me to thinking about a future potential project - little bears made out of cutesy print fabrics. Let's see if that ever comes to fruition! (Too many ideas, and crafty plans, not enough hours in a day to execute!)
Happy Sunday,
Sam
xxx
Sunday, July 17, 2011
Sunday, June 12, 2011
Estes Wool Market
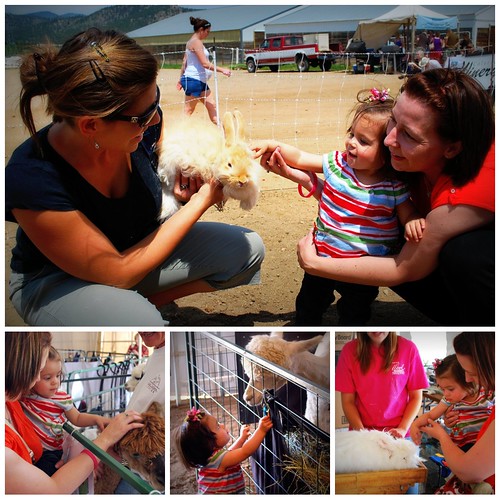
This weekend is Estes Wool Market in Colorado. Joe, Naomi and I headed up there to check it out. Not that I need any more yarn. Ever. But I figured it would be fun for Naomi to see the animals - she loves animals! (Are you buying that excuse? ;o)
As you can see, she had a great time! There were alpacas, sheep, goats and super soft angora bunny rabbits.
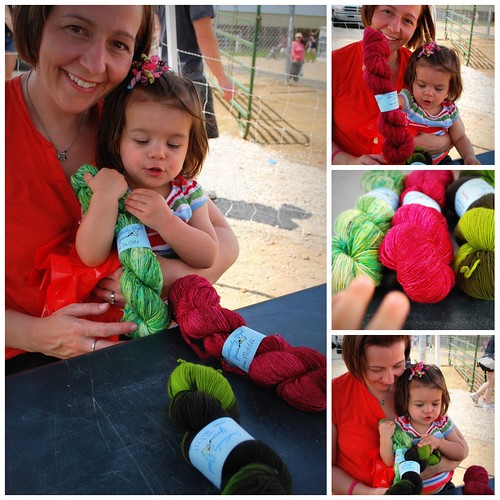
Oh, and maybe I did find a little yarn ;o) Naomi seemed pretty fond of it too! (This was a great company I hadn't heard of before - Creatively Dyed yarns out of south carolina. I was tempted by soooo very many of her colourways. Check it out!)
Hope you are having a great weekend too.
Sam
xxx
Saturday, May 28, 2011
My First Quilt
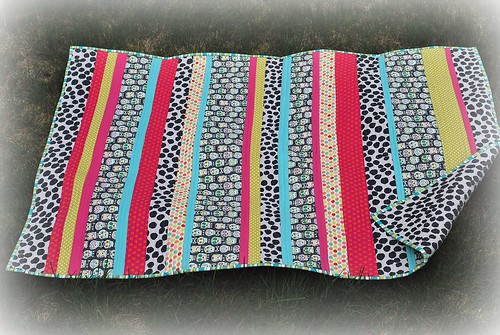
I did it! I made my first quilt. It's going to be a playmat for my new nephew/niece who is expected to make his/her debut sometime in August, and goes with this diaper bag that I'd made a few weeks ago for my sis.
I wanted something simple to start out with, and saw a great strip quilt that my friend Stacey had made. So I did a mini web search and found this great tutorial for how to put a strip quilt together. I followed these steps to piece together the top, and then referred to the Better Homes and Gardens Complete Guide to Quilting (thanks for this gift Mum :) to figure out how to assemble, quilt and bind.
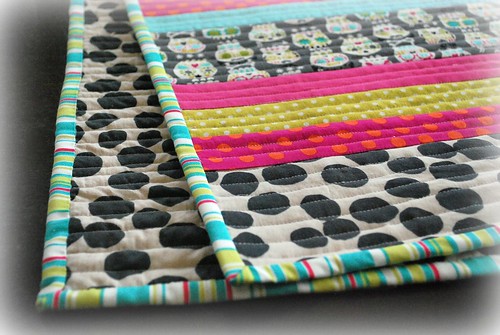
I chose a simple channel stitch for the quilting, after seeing this gorgeous inspiration piece. I love how it echoes the stripes in the quilt. The binding is double fold that is machine stitched to the front and then hand stitched using a ladder stitch to the back.
I'm hooked! I have my fabric for my next quilt. And am eager to try my hand at doodle quilting. I fear the knitting may be neglected for a little while!
Saturday, May 21, 2011
Camp Wanna Knit Knit
Last weekend was the local knitty girls annual trip up to the mountains. We tuck ourselves away in a lovely home, enjoy each other's company and get some good quality time on our projects.
This year I spent time on my Snowbird. It's a lovely pattern and the cardigan is progressing nicely. Hmm should have taken some pictures to share... maybe for a future post.
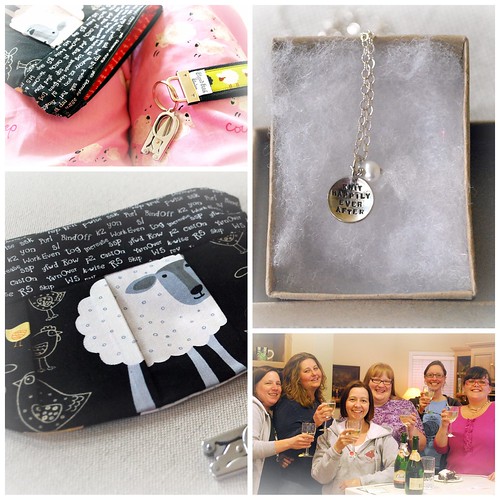
I also spent time working on these cute little purses:
Oddly enough, last year I had plans to do something similar for the goody bags using the sheep fabric you see here. I really don't know what I was thinking though (I blame the sleep-deprived baby brain) because at the time I didn't own a machine, or posess the skills! I guess it just seemed like it would be a fun idea... if I could have pulled it off. But this year all came together - our great teacher Stacey showed us the way, I had the lovely stash of fabric and zippers, and Joe has been 'best husband ever' (as always!) and bought me a lovely sewing machine for my birthday! :)
And what camp wouldn't be complete without awesome goodies:
This year Stacey and her Mom really spoiled us with the goodies - a beautiful 'knit happily ever after' necklace, sheepy pjs, a knitting theme notions purse and a lanyard with fold away scissors. Thank you ladies! And thanks also for cooking for us all weekend. I felt truly pampered!
Saturday, May 07, 2011
What do you do when you can't sleep?
Last night I was exhausted,but for some reason could not sleep. This doesn't happen to me often. In fact Joe jokes that I'm normally fast asleep by the time my head hits the pillow. But last night, whooo, I have no idea what was going on.
After laying there for a quite while I decided to just get up and make the most of this quiet time alone to do some crafting! I needed to make some thank you cards anyway, so it was a good way to feel productive and creative. And by the time I was done, I was feeling quite sleepy and was able to get a good few hours nap before my furry friends came in to bid me good morning.
Aside from loving the outcome, I also loved that I was able to use up some odds and ends of paper - the bits that are left from other projects, but I can't bear to throw away because that would feel wasteful. So armed with my cupcake paper punch and a box full of papery bits (and Bruno dog, under my armpit, observing every move) I created these cute little cupcakes. I used pastels to add some shading and some mini beads to add 'sprinkles'. What do you think? Not bad for a bleary eyed effort, if I say so myself! :)
Saturday, April 30, 2011
Baby Olive
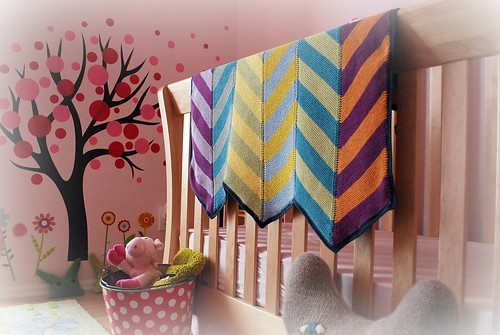
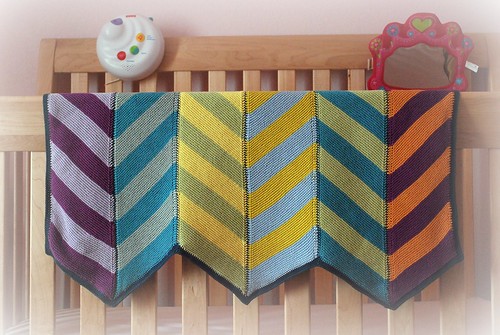
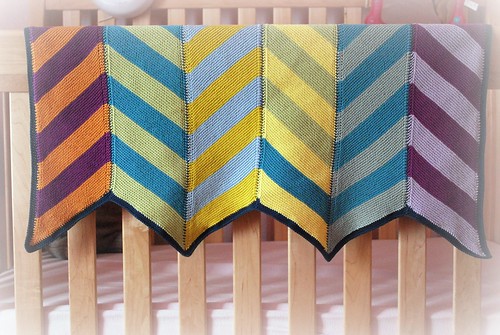
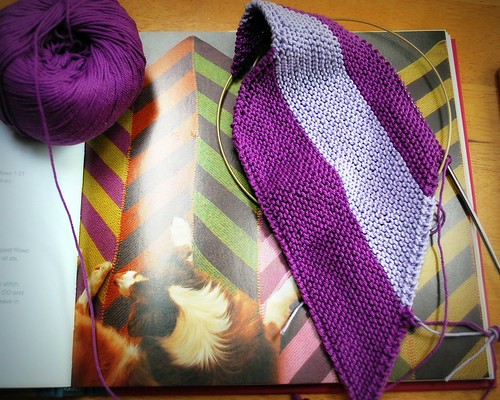
What a fun afghan! I was looking to make a baby blanket and wanted something a little different from the norm. I was flicking through Larissa Brown's 'Knitalong' book (love this book - made quite a few projects from it) when I came across 'Olive's Afghan'. The interesting zig zag lines and simple garter stitch called to me.
I had quite a lot of the Rowan 4-ply left in my stash from another baby blanket, and since it has held up really well to numerous cycles in the washing machine I decided it would be perfect for this project. So instead of the yarn and needle called for in the pattern, I used the Rowan 4-ply and a US 3 needle. I didn't make any changes to the number of stitches that the pattern recommends you cast on for each panel, but did only knit 12 stripes per panel. This seemed to be a good size for a baby blanket - it is about the width of a standard crib/cot.
I found that I only needed 6 panels to make the baby blanket (which was a good thing as, although I love the Rowan 4-ply cotton, I find it unforgiving on my hands - after a good stint of knitting I feel like I have achey claws instead of young, supple hands! Aah the scarifices ha ha!)
To finish, I placed right sides of the panels together and joined them using whip stitch in a nice contrasting steel blue colour. I chose the whip stitch because I wanted it to be a little visible, but not overly dominant (as a crochet join might be). And then of course added a crochet border in the steel blue (I seem to have this thing for adding crochet borders to all my blankets these days!) It is about 5 rounds of double crochet. At each point I'd dc 3 stitches into 1 hole, and at each trough I joined 3 stitches into 1. (I'm sure there's a correct way of describing this, but I'm not familiar with the crochet lingo!)
And that's about it. Oh it does have a 'design feature' - I ran out of the pale green yarn on the very last stripe in one of the panels, and ended up using one of the other colours from the blanket. I think it works out ok. In fact if it hadn't been one of the last panels I knit, I would have considered purposely adding an 'odd' stripe into each of the panels for a fun touch.
I'm pleased with how this turned out. But perhaps the biggest fan of the project is our big boy Bruno who would actively seek out this project and then take it on tours of the house, garage and dog run, leaving a Hansel and Gretal style trail of yarn everywhere! Yep, the end result had a good spin in the washing machine before being gifted!
Sunday, April 10, 2011
Birdie Sling with a Kanzashi Flower
I have some good friends. Big thanks to Stacey and Genia for hauling round multiple sewing machines, and their patience, yesterday. They kindly showed Terrie and I how to make the gorgeous Birdie Sling bag. It was a fun day. And we had fabulous finished projects at the end of it.
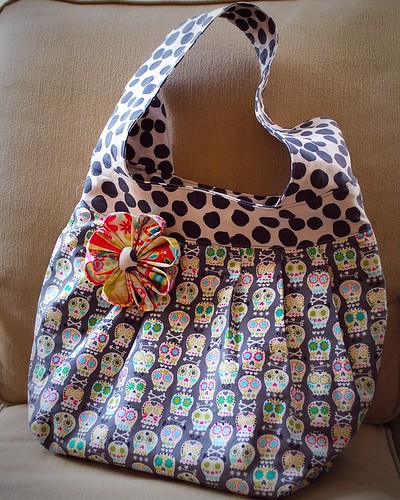
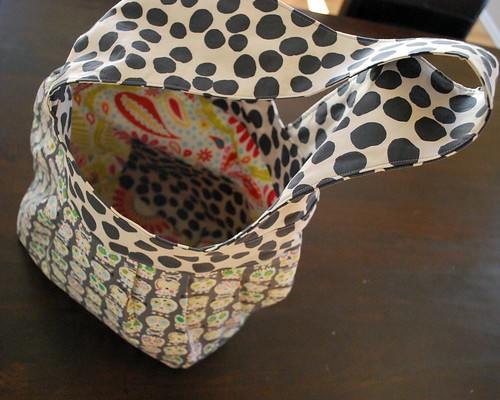
The bag I made is for my sis - a diaper bag for when her new baby comes along. She loves this skully pattern and the random polka dots seemed to be a fun touch. I absolutely loved the bright fabric on the inside.
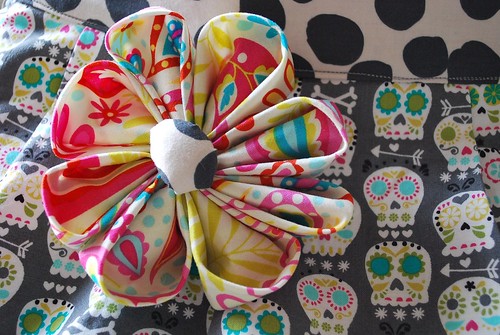
I decided it needed a splash of that bright colour on the outside and so made this Kanzashi flower from my scraps using the online tutorial here.
Super happy with the outcome. Can't wait to start the matching baby quilt. Oh yes, and I finished those Easter cards and got them out in the mail last week. These were a nice quick and easy project. And a little pic for family members that don't get to see Naomi very often.
Hope you've had a good weekend,
Sam xxx
Sunday, April 03, 2011
Hello... I haven't disappeared
A whole month since the last post? Where does the time go?
Happy Mothering Sunday to all Mums in the UK! Most especially mine :)
Since the US and UK celebrate mother's day on different dates I find it is easy for me to miss the UK one (which is alwways before the US). This year though, I was ahead of the game and was proud of myself for getting a little something in the mail in plenty of time. Except wouldn't you know it, it didn't arrive! Harrumph! So, sorry Mum if this ruins the surprise. And hopefully the goodies arrive in the next couple of days.
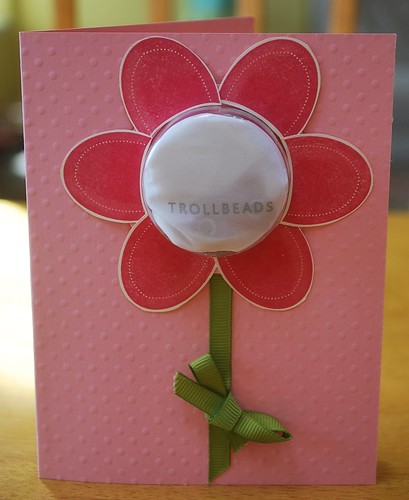
I put this card together and used a little plastic cup in the center of the flower to hide a package of troll beads. How cute is that!
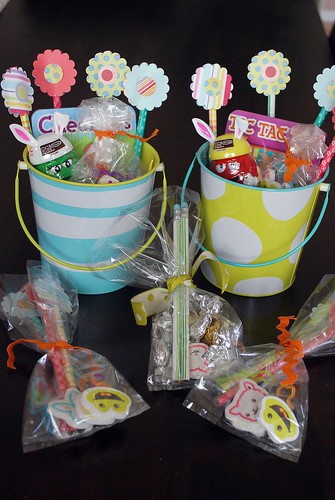
I've also been putting some Easter packages together. The little flowers are simply pencils (for the stalks) with the heads made by using a flower shaped paper punch and some patterned paper - simply cut 2 flower heads, stick the sides together using double sided sticky tape and slip on the top of the pencil.
Ooh yes, I've also started getting the photos ready for this year's Easter card. Need to finish the cards today and get in the mail tomorrow.
And felt it was only right that Bruno get a turn! (Bella, quite rightly, was having none of it).
And of course there has been some knitting. I have been making slow progress on the baby olive blanket - my priority one project. 3 panels done. 5 to go. I need to step up the pace on this one to have this completed in May. Loving the last strip with the blue and green colour combo.
Next project which I am super excited to start is a baby quilt and matching diaper/nappy bag for my sister who is expecting a baby in August. That's right, I'm going to try my hand at sewing again. I had soo much fun at the fabric store with Stacey and Terrie picking fabric out. And now am itching to get started! Roll on next weekend :)
Wishing you all a Happy Mothering Sunday,
Sam
Friday, March 04, 2011
Birthday Girl
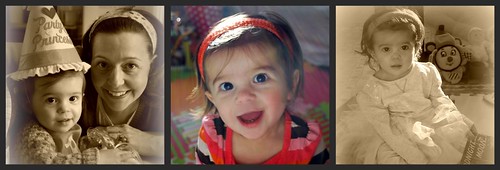
My little girl recently turned 1. That's right, where did the time go?
Aside from the whole cutting teeth thing, she had a lovely day (I think the pediatrician threw down the gauntlet at our 9mth appointment when she seemed surprised that Naomi had 0 teeth at that point... so we now have a grand total of 10! I'm thinking that's quite the mouthful in a few short months.) It's amazing when you think about how much these wee ones develop in such a short amount of time.
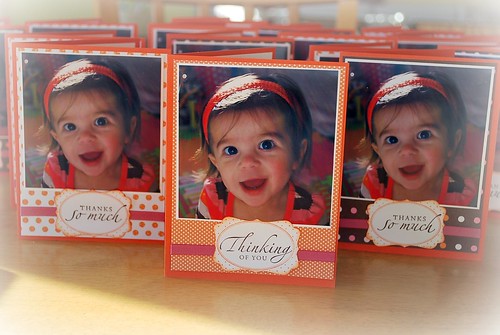
On a crafty note, I churned out a pile of thank you cards as baby girl made out like a bandit!
I'm learning that my dear girly is much healthier than her Mum, preferring some yummy grapes or slices of bananas over cakes anyday. (The birthday cake was not the hit I thought it would be!)
Wishing you a great day,
Sam xxx
Sunday, February 20, 2011
Bits and pieces
I've been working on a few smaller projects recently. There's something satisfying about finishing a couple of items that have been hanging around the WIP pile for a good long while.
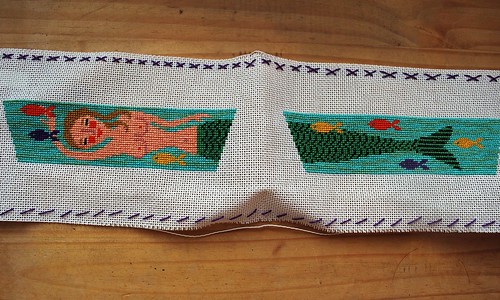
I had been working on some embroidered summer sandals and the needlepoint is now complete. I need to either send these to be finished professionally, or try my hand at it myself. I'm tempted to do the latter... once I figure out how!
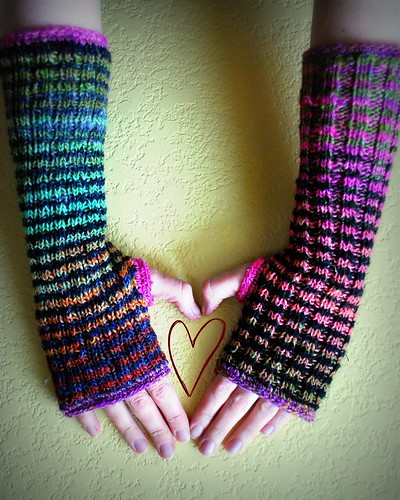
Then some wristwarmers that I started in 2008. (I know, I have no idea why it took me soo long to pick these back up) I couldn't remember how I did the first one, or the needle size I used so they have a 'little miss matched' vibe to them. Which I kind of like! These were knit in 2 colourways of Noro sock yarn, alternating every couple of rows. And because I can't resist adding crochet borders to my projects, I did the same here.
Ooh yes, we have a new puppy - Bruno. He's also been keeping me busy! In addition to his basic training, I'm also trying to train him to be one of my knitwear models! If successful you should see it a bit more of him here.
But my favourite knitwear model is Naomi! Baby girl is going to 1 year old this week! Wild! Anyhoo, her hair is getting really long and she's started pulling her hair clips out. Plus last time I had her fringe cut she looked like Mo from the 3 stooges!
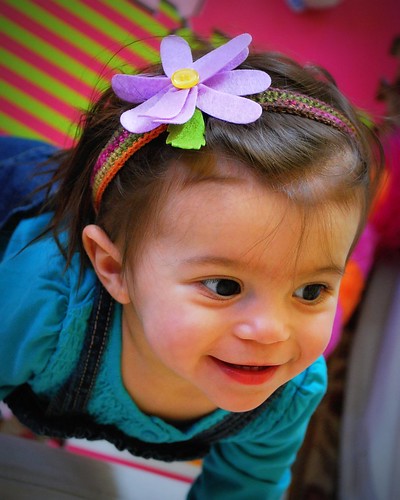
I wanted to try making a hairband to keep her hair out of her eyes. This seems to have done the trick and she kept it on all morning. I simply crocheted a chain with some sock yarn and then measured it around her head. Once the chain was just the right size to go round - not too loose, not too tight - I joined to make a circle and then single crochet around until it was the desired thickness.
It looks cute on its own, but I'd also made some felt flowers last night (from a Martha Stewart kit) and added one of these as a little bit of flair!
And finally I just started another baby blanket - a version of Olive's Afghan from the Knitalong book (except I'm using rowan cotton 4ply instead of the thicker alpaca yarn that's called for). It's for a baby that's due to arrive in May so that gives me a little time to crank this out. And the cotton will be nice for the warmer summer months.
Wishing you a good rest of your weekend,
Sam xxx
Thursday, February 10, 2011
Staggered eyelet shrug
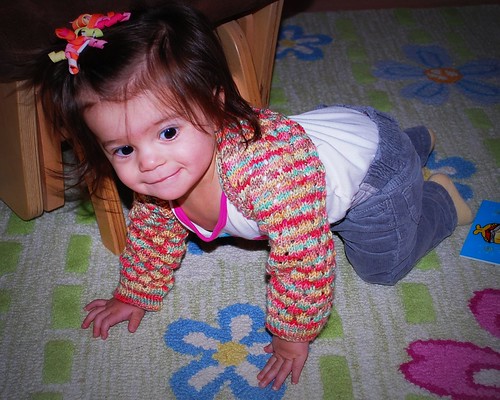
It's been extremely cold here. Temps below freezing. And so I decided to make Naomi a little something to help keep her warm while she's indoors... something that would allow her to move freely and continue exploring. I also wanted something that was straight forward to make and didn't require me to follow a pattern. So a make-it-up-as-I-went-along shrug was just the ticket.
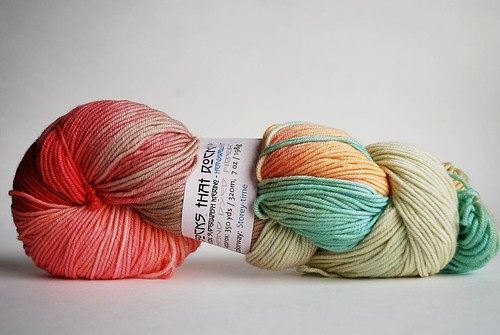
I used Socks that Rock heavyweight sock yarn in Storeytime colorway, and US 6 double pointed needles.
Here's the approach I used to make this shrug for a 12mth size:
Cuff:
- Cast on 39 stitches and divide evenly over 3 needles
- Join to work in the round, and k1, p1 rib for 8 rounds (approx 1 inch). Note that because there is an odd number of stitches, your round will start on a knit stitch and end on a knit stitch
Sleeve 1:
- Decide on the pattern that you want for the shrug. You could simply do stocking stitch for example. I chose to add a little interest by adding staggered eyelets as follows:
- Round 1 and 2: Knit every stitch
- Round 3: (K2, K2tog, Yarn over)* repeat to last 3 stitches, K3
- Rounds 4, 5 and 6: Knit every stitch
- Round 7: (K2 tog, yarn over, K2)* repeat to last 3 stitches K2tog, yarn over, K1
- Round 8: Knit every stitch
- Continue with rounds 1 through 8 until sleeve is desired length (I measured against one of her other cardigan sleeves. I also write down every row so that when I work the 2nd sleeve I can make sure they'll be exactly the same length)
Back:
- Instead of working in the round, now you want to work back and forth as if you were knitting a scarf
- Implication for the eyelet pattern is that for rows 2, 4 and 6 you will need to purl every stitch
- Continue in pattern until back is desired size
Sleeve 2:
- Return to knitting in the round, as described in sleeve 1
- And finish with 8 rows of K1, P1 rib
- Cast off off in rib pattern
Edging:
- I picked up stitches around the opening for the back (picking up 2 stitches for every 3 rows worked) and worked 8 rows in K1, P1 rib.
- Cast off in rib pattern
- Weave in ends
And that my friends is it!
It has turned out to be super practical - great for when she's busily active, but also perfect at night if it's a little chillier (since all her sleep sacks are without arms and the t-shirt material pjs don't seem sufficient in my mind.)
Hope you are keeping warm.
Sam
Sunday, January 30, 2011
Valentines Cards
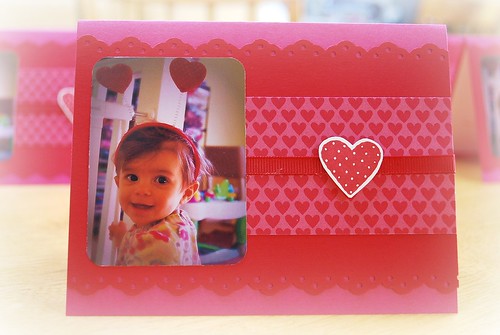
This weekend I whipped out a batch of Valentines cards for my family back home. I figure it's a nice way to send a recent photo of Naomi, as well as my love. (And who doesn't like to get something nice in the mail every now and then?)
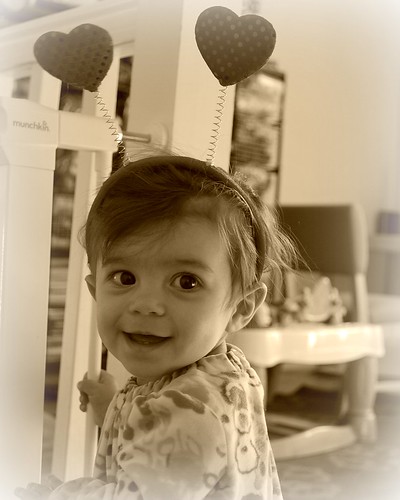
As usual, my supplies are from "stampin up" - card stock, heart patterned paper, heart stamp, ribbon, frilly border punch. I think they turned out nice, although if I were to re-do I would have done these portrait, not landscape, so that I could make the picture of Naomi larger. And maybe use the sepia version of the picture instead of full colour. Hindsight is 20/20 as they say.
(FYI, I use Picnik to work on my photos - it's a great, free, web tool that enables you to make various edits to your photos. I've also been using it to put a 'brag book' together for my Mum, using some of the collage style layouts they have available. Hmm, thinking of which, maybe I should share some of this in a future blog post?).
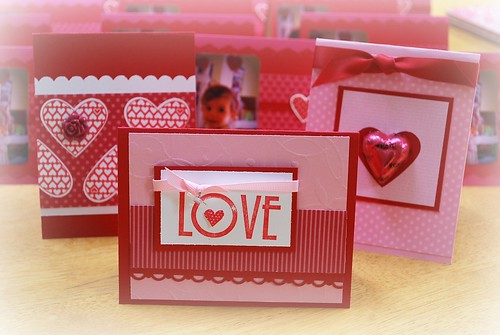
In addition to the Naomi Valentines, I normally get together with a couple of girlfriends each month to stamp. Here are the cards that were produced this month. (Sadly I wasn't there this time as Naomi had the bug-du-jour from daycare, but my girlies made these cards for me :) I especially like the one that uses a chocolate heart as decoration.
I can hardly believe that Valentines day is just around the corner. This means my baby girl will be turning one very soon. And might not be considered a baby for much longer and she tries and tries to stand and walk... that's right my baby girl is becoming a toddler.
Wishing you a happy rest of your weekend,
Sam
Wednesday, January 26, 2011
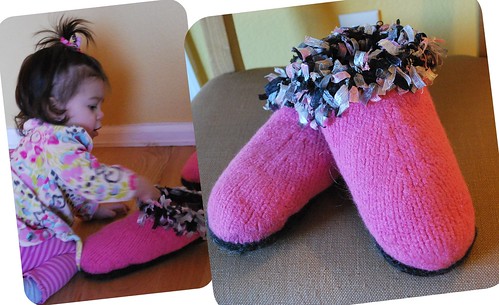
This year's annual batch of felted slippers
These felted slippers probably aren't the prettiest things, but they are soo warm and comfy that they have become a must-own item for most of my family. And since they are loved soo much, they pretty much get worn out each year. This is a good thing in my mind... much prefer that my hand knits be well loved and consequently well worn vs sitting unused/rarely used in a closet or wardrobe.
So this year I've churned out another batch:
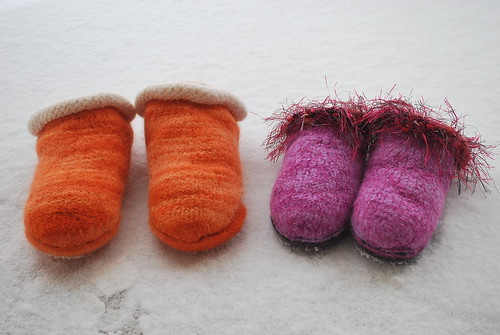
First request was from my brother for some in our local football teams colours - the Tangerine Army. And I'd heard that his wife needed an updated pair too.
My Mum is probably the #1 fan of these slippers so I made another pair for her:
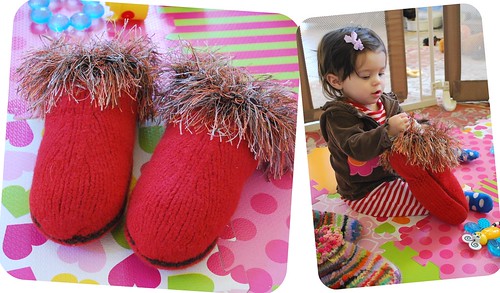
(I think Naomi is inspecting the workmanship of these since they are for Grandma!)
Joe is a huge fan too. To the degree that he gets a little disappointed when he has to throw an old pair away. So he's been looking into ways to make them last a little longer by putting a protective coat on the bottom (similar to that used on the underside of some non slip rugs). I'll let you know how that pans out...
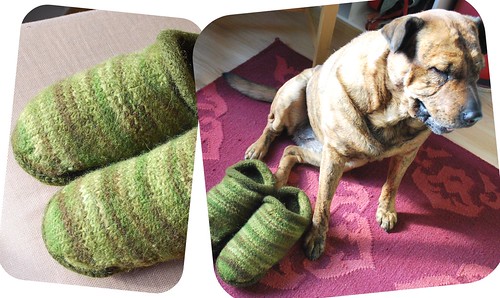
(Love Bella to bits, but she's nowhere near as cooperative a model as Buster used to be)
And one of my good friends had a birthday and I know she likes these.
Finally I also like to have a new pair each year. I normally use scraps of yarn for my version and used up a bunch of leftover tapestry/needlepoint yarns again this year:
Our newest family member has taken quite a liking to these. But given his fondness of chewing, this is the first and last time he'll be allowed to be this close to them :o)))
Besides he's found a much comfier place to lay down and rest - right on top of poor Bella!
Tuesday, January 04, 2011
More holiday handmade
The rest of the photos are now downloaded and I'll start with the good news about the scarves - everything came out in the wash! I was over the moon happy and the scarves went off to the ladies at daycare today. Yay! (Better late than never I say ;) I used a little ribbon on the packaging and these super cute sheepy gift tags that Terrie had made (she made bundles of these for all our knitty girls this summer and gifted them to us at knit camp). I think this was the icing on the cake, thanks Terrie :)
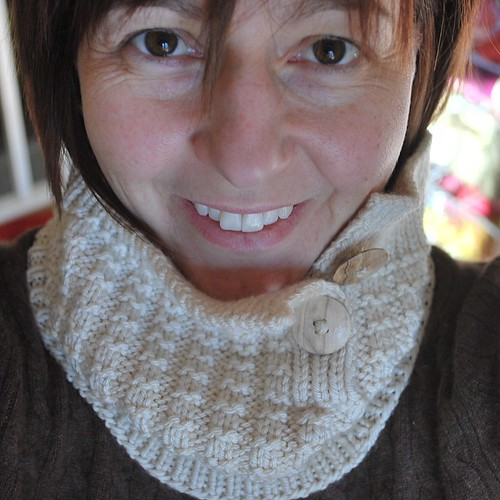
First Thermis - I've been wanting to make this one for a while, and it is a great gift knit as it is fairly quick to whip out. Think I might be making one for myself to keep warm now that the cooler weather has come by. I used RYC Cashsoft Aran, and made no mods to the pattern. It turned out nice - not too flopsy, but still retaining the softness of the yarn despite the density of the knitted fabric.
(Oooh nice crows feet, and don't even ask about the hair ;o)))
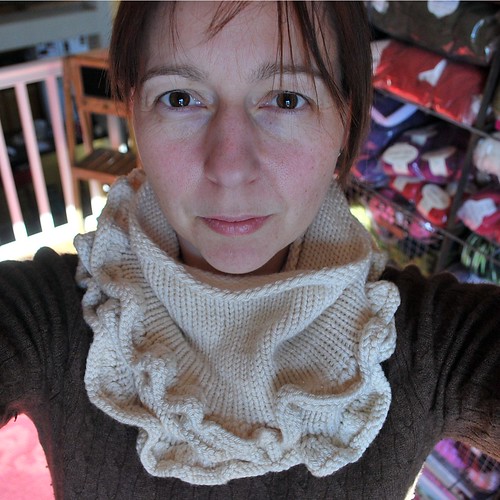
And second is the ruffle scarf, a fave of mine - I think this might be the 4th version of this that I've made now. Another great knit that's pretty quick if you are looking for a last minute gift or relatively instant knitty gratification. Again, used the RYC Cashsoft Aran.
(OK, maybe smiling is more flattering, despite the crows feet!)
In addition to the scarves, I've also put together some thank you cards for all the lovely gifties Joe, Naomi and I were lucky to receive this year. These were fun to make, and I'm pleased with how they turned out. If you are a stampin up stamper: Colours are tangerine tango and baja breeze, and I added some chalk to the petals and leaves to add some shading, and a little glitter spritz on the petals.
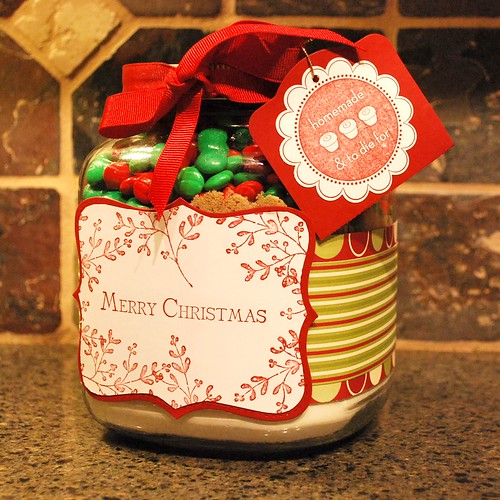
On the topic of stamping goodies, check out the gorgeous hand stamped gift from my friend Cheryl -- it's a big ole batch of the most decadent chocolate cookies that I've ever tasted. What an awesome idea - she wrapped the jar with pretty Christmas paper, handstamped the labels and added her secret recipe on the inside of the tag. Love this super thoughtful gift!
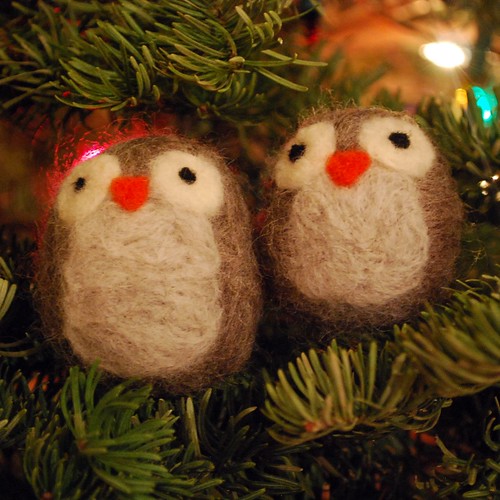
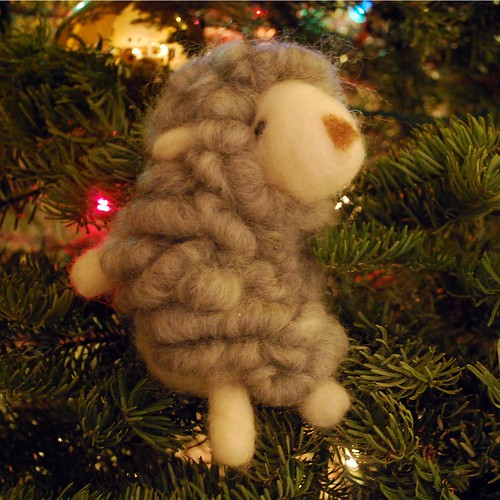
And last but not least I'll leave you with the felted animals that the super talented Jessica made. Note that this is her first 'attempt' at needle felting - yes, she truly is a natural at everything she tries her hand at.
Hope you also enjoyed some handmade lovelies, and crafting, over the holidays.
Love,
Sam xxx
Subscribe to:
Posts (Atom)