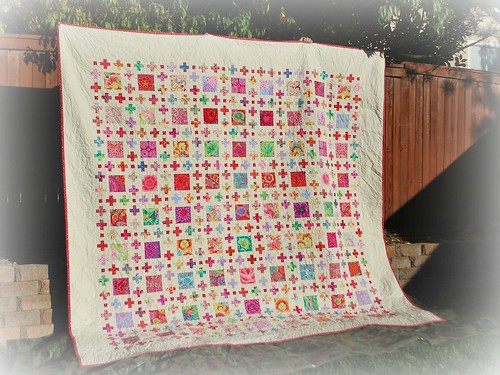
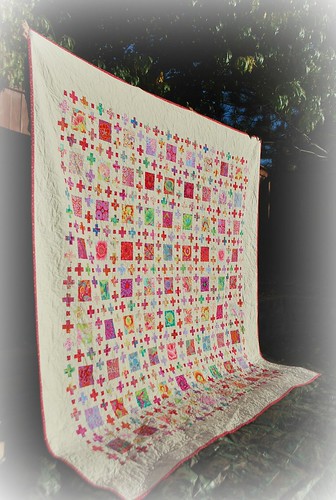
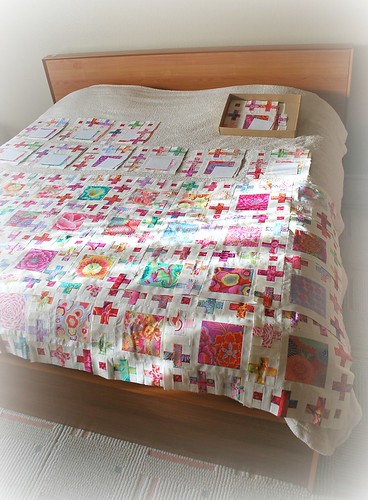
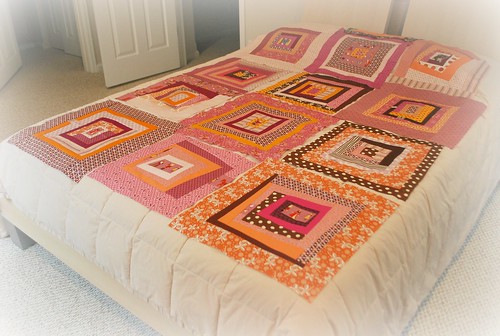
Well, here it is folks... one year in the making and the King Size Curio Quilt is finally finished :)
Mum and I started this one year ago - Mum had asked if I would make her a quilt to match her new bedroom (my brother had kindly redecorated for her). Sure, I said. I was a brand new quilter, full of optimism and false confidence. I'd happily make you a quilt, Mum. So after much Pinterest searching we agreed on the
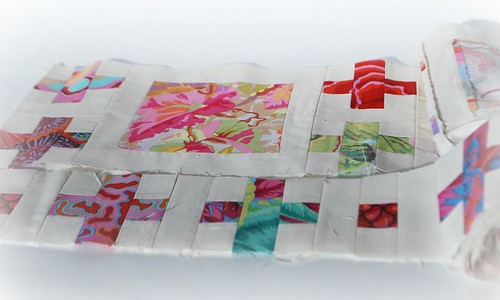
Curio Quilt from Fat Quarterly Issue 7, and went shopping for a variety of Kaffe Fassett fabrics.
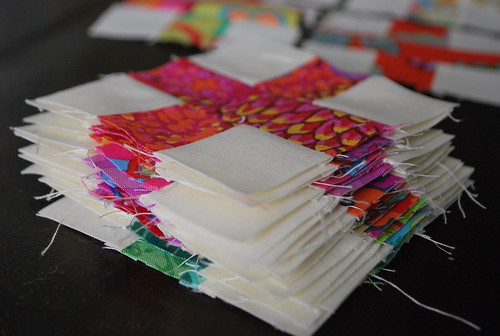
That first year, while Mum was visiting from the UK, she would spend her days fussy cutting the big flower squares and cutting the fabric strips for the little plus signs. I'd come home after work and help with the cutting as well as start the sewing while Mum would iron open all those teeny tiny seams.
I've read differing arguments for sewing seams open vs to one side. In hindsight, ironing to the dark side would have been much quicker, and stronger. But those little open seams did look so very neat.
This quilt would have taken much longer if it wasn't for all the help that Mum provided - I'm trying to talk Joe into being my ironing helper now Mum has gone, but he is having none of it! By the end of her visit last year we had the big squares completed and a good portion of the plus signs.

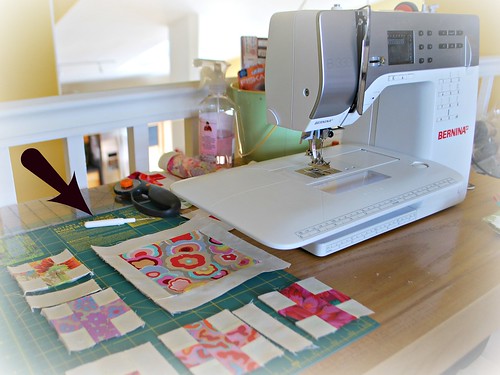
Over the course of the next few months I would slowly plug away at finishing the plus signs and then the little one inch 'fish scale' squares. It was quite the task. I was soo excited when they were all complete.

It felt like a major achievement. The next job was to sew it all together. I sewed the first row, then the second, only to find that rows 1 and 2 did not align well. Harrumph. I put it on one side for a bit...
With renewed enthusiasm I decided that instead of sewing the big long strips together that I would put together in blocks. This way I could match up the rows and columns as I went along. This worked well for me.
I set myself a goal of trying to complete for Christmas... erm, there was no way.
Then Mum's 60th in April, yup that wasn't happening either.
But for sure it WAS going to be finished during my Mum's trip this year.
And sure enough it WAS :)
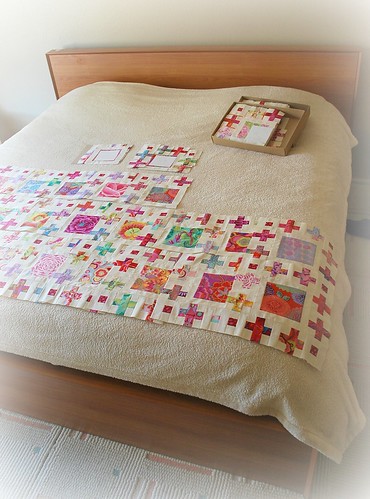
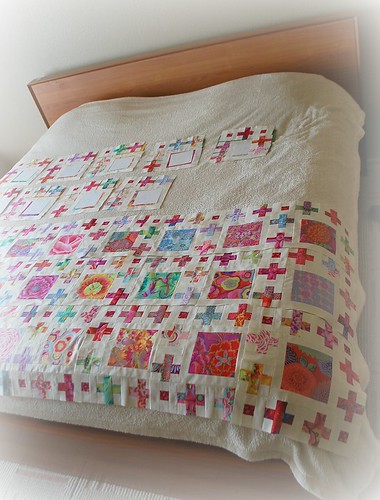
It's on it's way back to the UK as I type. Mum has been here for the last 2 months, and over the course of that time we slowly put together the pieced blocks, and then sewed it all together.

Again, I cannot tell you how mush faster this process goes with someone doing the ironing :) I almost couldn't believe it when the quilt top was completely pieced together given how long we had been working on it. Next up we added a border so that the quilt was the desired size for Mum's bed back home. Picked out some backing and added that.

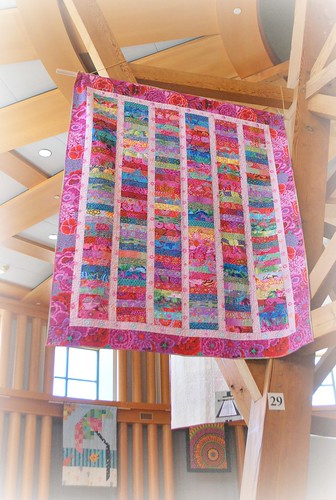
One of the kind ladies -
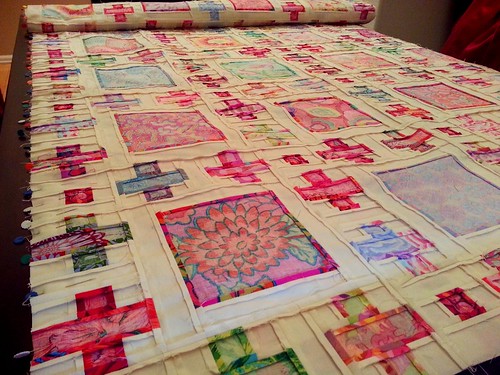
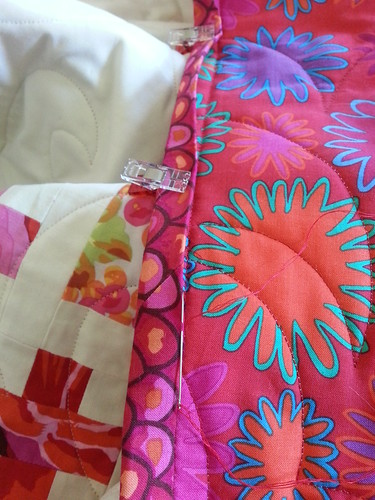
Amy Wade - at Quilt Guild offered to quilt it for us so that Mum could take it back with her (beautiful work with a super fast turnaround, thank you Amy). Here is a great 'in progress' shots that she shared:
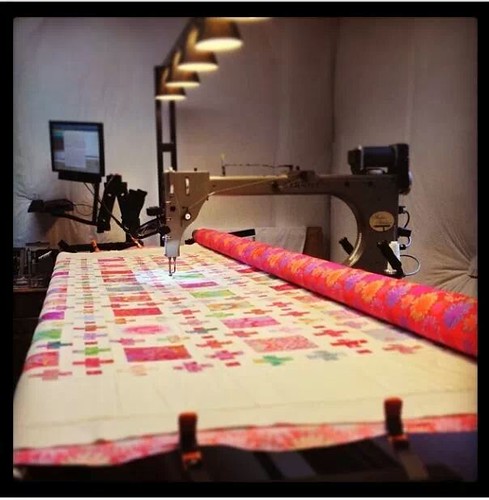
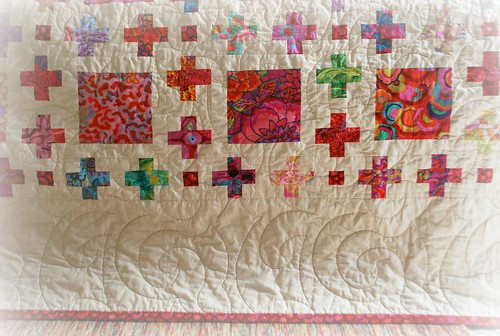
She had recommended a big swirly stich which has a very nice modern feel to it, and helps soften out all the corners on the squares and plus signs.
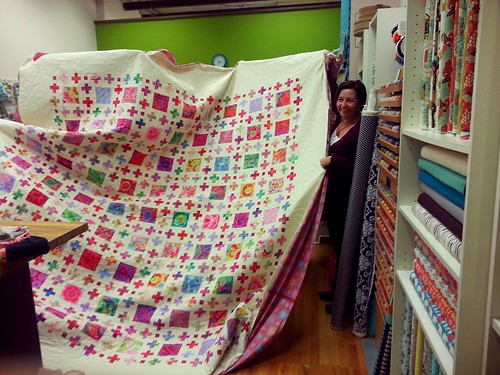
We got to show off the quilted piece at quilt guild.
All that was left now was to trim up and add the binding. I like to machine stitch the binding to the top, and then hand sew the back. Quite the job on a quilt that measures 112x112 inches!

Mum actually did the majority of the hand sewing of the binding. Thanks Mum! Final touch was a turn in the washing machine, when all those lovely crinkles start to appear as a result of a little shrinkage - I just love those crinkles. And now it is done.

Amy had actually sent me this on Pinterest, and yes I do feel a little bit this way :)
I cannot tell you how happy Mum and I are with the finished quilt. It is truly beautiful and I feel soo proud to have been able to make this. It is my 3rd actual quilt (first one baby size strip quilt, 2nd one a simple design for Naomi's bed... so this was quite the leap in both size and difficulty). But what's probably the very best thing is that it was such a great experience to work on this together with Mum. xxx Sam
.jpg)
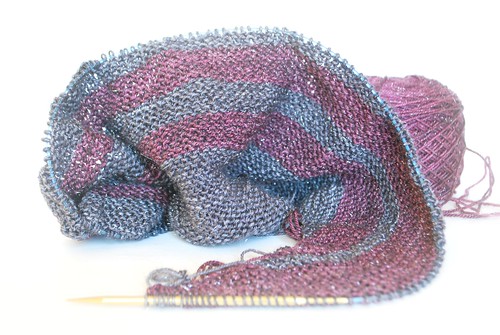


This is the Pendulum scarf from Amy Miller. It uses short rows to create these thick to thin stripes that swing from side to side.
The yarn is Anzula yarns Nebula in a charcoal and deep plum colour, each with sparkle throughout. :)
More to follow on this beauty...
Enjoy the weekend!
Sam xxx