Thursday, February 27, 2014

Monster Bags

Naomi turned 4 this last week.  4! 
I'm still wondering how that happened so quickly?

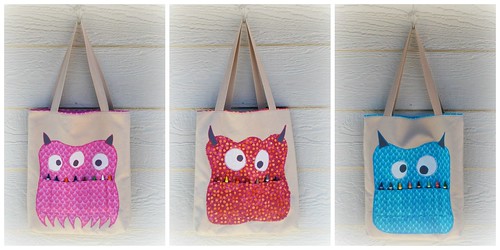
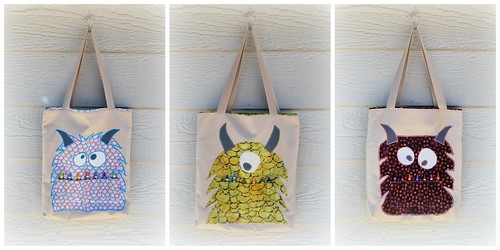
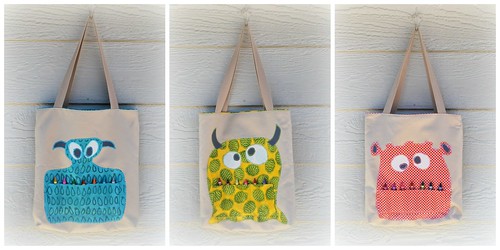
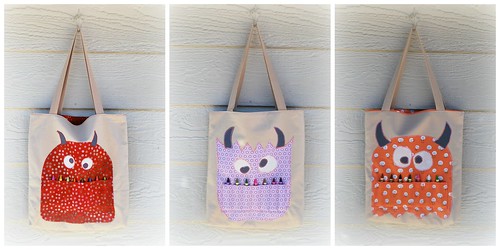
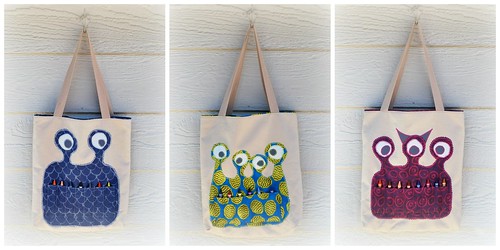
Anyway, her birthday provided me the perfect excuse to work on party gifts - monster bags:

Monster bags
Monster bags
Monster bags
Monster bags
Monster bags

These were so much fun to work on.  Perhaps my most enjoyable project to date.

Inspiration came from the following places:

I essentially followed the directions for the simple reversible tote, making the following small changes:
  • I added a monster applique to the exterior fabric before assembling the tote
  • I added interfacing to the exterior fabric to add some stability
  • I purchased some soft canvas style ribbon instead of making handles

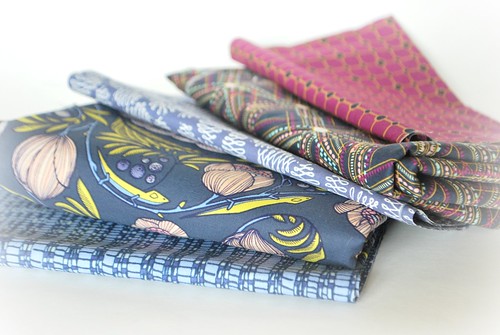
I started by selecting fabrics that looked 'monstery' :)))
My favourites are probably the batiks. But in truth I love them all. 
These patterned fabrics were used for the monster, but also a matching interior for each tote. 
The exterior fabric was a Kona beige that I had in my stash (that's right - this one was a good stashbuster!). 

I wanted each monster to be different and enjoyed coming up with each design.  Naomi and Joe both got involved on the design process too:  What about fuzzy monsters?  What about monsters with eyes on antennas?  How about some with 1 eye and others with 2 or 3? 

I'd also have Naomi help with layout before sewing the applique pieces in place:  Where should the eyes go?  Should we have horns?  Where should they go? 

And of course Naomi would add the crayons once all the other assembing had been done.
I think it made this extra special knowing that they were truly a team effort!
As each one was complete I'd hang them around my craft room.  I sure do miss those cheery faces greeting me each morning.  But am thrilled that they've gone to happy homes!

Naomi's favourite is the monster in the bottom right - purple with 3 eyes on stalks.
Do you have a fave?

Hope your week is going well?
Love,
Sam

Sunday, February 02, 2014

Happy February!

So, how did you all do with your first month of resolutions?

I was so so: 
Some areas where I can give myself a pat on the back (health related)
Others where I wag a stern finger at myself (crafty output to exceed intake).

Here's the rundown on the output must exceed intake... or my failure to do this in January :)))

Yarn:
Berties Blanket
  • But, there have been a couple of purchases: 
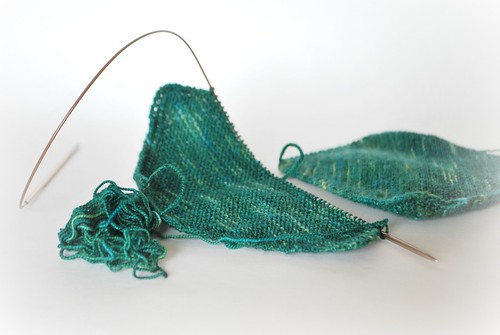
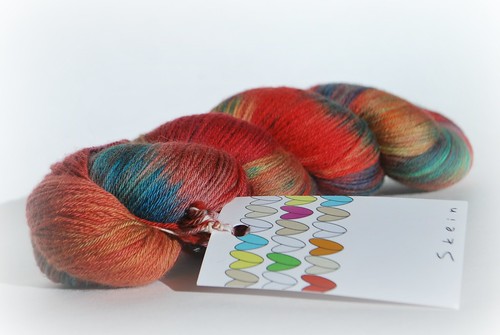
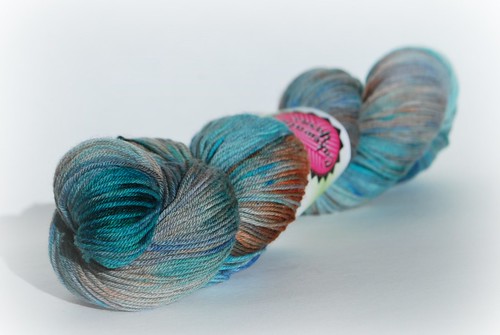
  • Before the holidays I signed up for a monthly sock yarn club from Skein.  In January I received my second installment (and a groovy tote project bag).  I am eager to knit with this, and try out this new-to-me brand of yarn.  In the back of my mind I am thinking I should probably stop with the monthly installments... I'll have a hard time trying to outpace an influx of 400 yards each month. Especially with the deficit I am in right now!
Skein yarns

  • Then there is a skein of cakewalk yarns that I was able to get my hands on.  I was really keen to try this out after seeing these lovely purple socks.  The cakewalk yarns are tough to get your hands on since the lady that started the company no longer dyes... so it's Ravelry destashes, or eBay finds, or the like...
Cakewalk yarns

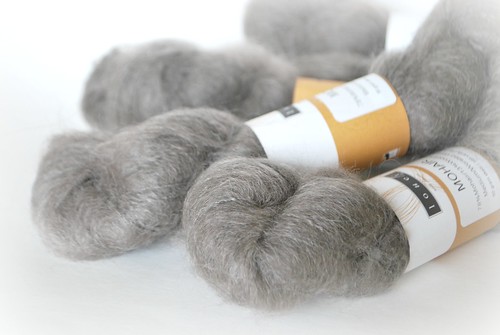
  • And speaking of eBay (I love a good bargain):  I 'won' some of this lovely mohair yarn.

Louet Mohair

No, I don't need it.  This is the one where I really wag a stern finger at myself and shake my head disapprovingly.

Must. Do. Better.
Fabric:
  • I made the lovely Infinity scarf (which Naomi now tells me is hers any time I try to wear it)
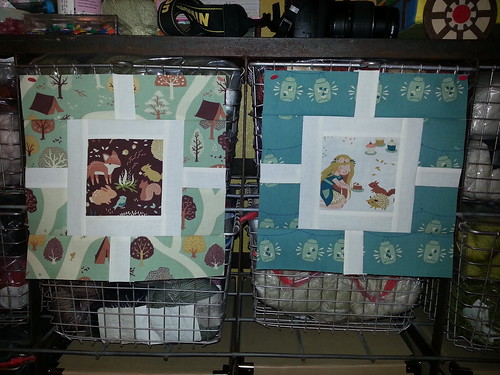
  • And a couple of squares for swaps with gals at the Denver Quilt Guild:  Here are the squares for Jen's Garden Fence quilt using Birch Fabrics
Swap squares for Jen

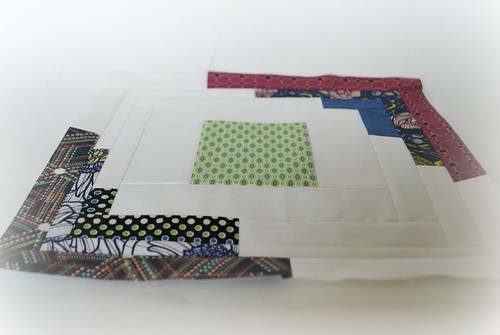
Converging corners

  • I must have messed up on Elizabeth's square because I needed extra fabric... and ended picking up much more than was actually needed:
Art Gallery

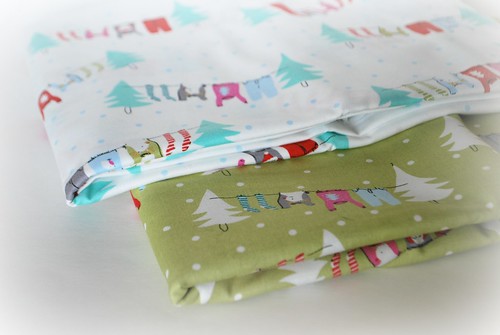
  • And then there was this Christmas fabric that I had to have (I fell in love then I saw the store had made a pillow cade out of it, and it was soooo cute)
Aneela Hooey Christmas Washing Line
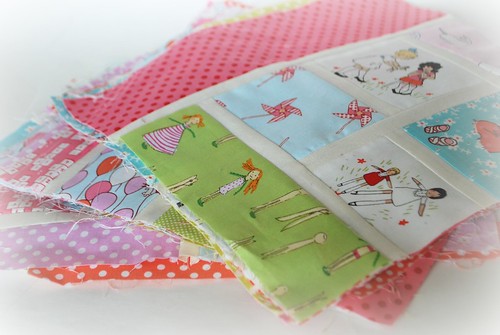
  • The girls at quilt guild have been making stained glass squares for a quilt for Naomi.  That is really close to completion now:

Stained Glass squares

And so I picked up some backing and binding fabric.

Stained Glass Backing
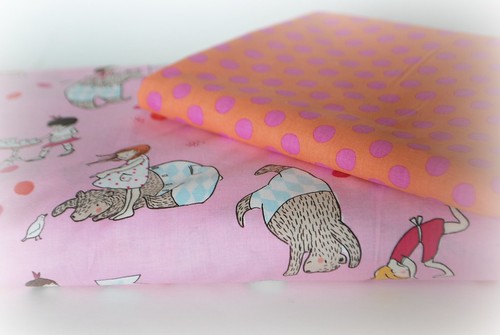
  • Then January is the month of sales, and I can't resist a good deal and so, ahem, here is the last of my fabric confession.   Yikes.
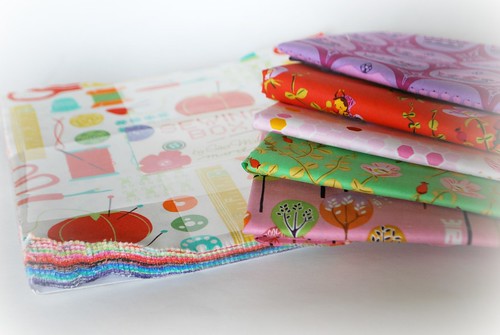
Heather Ross + Sewing Box

Cross Stitch (yes, there's more)
  • The good news is that I finished the 12 days of Christmas (counting this as 12 out)
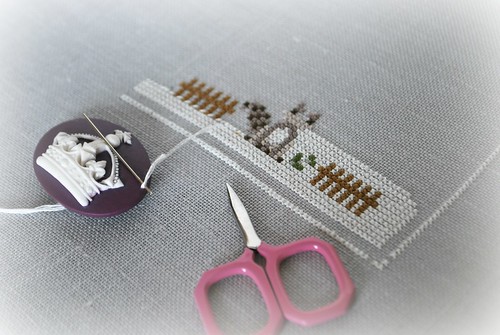
  • But I have 2 stitchalongs that I have subscribed to this year:  Once Upon a Time Sampler (waiting for the cashel crystal to arrive at the local stitching store so that I can start) and Frosty Forest (received the first couple of patterns).  Here's the start of square 1 for the frosty forest - Mr Raccoon by his picket fence!
Frost Forest - Raccoon WIP
  • And I stumbled across these 12 sheep virtues (counting this as 12 in, even though I will stitch them all together on one piece of linen). Seriously, what knitter wouldn't want these stitched and hung in a craft room :)
Erm, so clearly lots of opportunity to improve in February :)

Happy Superbowl Day!  It's going to be a crafting, TV viewing day for me :)

Big hugs,
Sam

Sunday, January 19, 2014

Oversized Pendulum Shawl

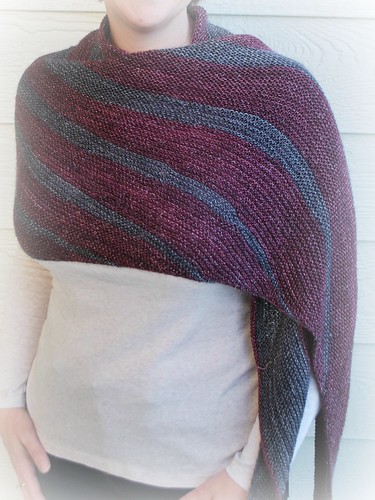
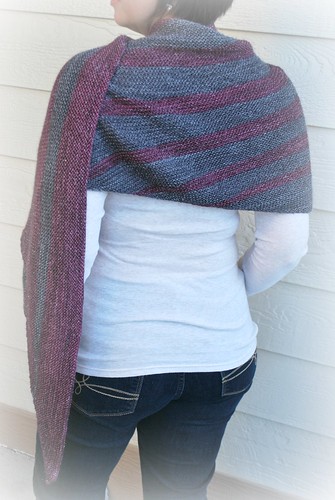
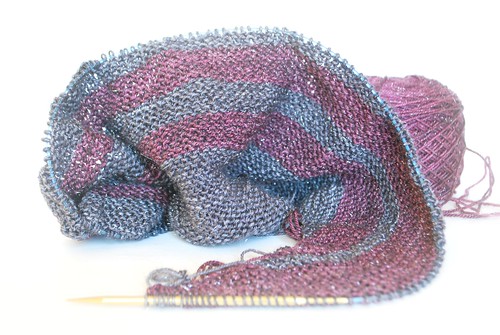
So here it is, the finished pendulum shawl:

Pendulum

Pendulum

Details:
  • Pattern:  Pendulum from Amy Miller
  • Yarn:  Anzula Nebula in Charcoal and Black Cherry (love the sparkle throughout these yarns)
  • Modifications:  The pattern recommends 5 stripes of each colour... I ended up knitting an extra stripe of the contrast colour which took the shawl width from 70" (width that the pattern was written for) to 84".  I like the extra width, and think it will be nice and snuggly on chilly winter days.
  • Tip:  The pattern is written to use M1R and M1L increases.  If I were to do-over I would use a yarn over increase.  I found that the sides of the shawl are quite tight, and would have benfitted from a bit more 'give'.
I used up the majority of both skeins of yarn... there may be enough left for a Bertie's Blanket square but thats about it.  This feels really good as my new year resolution was to use up more yarn than I acquire... this gives me close to 800 yards used.  Although my purchasing habits have been keeping up with this so far ;o)

Ooh and Jody had asked if this was going to be for me.  Yes, yes it is (I say beaming from ear to ear :).  I am extremely happy with how this turned out and enjoyed working on something for myself after a productive pre-Christmas gift knit marathon!  Now hubby is telling me it's his turn; that he has been neglected.  He's silly.  But yes, I see some socks and slippers in his future. 

Hope you are enjoying the long weekend. 
Hugs,
Sam xxx

Friday, January 17, 2014

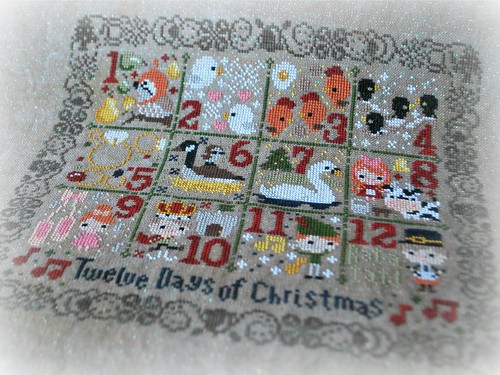
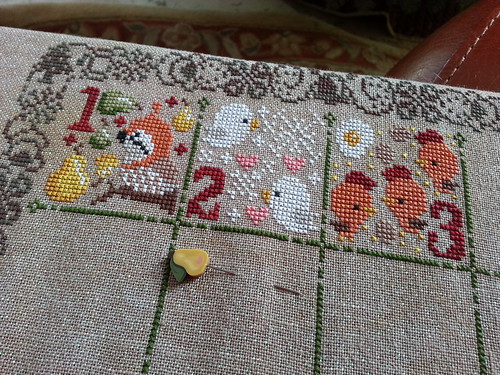
12 Days of Christmas


12 days complete, originally uploaded by samjoepics.
Isn't this pattern a beauty!

I'm delighted with how the 12 Days of Christmas Cross Stitch turned out. Gotta love the gals from the Frosted Pumpkin Stitchery and their super cute designs. I used their recommend fabric (Cashel Crystal in Ale) and the recommended threads (a combination of Weeks Dye Works variegated threads and Cosmo for the solids).

So pleased that I persevered on this one. The plan is to get this framed so that it can be displayed each year at Christmas.

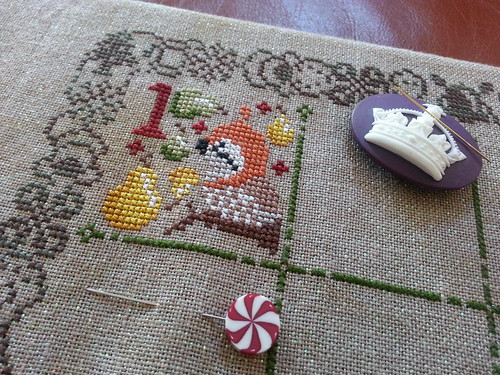
Do you have a favourite square? My absolute favourite is 1: Partridge in a Pear Tree. So very pretty.

OK, back to knitting now... I have a sparkly scarf that is close to completion and calling my name :)

Enjoy the long weekend friends,
Sam xxx

Sunday, January 05, 2014

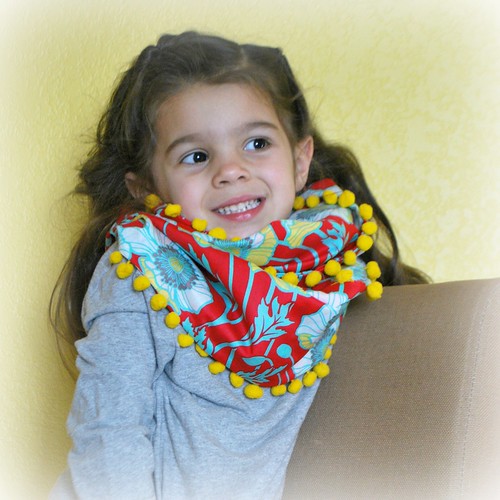
Infinity scarf

So here we are - the 12th day of Christmas, and my 12 days cross stitch is not complete (as hoped).  It is looking beautiful though.
My goal was far too aggressive (read unrealistic), even with a couple of days cooped up at home with a poorly girl, and snowy weather. (Poorly girl much better after a restful few days and much loving attention from her big brother who is visiting this week).

What was needed this afternoon was an instant gratification project to make me feel like I had completed something over the Christmas break:  an infinity scarf.

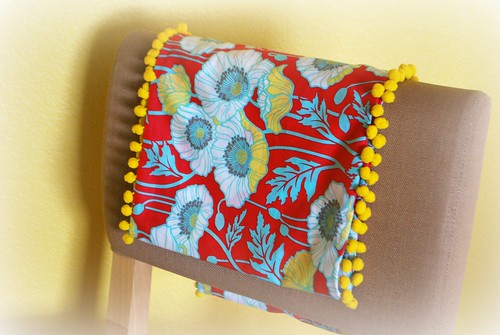
model #1
This version is inspired by some that I had seen at Treelotta - a favourite local fabric store.
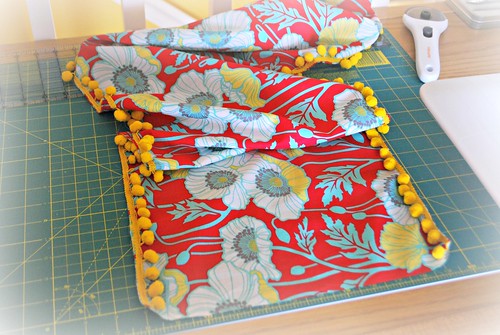
Essentially it is the combination of:
(Aren't they gorgeous!)

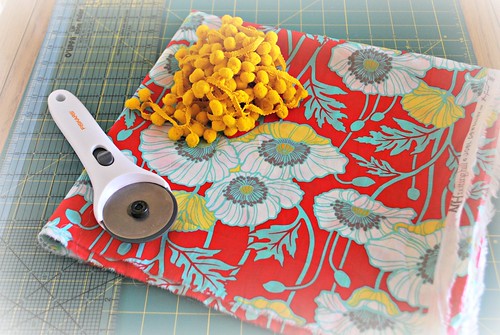
Materials needed:
  • 24inches of a pretty voile fabric (what would have been better still would be 2 complementary fabrics of 12 inches each). Note that the voile was 53" wide - this becomes the circumference of your scarf (I wouldn't go any shorter than this if you want to wear the cowl doubled up).
  • 106 inches (2x width of fabric) pom pom trim
materials needed

General directions:
  • Iron fabric, trim the edges and cut into 2 pieces (you will have 2 pieces that are ~12" x 53")
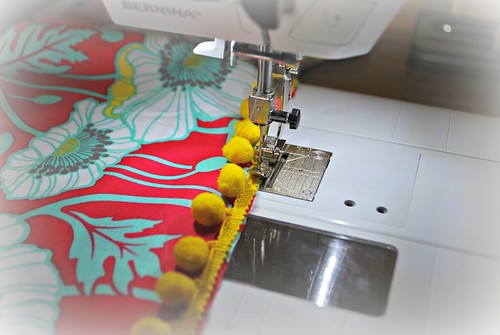
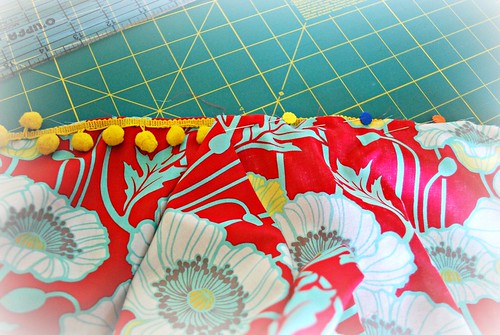
  • Take first piece of fabric and, with right side facing, baste the pom pom trim to the long/53" edges of the scarf (both sides), with pom poms pointing toward center of the fabric
  • basting the pom poms

    pom poms attached
  • Take second piece of fabric and pin to first, with right sides together
  • sewing the 2 pieces together
  • Using a zipper foot to get up to the edges of the pom poms, sew both of the long edges of the scarf together
  • You now have a big ole tube that you need to turn right side out
  • I followed the Cottage Mama's directions for joining the ends together
  • And you are done: Instant gratification!
Finished infinity scarf

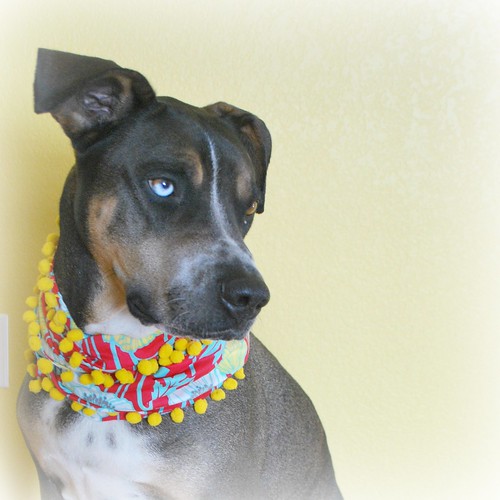
Model #2

Hope you have had a good weekend and are staying warm, safe and healthy,
Sam xxx

Friday, January 03, 2014

All that glitters...


pendulum, originally uploaded by samjoepics.
There must be something about the festive season and my attraction to all things sparkly... if it's not the sparkly linen on the 12 days of Christmas cross stitch, its glitter art projects with Naomi, and then there is my current knitty WIP:

This is the Pendulum scarf from Amy Miller. It uses short rows to create these thick to thin stripes that swing from side to side.

The yarn is Anzula yarns Nebula in a charcoal and deep plum colour, each with sparkle throughout. :)

More to follow on this beauty...

Enjoy the weekend!
Sam xxx

Wednesday, January 01, 2014

Happy New Year!

Hello Friends,
Here's wishing you all good things for 2014.  I hope you had fun yesterday evening and a lovely start to 2014 today.

Do you have fun plans for the year? Any resolutions?

It's a big year for Joe and I: We both turn a decade older. :) For me, that happens 4 months tomorrow and I'd really like to be in much better shape to mark the milestone. So resolutions include eating healthier and working out consistently. Here's to a healthier 2014!

On the crafting front, I was really happy with 2013: Mum's quilt completed; Berties Blanket completed (thanks to you); lots of gift knits...  In 2014 I'd like to complete the 2nd Bertie's Blanket for hospice, and continue making gift for friends and family.

What I also have in mind is to limit my craft purchases. Not stop altogether (let's start with baby steps :))) But I do want to reach a point where my output exceeds my stash enhancement.  And then maybe next year consider whittling down ;o)

There are lots of other things I have in mind on the home front - clearing out, simplifying, improving home organization etc...  It's all typical stuff. But I do love January 1 and that 'let's start afresh feeling'

In the mean time I have this extremely short term goal that I've been working on - to try and finish the 12 days of Christmas cross stitch by the end of the 12 days.  It is an aggressive goal. But I am loving working on the project, so lets see how this goes.


day 3: french hens, originally uploaded by samjoepics.

Wishing you all the very best for 2014
Love
Sam
xxx

Sunday, December 29, 2013

Day 1: Partridge in a Pear Tree

This is the 12 days of Christmas pattern from the frosted pumpkin stitchery. Border and day one now complete.

I adore this project: the traditonal inspiration with a more modern design, the glittery linen, the gorgeous colours... so very pretty

Hope you are enjoying the festive season.
Love Sam xxx

Monday, December 23, 2013

Merry Christmas

I wanted to take a moment to wish you a very Merry Christmas!

I hope you have fun plans for this holiday season and are surrounded by friends and family.

It has been quiet on the blog front, but there has been much productivity behind the scenes: I've been running my own little Santa's workshop as I have been spending a good deal of time working on Christmas gifts.

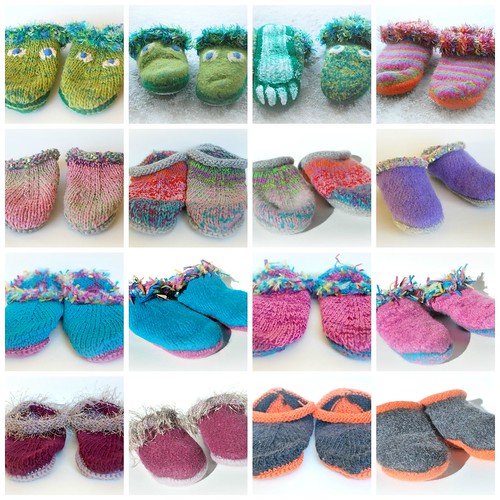
If you have been visiting here for a while you will know that I produce a batch of felted slippers each year. The pattern is Felted Clogs by Bev Galeskas. And while these slippers are not the most beautiful things you may have laid your eyes on :) they are super cosy. Which brings an ever-growing list of family and friends returning with requests each year. And I love it! It's fun to work on something that you know will be well loved.


Collage Plitters, originally uploaded by samjoepics.

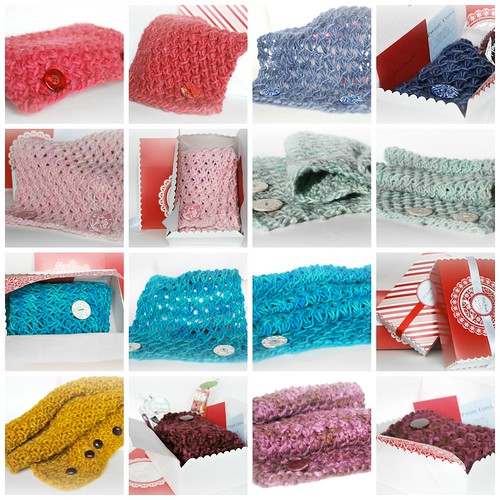
The other thing I'd been working on are teacher gifts. As in previous years, I decided to make cowls for the lovely teachers at Naomi's school. My go-to pattern is Phydeaux Designs' Twist Cowl. The pattern is written for a super bulky yarn and US 15 needles - they work up quickly! In previous years I had worked these in Malabrigo Rasta (soooo soft) but I also love Phydeaux Designs bulky yarns (and had a bunch of these in my stash). I figured out that if I go down to a US 12, and add about 4 extra stitches to the width of the cowl that the cowl works up beautifully in the Phydeaux bulky mousse yarn (vs the super bulky that the pattern is written for) and takes exactly one skein. I'd also bought some of her handmade buttons and think that they add a lovely touch to the finished cowl.


Collage cowls, originally uploaded by samjoepics.

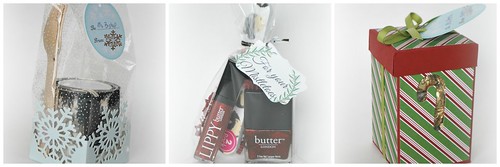
And then there were a couple of stocking stuffers for some of the other helpers at school: A pot of chocolate fondue with some pretty decorated forks; A 'for your mistletoes' bundle of nail polish and nail file (this one got a bonus matching lip gloss); A box of Hershey's kisses.  All very simple... but a token of gratitude nonetheless.


Collage gifts, originally uploaded by samjoepics.

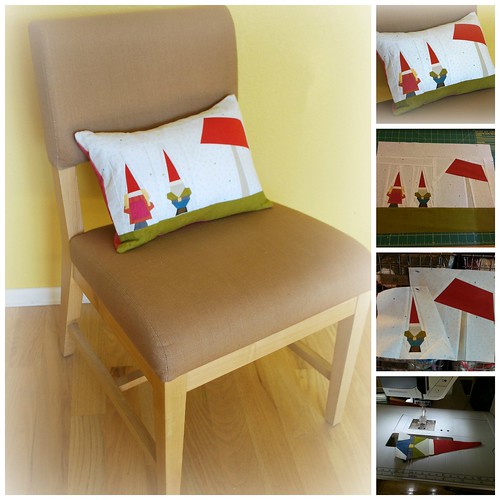
Then there is a gnome pillow for a dear friend that just loooves gnomes. This a paper piecing pattern that is available for free online. It was a little tricky for me (I consider myself a beginner when it comes to sewing) as there were a lot of little pieces in this, but well worth the effort (and persistence :o))) The cushion is a simple envelope fold back, with interfacing and french seams. I am over the moon with how this turned out.


Collage gnome, originally uploaded by samjoepics.

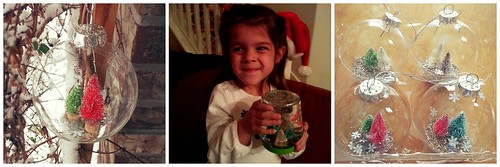
Finally I made a couple of quick and easy ornaments. The first were these adorable christmas tree baubles. (Simply take clear glass baubles, bottle brush trees and glitter... I used a hot glue gun to add glue to the bottom of the trees, and using tweezers put them in the bottom of the glass bauble. Once the glue had dried, just add glitter and you are done. It's a bit of a fiddle to get the trees in the bauble, but other than that it doesn't get much simpler). Naomi and I also made a snow globe. Also very simple - bottle brush trees, glitter, distilled water and glycerin and of course a jar. Hot glue the bottle brush trees to the inside of the jar lid and let set. To the jar add the distilled water, glitter and glycerin (glycerin not vital... it just makes the water a little viscous). Once set, just put the lid back on the jar, shake and marvel :o))) I actually love the one we created... so simple and yet effective.

Collage Ornaments

Hope all is going well with your Christmas plans.
Wishing you the very best for the festive season.
Much love,
Sam xxx

Thursday, November 07, 2013

Random Updates

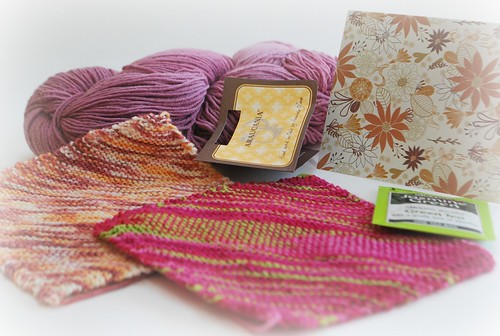
I should have posted this sooner... do you remember that I was part of Andi's KAL/CAL? Goal was to complete WIPs, and for every WIP you were entered into a drawing for some yarny loot. Well, I was one of the very fortunate winners. Andi sent me a gorgeous skein of Araucania in a dusky pink. Yum! And if that wasn't loot enough, she also sent me a couple of sock squares for Bertie's Blankets. This was graciously received as I am still plugging away on the sock yarn blanket. What an absolute sweetheart! Thanks so much Andi!

Gift from Andi

Other than that, I've started the Christmas gift knitting... starting with the annual batch of felted slippers. Love those things - they look a little goofy, but wow they are so warm and comfy. I have various family members that ask for a fresh pair each year (and a pair typically takes 2-3 evenings to crank out). Also birthday knitting: I used some of the wonderful Phydeaux Yarn in a bulky weight, and made a little moebius cowl:

Moebius Cowl for Marsha

I really like how this turned out and will probably make myself one to go under my winter coat to add a pop of colour. The moebius cowl is a fun knit and here's a great YouTube video for how you cast on:


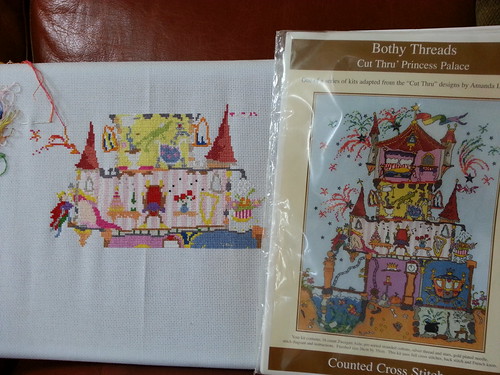
And finally I seem to be a cross stitch mood these days. I am back working on the princess castle that was gifted to me before Naomi was born. In fact before we even knew our little babe was going to be a girl. The fun thing is that Naomi likes to work on this with me - I locate the cross stitch hole and she likes to pull the needle and thread through. It's the little things, but it tickles me no end when she takes an interest in crafts.

20131106_084226

I've also subscribed to a couple of stitchalongs from the Frosted Pumpkin Stitchery - 12 Days Of Christmas Sampler, and Gingerbread Lane. These are adorable and I'm really looking forward to getting started. One of the girls behind The Frosted Pumpkin Stitchery has a fabulous blog - Hey PorkChop - I'd recommend you check it out. There is knitting, quilting, stitching... so many stunningly beautiful projects.

I hope you had a fun Halloween... little Miss thoroughly enjoyed hers. She was batgirl this year :) Such a cutie pie. I think she was as excited to dole out candy as she was to receive it!

Well, that's all I have for this evening.
Wishing you a lovely weekend,
Sam xxx

Saturday, October 26, 2013

Curio Quilt

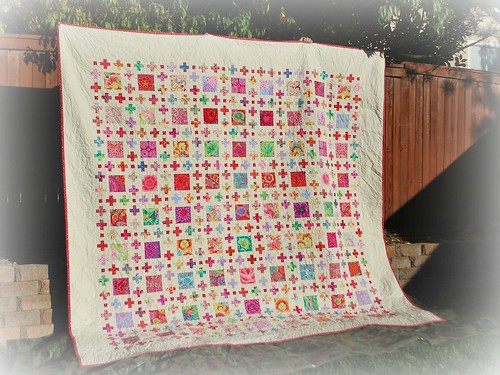
Well, here it is folks... one year in the making and the King Size Curio Quilt is finally finished :)
Curio Quilt

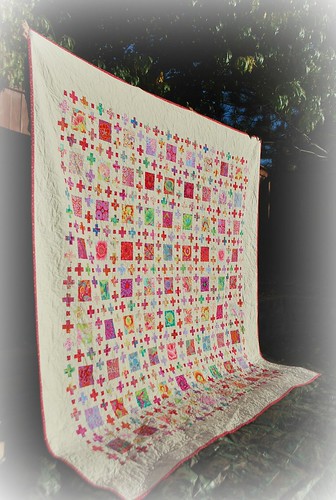
Mum and I started this one year ago - Mum had asked if I would make her a quilt to match her new bedroom (my brother had kindly redecorated for her). Sure, I said. I was a brand new quilter, full of optimism and false confidence. I'd happily make you a quilt, Mum. So after much Pinterest searching we agreed on the Curio Quilt from Fat Quarterly Issue 7, and went shopping for a variety of Kaffe Fassett fabrics.
Curio Quilt

That first year, while Mum was visiting from the UK, she would spend her days fussy cutting the big flower squares and cutting the fabric strips for the little plus signs. I'd come home after work and help with the cutting as well as start the sewing while Mum would iron open all those teeny tiny seams.

I've read differing arguments for sewing seams open vs to one side. In hindsight, ironing to the dark side would have been much quicker, and stronger. But those little open seams did look so very neat.
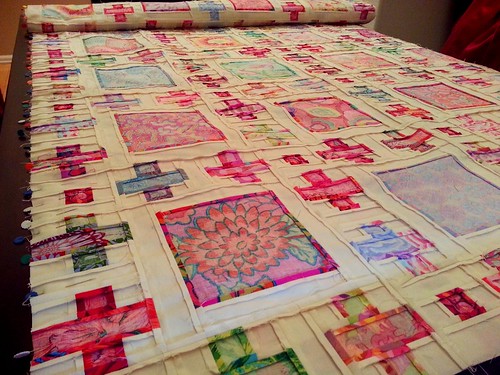
sea of seams

This quilt would have taken much longer if it wasn't for all the help that Mum provided - I'm trying to talk Joe into being my ironing helper now Mum has gone, but he is having none of it!  By the end of her visit last year we had the big squares completed and a good portion of the plus signs.

Layout - wip

Over the course of the next few months I would slowly plug away at finishing the plus signs and then the little one inch 'fish scale' squares. It was quite the task. I was soo excited when they were all complete.
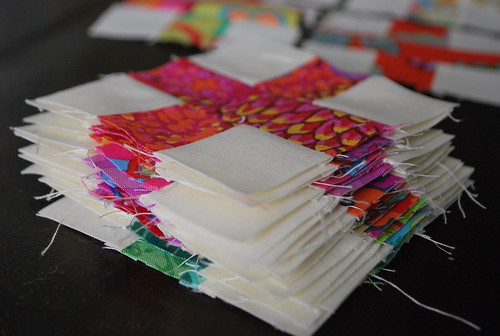
Lots of +'s

row1 sewn together: 100

It felt like a major achievement. The next job was to sew it all together. I sewed the first row, then the second, only to find that rows 1 and 2 did not align well. Harrumph. I put it on one side for a bit...
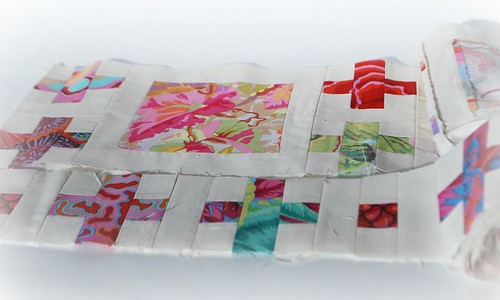
To be unpicked and reassembled

With renewed enthusiasm I decided that instead of sewing the big long strips together that I would put together in blocks. This way I could match up the rows and columns as I went along. This worked well for me.
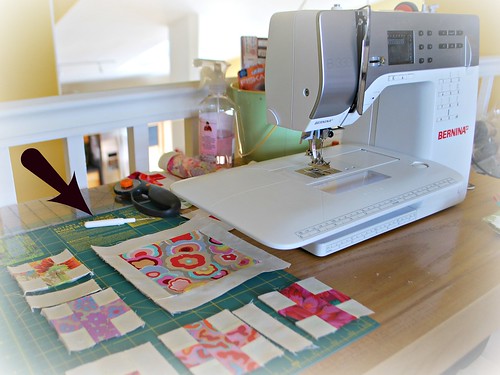
Be gone seam ripper

I set myself a goal of trying to complete for Christmas... erm, there was no way.
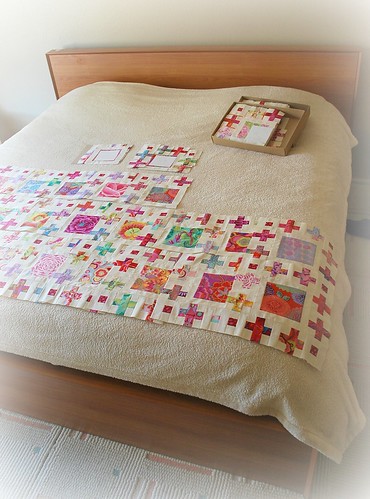
Mum's Curio Quilt - Row G WIP

Then Mum's 60th in April, yup that wasn't happening either.
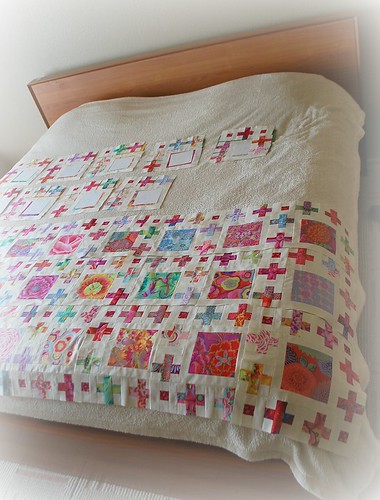
Mum's Curio Quilt: Row G Finished

But for sure it WAS going to be finished during my Mum's trip this year.
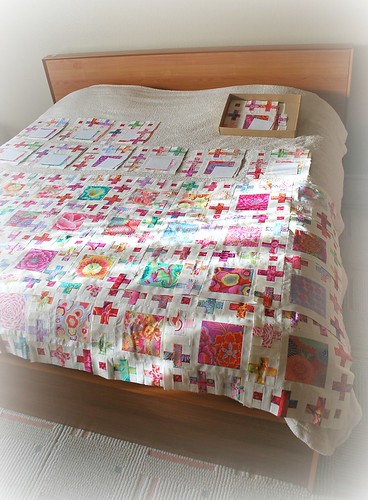
Curio Row F

And sure enough it WAS :)
It's on it's way back to the UK as I type. Mum has been here for the last 2 months, and over the course of that time we slowly put together the pieced blocks, and then sewed it all together.
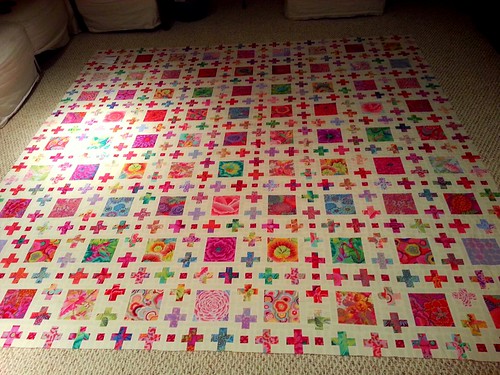
next... borders

Again, I cannot tell you how mush faster this process goes with someone doing the ironing :) I almost couldn't believe it when the quilt top was completely pieced together given how long we had been working on it. Next up we added a border so that the quilt was the desired size for Mum's bed back home. Picked out some backing and added that.

with border

One of the kind ladies - Amy Wade - at Quilt Guild offered to quilt it for us so that Mum could take it back with her (beautiful work with a super fast turnaround, thank you Amy).  Here is a great 'in progress' shots that she shared:
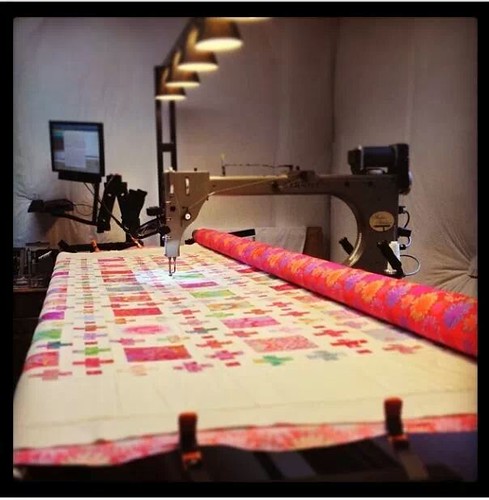
Amy Wade quilting Mum's quilt

She had recommended a big swirly stich which has a very nice modern feel to it, and helps soften out all the corners on the squares and plus signs.
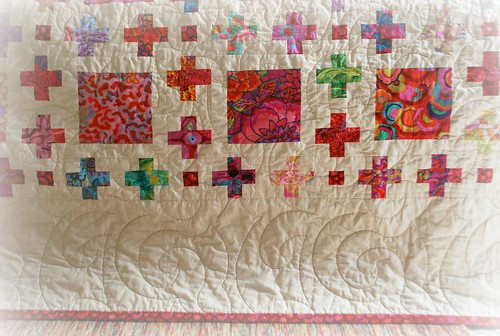
Big swirls quilt stitch

We got to show off the quilted piece at quilt guild.
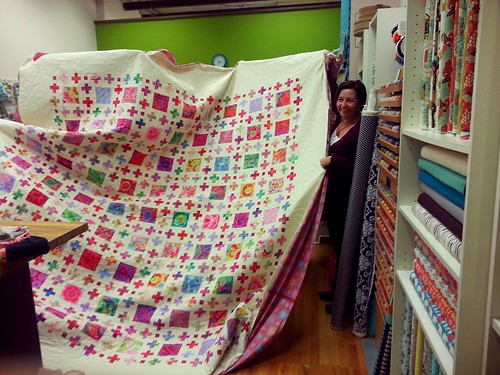
quilted!

All that was left now was to trim up and add the binding. I like to machine stitch the binding to the top, and then hand sew the back. Quite the job on a quilt that measures 112x112 inches!
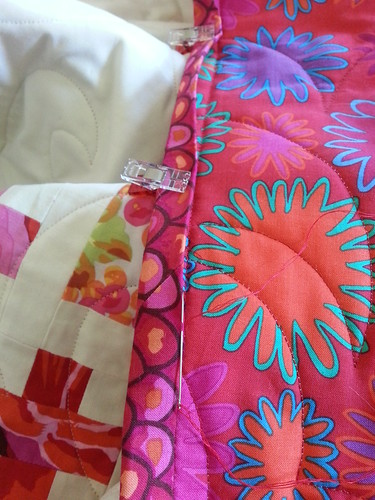
20131019_151540

binding

Mum actually did the majority of the hand sewing of the binding. Thanks Mum! Final touch was a turn in the washing machine, when all those lovely crinkles start to appear as a result of a little shrinkage - I just love those crinkles. And now it is done.
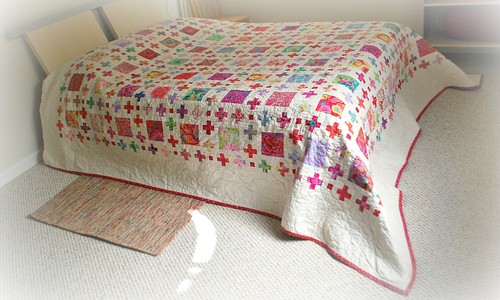
Curio Quilt

Amy had actually sent me this on Pinterest, and yes I do feel a little bit this way :)


I cannot tell you how happy Mum and I are with the finished quilt. It is truly beautiful and I feel soo proud to have been able to make this. It is my 3rd actual quilt (first one baby size strip quilt, 2nd one a simple design for Naomi's bed... so this was quite the leap in both size and difficulty). But what's probably the very best thing is that it was such a great experience to work on this together with Mum. xxx Sam