Showing posts with label Sewing. Show all posts

Sunday, September 18, 2016

Halloween Prepping

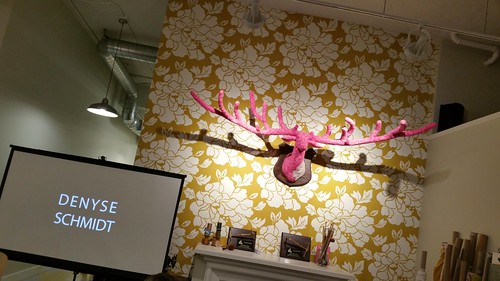
Last weekend I had the opportunity to attend a talk by Denyse Schmidt at Fancy Tiger crafts. It was fascinating to hear how her crafting story unfolded, and also the business decisions she had made along the way. I love her quilts and fabrics and thoroughly enjoyed listening to her creative process.

2016-09-17_03-38-01

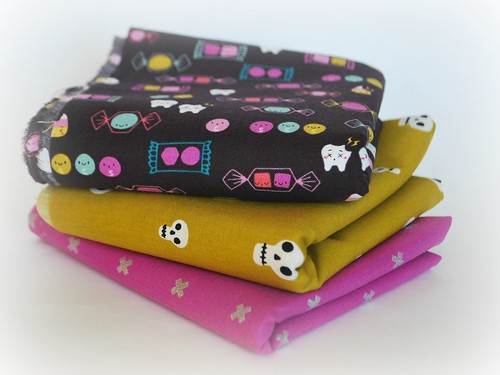
While I was at Fancy Tiger I did a little window shopping. Which turned into actual shopping, when these beauties came home with me.  I'd been looking on Pinterest for a trick or treat tote to make for Naomi, and these fabrics are just the ticket! Loving the ouchy tooth image. Naomi got a kick out of that too!

Cotton and Steel Halloween Fabrics

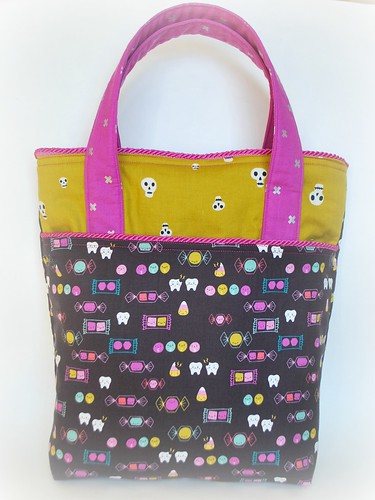
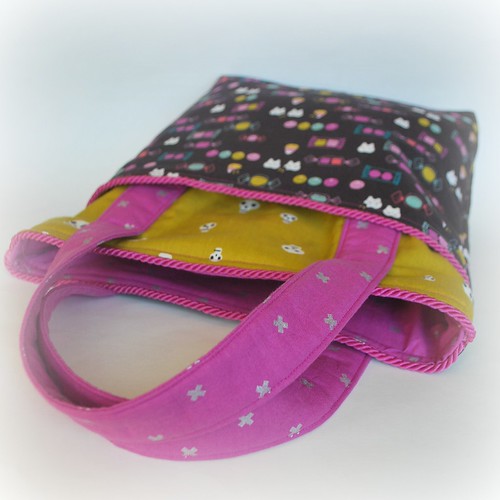
The pattern I used is the Pocket Tote, Library Bag from Sugar Bee Crafts.  It is a great pattern - well written with clear supporting photographs (her selection of fabric is adorable too!).  I like that this is kid-sized and has some structure to it.  Naomi thinks the tote is awesome, so we have a winner!

Trick or treat bag

Halloween trick or treat bag

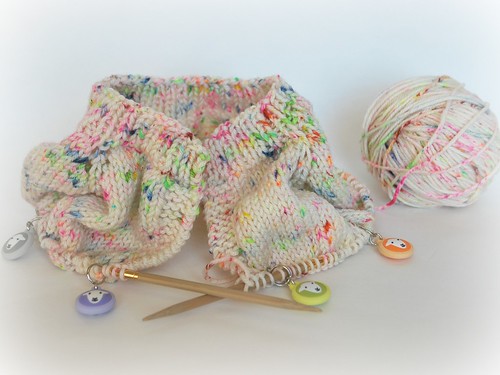
In addition to this sewing project I've been working on a little capelet cardigan for Naomi in the fun Madeline Tosh yarn that has the 'rainbow paint splats' on it.  I am winging this one, so hoping that it works out nicely.

Rainbow splash cardigan

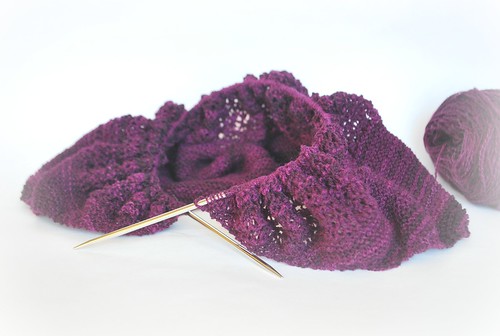
And of course continuing to plug away on the lace section of the rosewater shawl.  This is such a fun color for Halloween... not sure if it will be finished in time though.

shawl

Hope you are having a great weekend,
Sam
xxx

Sunday, July 17, 2016

Gnomes

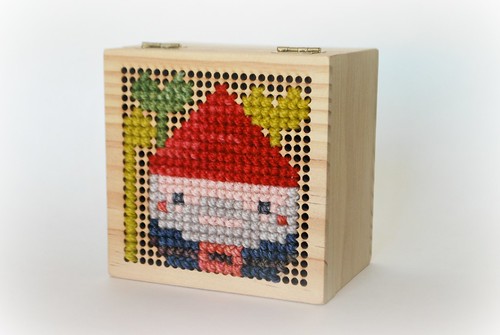
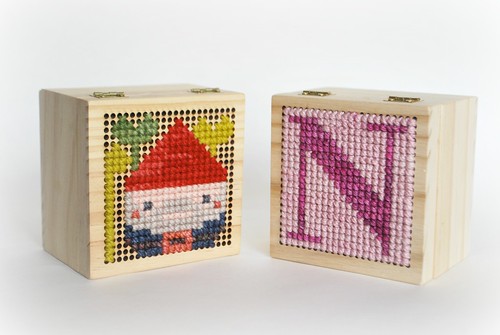
I've been having fun putting together a couple of gifts for a friend that likes gnomes. First is a simple wooden box that is embellished with a cross stitch gnome on the lid.
Gnome cross stitch box
The box is a Hand Made Modern wooden box from Target, and the gnome pattern comes from the Frosted Pumpkin Stitchery's Woodland Sampler (you have to decrease the height of the gnome hat to make it fit).  I started with cross stitch thread but wasn't getting the coverage I wanted, and then changed to use sock yarn from my stash.
Gnome cross stitch box
I think it turned out pretty cute. Turns out that I wasn't the only one - Naomi asked if I would make a box for her too. For her box I opted for a simple initial in colours that match her room.
Cross stitch boxes
This is a simple, quick and easy project. There are some fiddly elements - dealing with the lid as you stitch and tucking in the end of each threads But otherwise it's a straightforward make, with a cute result.

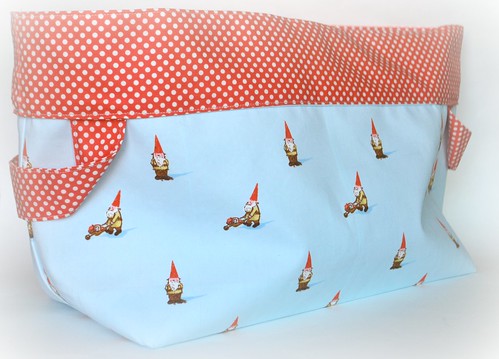
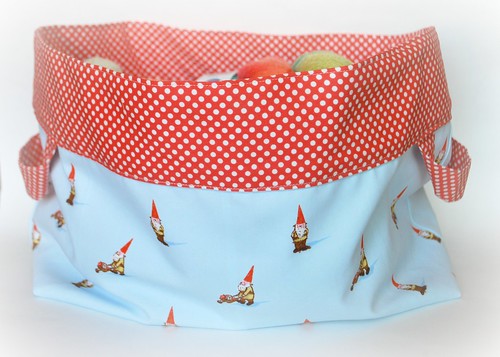
The other project is a storage basket made from the adorable Heather Ross gnome fabric, together with some Michael Miller polka dots.
Gnome yarn basket
The pattern is a modified version of the popular, free pattern: One Hour Basket from Hearts and Bees. My modifications were to make it larger:
  • I cut 4 pieces of fabric that were 17 x 21 inches
  • The square cutouts for each corner were 3.5 inches
  • I folded over approx 3 inches of the polka dot fabric at the top of the basket and top stitched across the top and bottom of this polka dot band

Gnome yarn basket
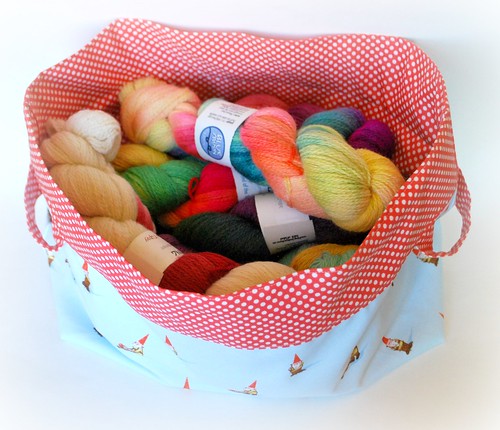
The storage basket is quite floppy - which could be a result of the larger size. But if I were to do this again, I'd probably use a stiffer interfacing. However, with enough yarn stashed inside, it stands up quite nicely :)
Yarn in the basket
Hope that you are having a fabulous weekend.
Love,
Sam
xxx

Sunday, February 28, 2016

Birthday Fun

It's been a fun, yet busy, week with Naomi. She turned 6 and in honor of her birthday she got to be student of the week at school, which involves a daily activity: bring a poster to school about yourself, bring someone to school to read to the class; ... you get the idea. Add to this a music performance her class was giving on Tuesday evening; 100 days at Kindergarten on Friday day, and a Spanish festival on Friday night. Yup, quite the busy week!

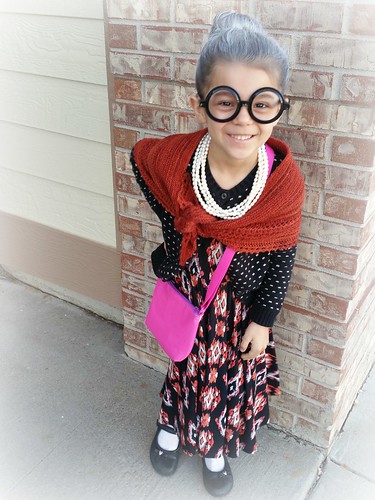
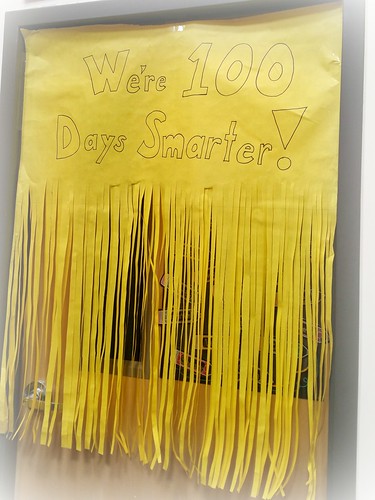
100 days of school = dress like you are 100 years old
2016-02-28_04-42-21

I hadn't heard of the 100 days of school activity prior to this year, but essentially the kindergartners get to celebrate their 100th day by dressing as though they are 100 years old.  Typically I'd go out and hunt for something, but given the hectic schedule we went searching through the closets at home. A simple dress and cardigan and a few props later, we were ready! The plastic glasses were a party giveaway, the faux pearls from a previous Christmas party, and maybe you recognize the shawl? It is the Handspun Henslow that I made many moons ago.

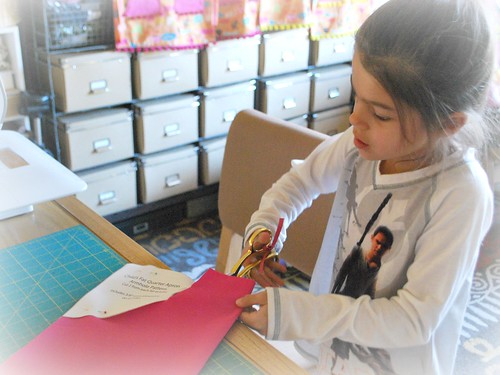
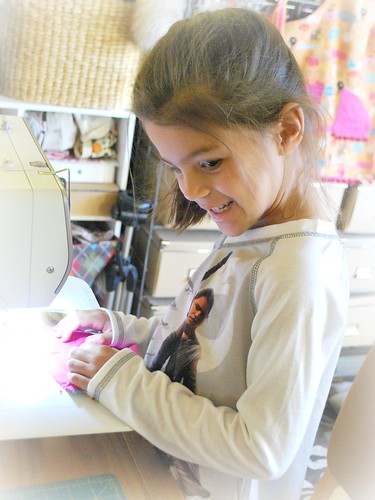
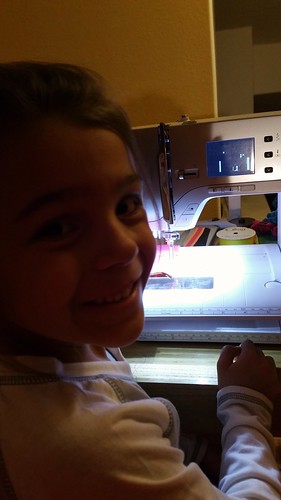
On top of the school activities, we've been working on the aprons for the birthday party.  That's right "we".  I can't tell you how pleased I was that Naomi wanted to play an active role in making these for her friends.  Cutting out the sleeve/pocket pattern, measuring and cutting the ribbons, and helping me stitch (sat on my lap, her hands on mine as we guide the fabric through the machine).  I was really impressed with how she got on.

Cutting the pattern

Little helper

2016-02-28_04-39-51
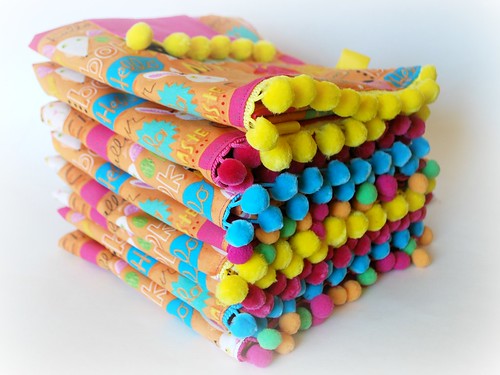
Pom poms
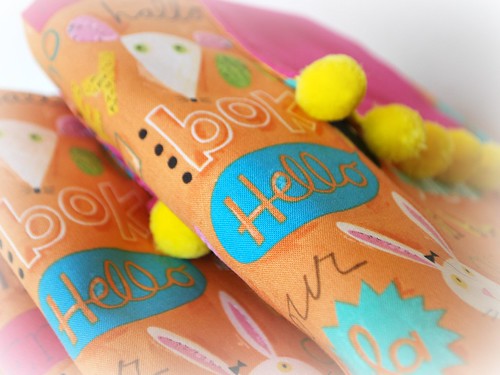
Hello... it's me

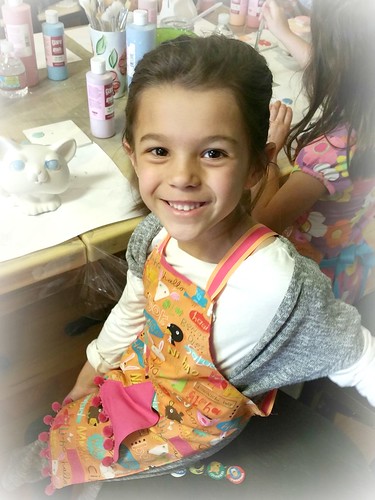
The party was earlier today and they had such a wonderful time.  If you are in Colorado/Denver area, we went to Hot Pots in Littleton, and it is a great place with the most helpful staff. The space is beautifully decorated and there is room for the kiddos to be in a dedicated area of the store. I highly recommend it.
birthday girl

Well, time for me to put my feet up!
Hope you had a great weekend,
Sam xxx

Sunday, February 21, 2016

Children's apron

It is rapidly approaching Naomi's birthday, and we have just settled on a party idea:  Pottery painting at a local studio. If you have been following me for some time you know that:
a) I love to make party favors and gifts
b) I have a tendency to leave the making of said favors and gifts to the last minute
This year is no exception!

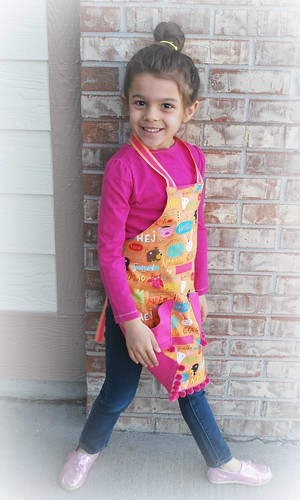
Given the kiddos will be painting, I thought a fun apron would be a sweet thing for them to wear at the party and take home afterwards.  I found 2 strong candidates via Pinterest:
1.  Aesthetic Nest: Children's Reversible Fat Quarter Apron
2.  Brown Eyes plus Blue:  Pinafore Apron

There's something very appealing to me about the cool and utilitarian vibe of #2, and I had a vision of how this could look with the mochi mochi dots from my stash.  However Naomi preferred #1, hands down.  And what's not to love about this bright patterned apron with the whimsical details.

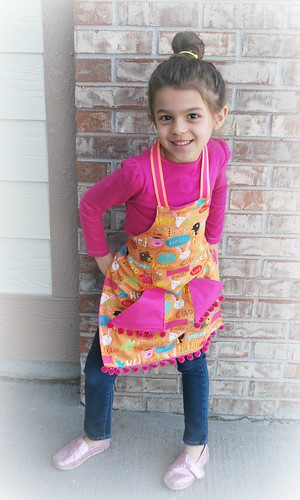
Apron

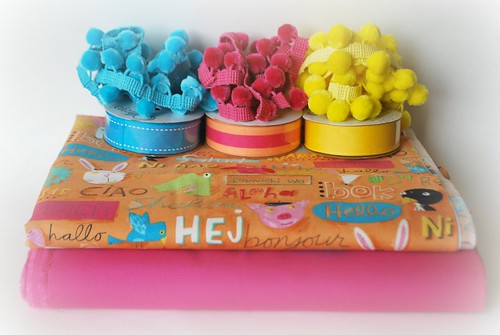
So, we started with a rummage through my fabric stash and found this fabulous children's print:  It is a Kokka fabric called Hello Animals by designer Nancy Wolff.  The backing will be a solid hot pink Kona cotton.  The ribbons and pom poms were picked up at Jo-Ann fabric.

Fabric for apron

I made a couple of modifications to the original pattern:
1.  I added both pockets to the 'front' of my reversible apron, and added some additional pom pom trim detail to them
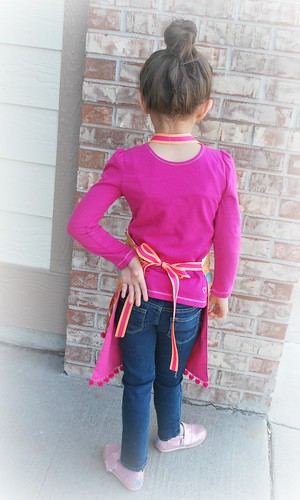
2.  I did not add a button and button hole for the neck ribbon.  Instead I cut the ribbon at about 18 inches, so that it sleeps over Naomi's head.  In fairness, this is a snug fit, so I may alter the other versions to either use a velcro closure at the back of the neck, or simply add 2 lengths of ribbon that can be tied in a bow at the back of the neck.

et Voila!  I am delighted with how the prototype turned out.  The rest of my Sunday will be in mass production :)

Apron Back bow

Wishing you a great day ahead!
Love,
Sam

Saturday, June 27, 2015

Gnome project pouch

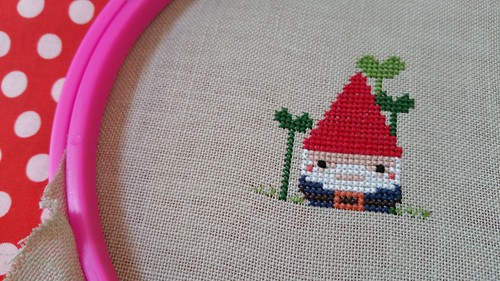
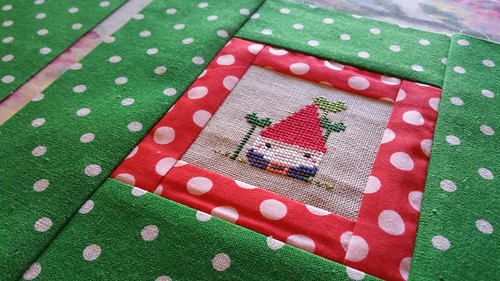
It has been a good week for crafting and I've really enjoyed the project that I've been working on.  Step one was making the cross stitch gnome.  This little guy is part of a pattern that comes from a Frosted Pumpkin sampler.   The recipient loves gnomes, and I knew she was going to adore this!

Sweet little gnome

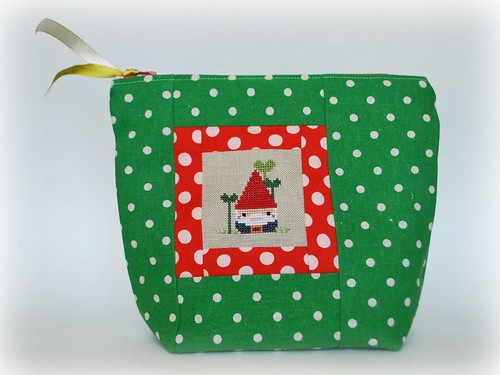
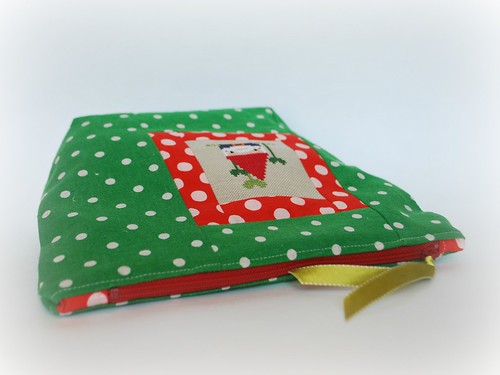
But that was just the start of my gifty plan - I wanted to turn this into something that would be useful for a craft project.  So, after looking through Pinterest, and my fabric stash, I decided on a flat-bottomed, lined, zipper pouch.  The red polka dot fabric is Kaffe Fasset and the Green is a heavier weight linen mochi mochi dot.  The pouch measures approx 10in wide x 7in high. with a 3 inch deep bottom - a great size for a sock knitting project.

Sneaking in some early morning craft time

I am super happy with the end result on this one.  I can see more of these zipper pouches in my future - teacher gifts, travel accessories, storage for crayons, pencils, legos...

Gnome zipper pouch

Zipper pouch

What have you worked on recently that has filled you with delight?

Hope you are having a fun weekend.
Sam x

Sunday, May 10, 2015

Feel good projects

Instant gratification has been the name of the game over here.
One of my (many) quirks is that I like to feel productive, or that I have achieved something each day. If that isn't happening elsewhere then I look to my crafts to meet that need... and it has been meeting that need these last few weeks, with a stream of small, instant gratification, feel-good projects:

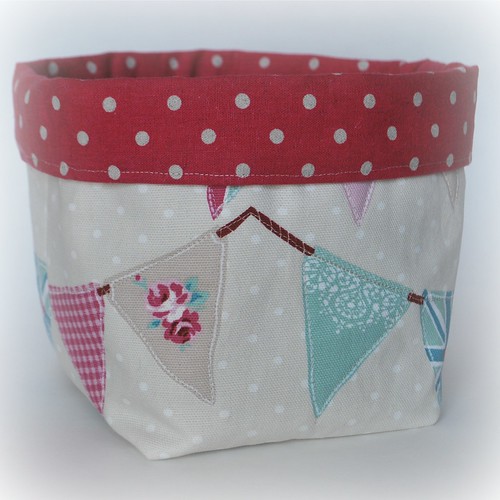
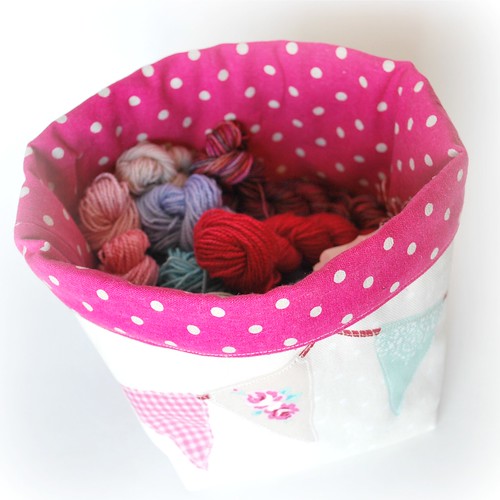
Fabric bucket

Fabric bucket

First up is a fabric storage bucket that is perfect for a knitted sock project, or other small portable project. This bucket uses some cute bunting fabric that I picked up on my last trip to the UK, together with the hot pink mochi dot linen fabric for the inside. I followed the instructions for the small fabric bin from the birch blog. The only mod was using batting instead of interfacing. I highly recommend this project if you are looking for some super cute storage bins.

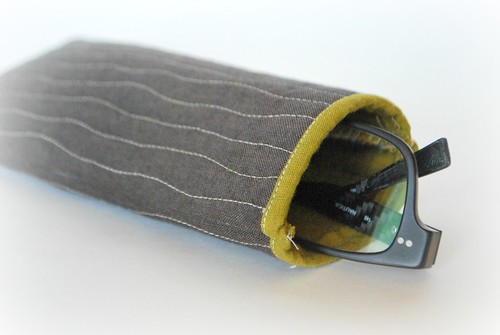
Glasses case for Joe

Next up, Joe asked if I would make a something to carry his glasses in, instead of the bulky hard case. I had to dig around for some manly fabric from my stash, and I think the brown and olive Kaffe Fassett fabrics fit the bill. No real pattern on these - just a simple pouch that I quilted to add a little protection. I love how this has a wood grain vibe to it.

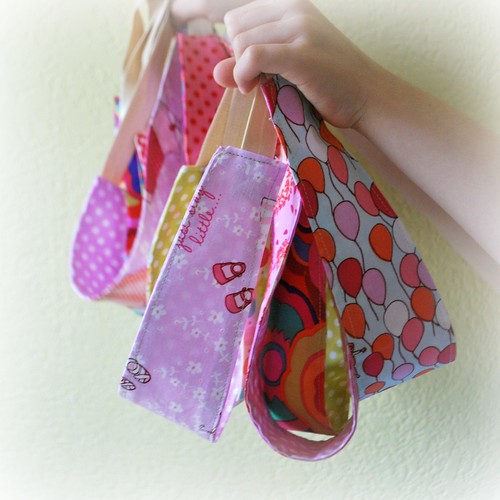
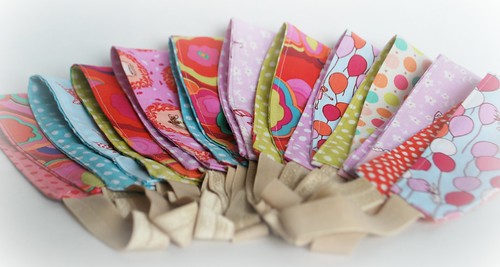
Headbands!

Headbands for soccer end of season goody bags

The next few items are for an end of season soccer celebration. There are these lovely headbands using the directions from alice and lois. These are ridiculously simple to make, and extremely comfortable to wear. We made a batch for the soccer girls using a selection of fun fabric scraps.

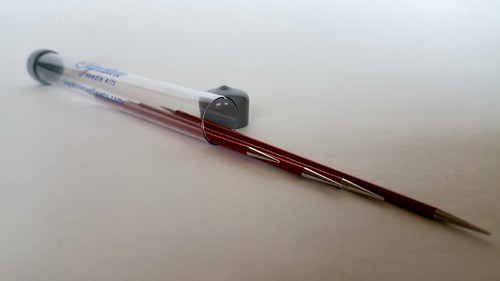
The Ferrari of knitting needles from Baz and Clare

I also received some amazing crafty goodies from my brother and sister for my birthday last week: These fabulous sock knitting needles from my brother (who has coined them the 'Ferrari of knitting needles'). I hope to take them for a spin this weekend.

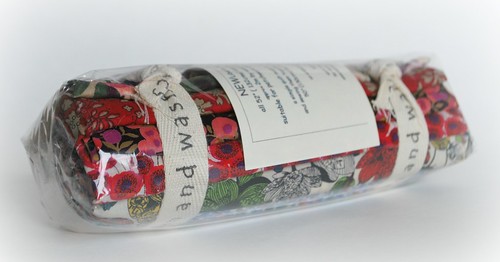
Liberty London fabric from my sis and her family

And my sister sent me this gorgeous bundle of Liberty fabrics. Droool! So as my Uncle often told me: Cast your bread upon the water and it will be returned tenfold. That certainly seems to be the case this week.

Wishing you all a happy mother's day. Love, Sam xxx

Sunday, December 28, 2014

Did you have a wonderful Christmas?

Ours was lovely. Mum was over since Thanksgiving and only left yesterday. We had a great time, and created lots of fond memories - ice skating, pottery painting, movie visits etc... and good Grammy time for Naomi.

I've been slow on the crafting front. I started a new job on October 1st and it consumes a lot of my free time. I'm thinking that as I get up to speed I should regain some of my work/life balance. Until then, it may be a little slow and sporadic here at sticks and strings. We have however been on a shut down from work this last week. Which was AWESOME! Quality time with family, as well as some craft time too. A girl could get used to this :)))

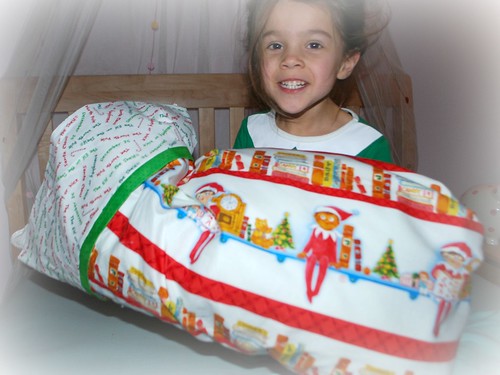
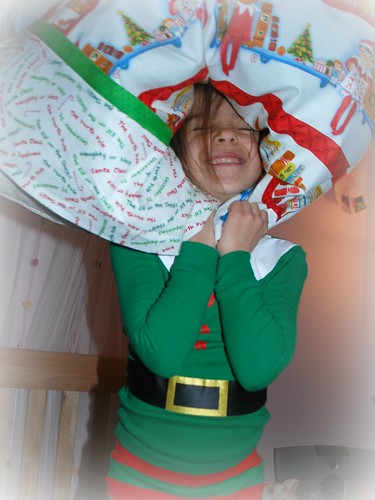
I created a few quick projects: First is an elf pillow for Naomi, to go with her elf pjs.

Elf pillow

Happy Elf

There are some really good instructions for this on the smashed peas and carrots blog.  It seems like some sort of construction magic when you make these for the first time... but it works beautifully! 

Anyhoo, while Naomi was fast asleep I snuck this new pillowcase onto her pillow and when she woke up she was all giddy about what the elves had made for her :)))

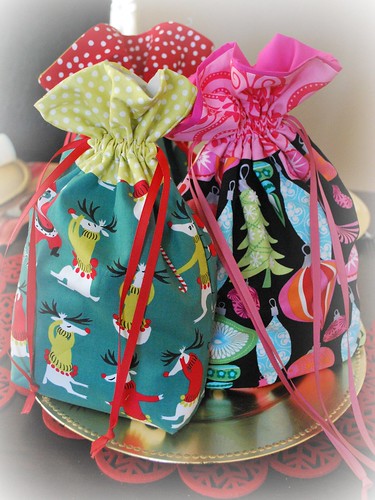
The next set of projects was a variety of gift bags - some for the teacher gifts, some for friends... you get the idea. I was able to use some of my stash for these beauties.

Gift bags

The pattern and instructions for these drawstring pouches can be found on the In Color Order blog.  PS - these also make great knitty project bags - and are straightforward to make.

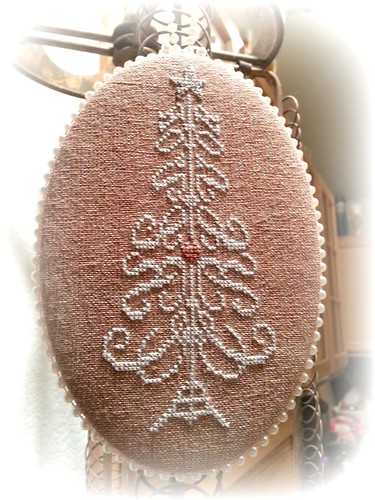
Finally I had my 'Trevor tree' ornament finished so that it could go home with Mum yesterday.


Trevor tree

Hope you are enjoying a relaxing Sunday, and wishing you wonderful New Year celebrations this coming week.
Sam xxx

Saturday, March 15, 2014

Voile Infinity Scarf

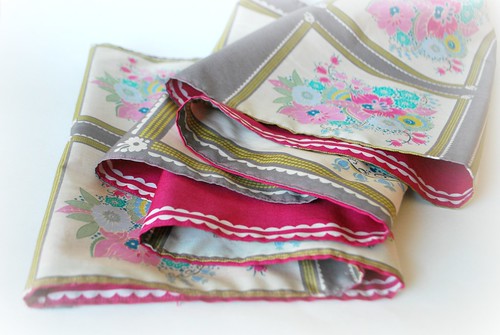
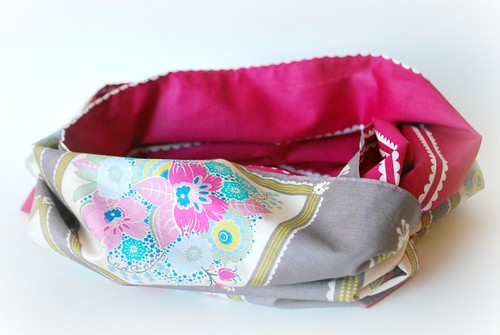
A good friend had a birthday recently and I wanted to make her a little something to mark the day.  She loves to wear scarves and I thought she'd like an infinity scarf.
Infinity scarf

I used the directions from the Anna Maria Horner Figure 8 scarf... but instead of using velveteen, I used voile on both sides.
Infinity scarf

Voile is such a lovely fabric:  Lightweight, soft and with a silky feel. 
Silly me had no idea how to pronounce 'Voile' when going into one of my local fabric stores... but figured that it must have a fancy pronunciation for such a fancy fabric.  So there I was asking for where they stocked their 'Vwaaahhl'.  Of course the lady looked at me like I had lobsters coming out of my ears.  Lesson learned:  Voile is pronounced like foil, but with a V.  Which sounds nowhere near as sophisticated in my northern English accent :)))

Hope you are having a lovely weekend,
Sam
xxx 

Thursday, February 27, 2014

Monster Bags

Naomi turned 4 this last week.  4! 
I'm still wondering how that happened so quickly?

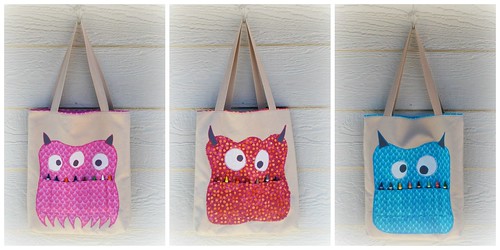
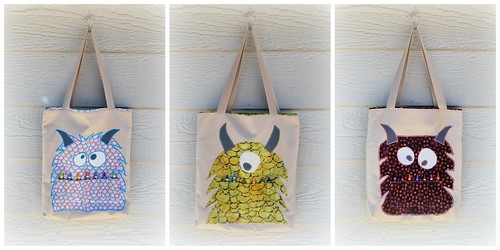
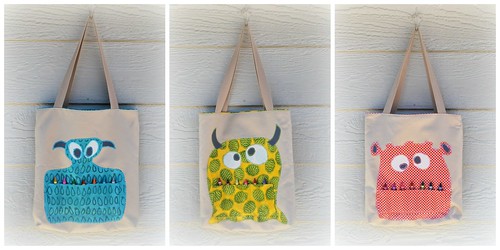
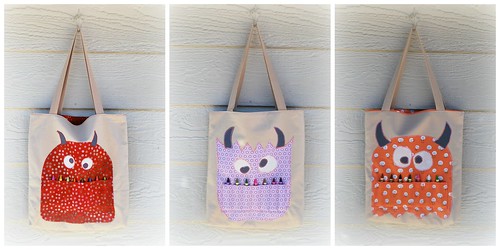
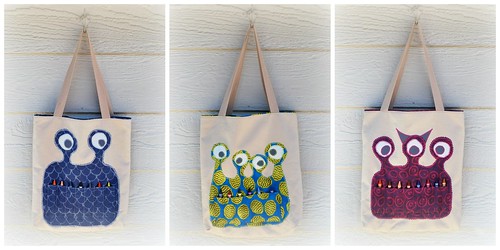
Anyway, her birthday provided me the perfect excuse to work on party gifts - monster bags:

Monster bags
Monster bags
Monster bags
Monster bags
Monster bags

These were so much fun to work on.  Perhaps my most enjoyable project to date.

Inspiration came from the following places:

I essentially followed the directions for the simple reversible tote, making the following small changes:
  • I added a monster applique to the exterior fabric before assembling the tote
  • I added interfacing to the exterior fabric to add some stability
  • I purchased some soft canvas style ribbon instead of making handles

I started by selecting fabrics that looked 'monstery' :)))
My favourites are probably the batiks. But in truth I love them all. 
These patterned fabrics were used for the monster, but also a matching interior for each tote. 
The exterior fabric was a Kona beige that I had in my stash (that's right - this one was a good stashbuster!). 

I wanted each monster to be different and enjoyed coming up with each design.  Naomi and Joe both got involved on the design process too:  What about fuzzy monsters?  What about monsters with eyes on antennas?  How about some with 1 eye and others with 2 or 3? 

I'd also have Naomi help with layout before sewing the applique pieces in place:  Where should the eyes go?  Should we have horns?  Where should they go? 

And of course Naomi would add the crayons once all the other assembing had been done.
I think it made this extra special knowing that they were truly a team effort!
As each one was complete I'd hang them around my craft room.  I sure do miss those cheery faces greeting me each morning.  But am thrilled that they've gone to happy homes!

Naomi's favourite is the monster in the bottom right - purple with 3 eyes on stalks.
Do you have a fave?

Hope your week is going well?
Love,
Sam

Monday, December 23, 2013

Merry Christmas

I wanted to take a moment to wish you a very Merry Christmas!

I hope you have fun plans for this holiday season and are surrounded by friends and family.

It has been quiet on the blog front, but there has been much productivity behind the scenes: I've been running my own little Santa's workshop as I have been spending a good deal of time working on Christmas gifts.

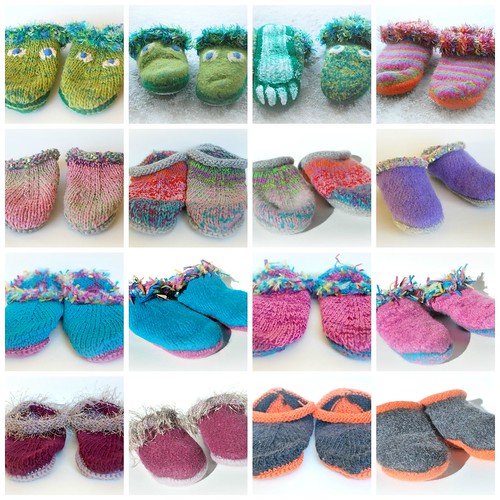
If you have been visiting here for a while you will know that I produce a batch of felted slippers each year. The pattern is Felted Clogs by Bev Galeskas. And while these slippers are not the most beautiful things you may have laid your eyes on :) they are super cosy. Which brings an ever-growing list of family and friends returning with requests each year. And I love it! It's fun to work on something that you know will be well loved.


Collage Plitters, originally uploaded by samjoepics.

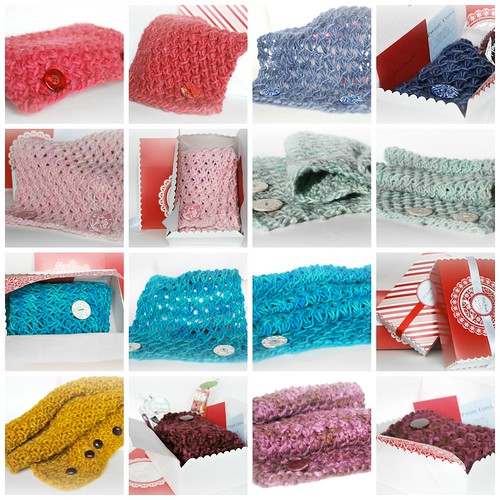
The other thing I'd been working on are teacher gifts. As in previous years, I decided to make cowls for the lovely teachers at Naomi's school. My go-to pattern is Phydeaux Designs' Twist Cowl. The pattern is written for a super bulky yarn and US 15 needles - they work up quickly! In previous years I had worked these in Malabrigo Rasta (soooo soft) but I also love Phydeaux Designs bulky yarns (and had a bunch of these in my stash). I figured out that if I go down to a US 12, and add about 4 extra stitches to the width of the cowl that the cowl works up beautifully in the Phydeaux bulky mousse yarn (vs the super bulky that the pattern is written for) and takes exactly one skein. I'd also bought some of her handmade buttons and think that they add a lovely touch to the finished cowl.


Collage cowls, originally uploaded by samjoepics.

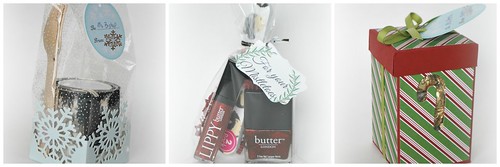
And then there were a couple of stocking stuffers for some of the other helpers at school: A pot of chocolate fondue with some pretty decorated forks; A 'for your mistletoes' bundle of nail polish and nail file (this one got a bonus matching lip gloss); A box of Hershey's kisses.  All very simple... but a token of gratitude nonetheless.


Collage gifts, originally uploaded by samjoepics.

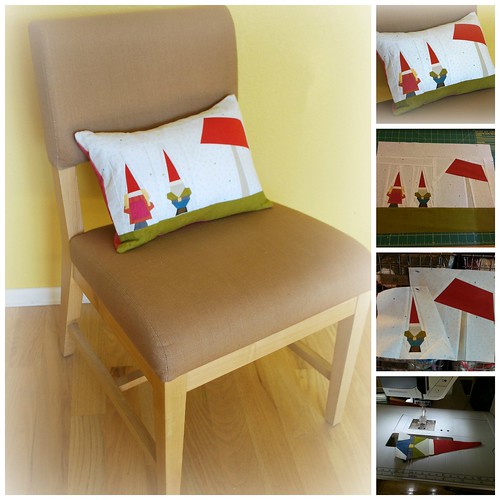
Then there is a gnome pillow for a dear friend that just loooves gnomes. This a paper piecing pattern that is available for free online. It was a little tricky for me (I consider myself a beginner when it comes to sewing) as there were a lot of little pieces in this, but well worth the effort (and persistence :o))) The cushion is a simple envelope fold back, with interfacing and french seams. I am over the moon with how this turned out.


Collage gnome, originally uploaded by samjoepics.

Finally I made a couple of quick and easy ornaments. The first were these adorable christmas tree baubles. (Simply take clear glass baubles, bottle brush trees and glitter... I used a hot glue gun to add glue to the bottom of the trees, and using tweezers put them in the bottom of the glass bauble. Once the glue had dried, just add glitter and you are done. It's a bit of a fiddle to get the trees in the bauble, but other than that it doesn't get much simpler). Naomi and I also made a snow globe. Also very simple - bottle brush trees, glitter, distilled water and glycerin and of course a jar. Hot glue the bottle brush trees to the inside of the jar lid and let set. To the jar add the distilled water, glitter and glycerin (glycerin not vital... it just makes the water a little viscous). Once set, just put the lid back on the jar, shake and marvel :o))) I actually love the one we created... so simple and yet effective.
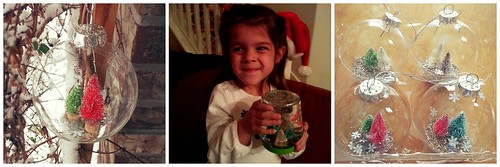
Collage Ornaments

Hope all is going well with your Christmas plans.
Wishing you the very best for the festive season.
Much love,
Sam xxx